Let’s start with the tools you’ll need. You’ll need a cross dowel jig.
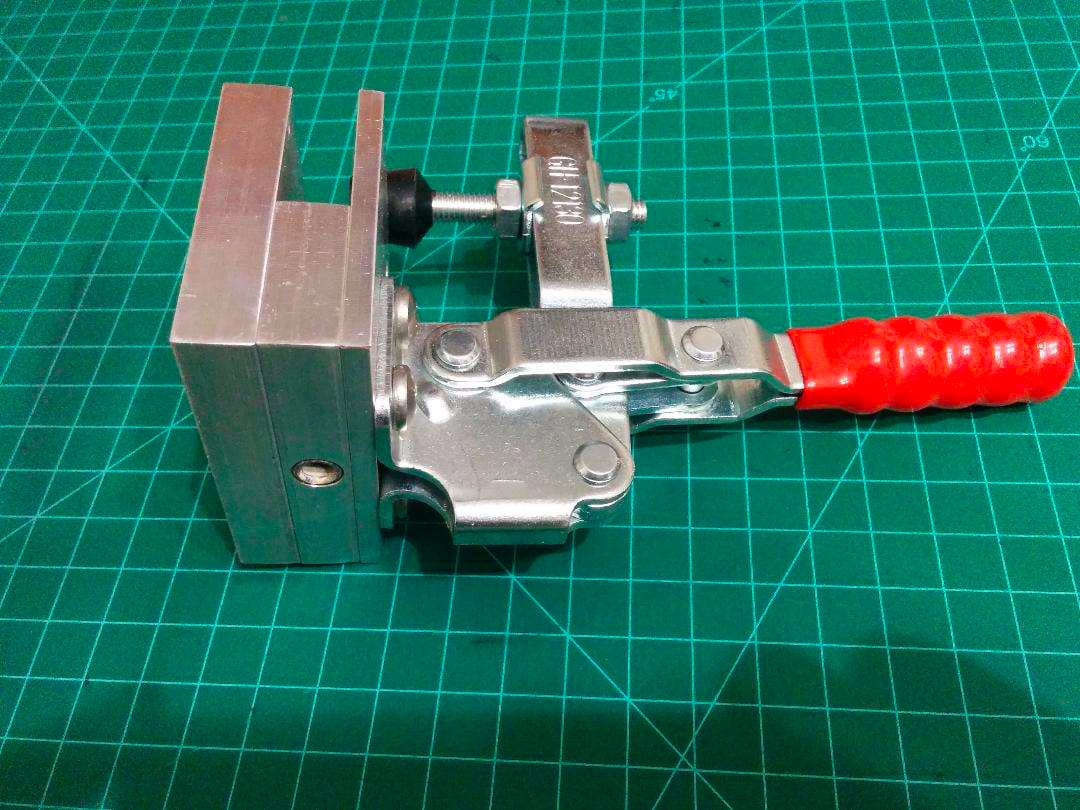
Some clamps. These are Bessey clamps but there are similar clamps at the big box hardware stores. I
don’t like the “trigger” clamps. I prefer a screw clamp that can hold with some force.

You’ll want a 6 inch combination square. These things are great. Most woodworkers carry one in their
apron pocket at all times – they’re that useful. You’ll be using it a lot in cross dowel work.

And you’ll need a tape measure and a sharp pencil. I use those mechanical pencils with the thin lead.
They can be annoying but they make sharp lines.
We’ll start by making a square corner – like the corner of a box.
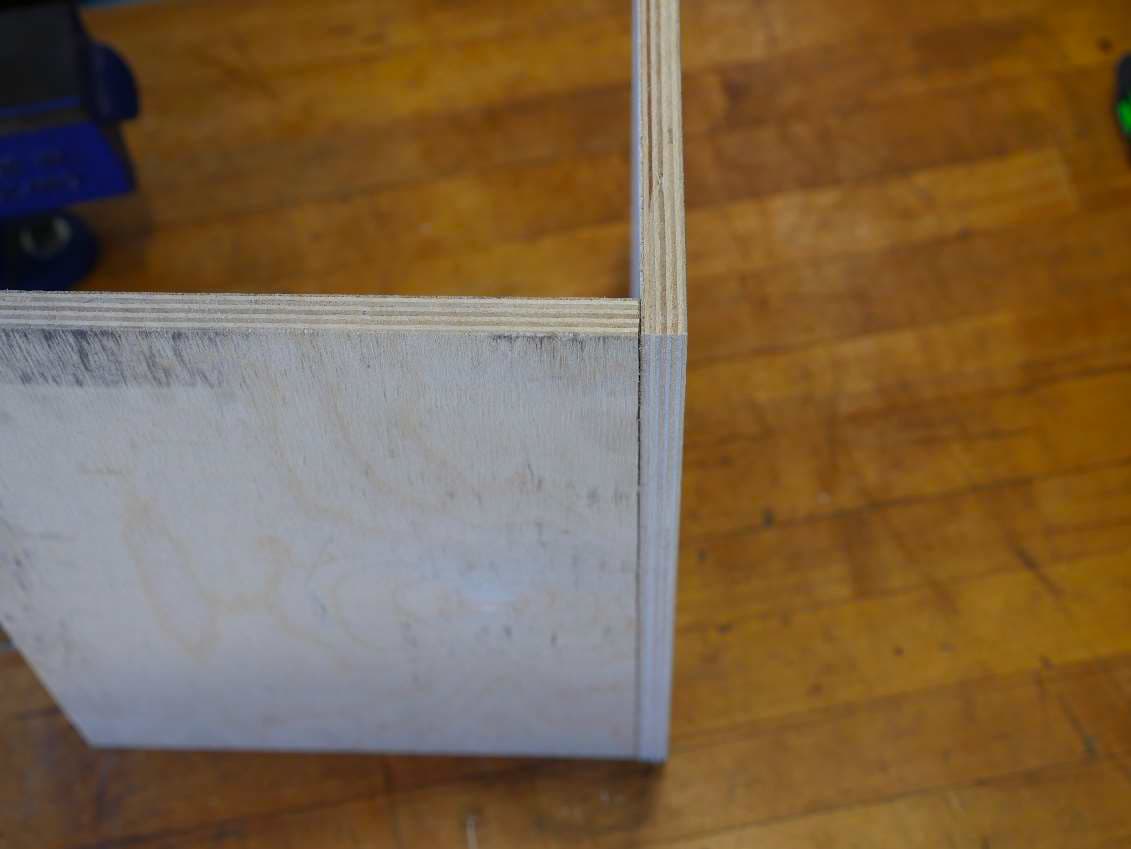
There’s an inside panel and an outside panel. The inside panel carries the cross dowel and the outside
panel only has a through hole on the edge.
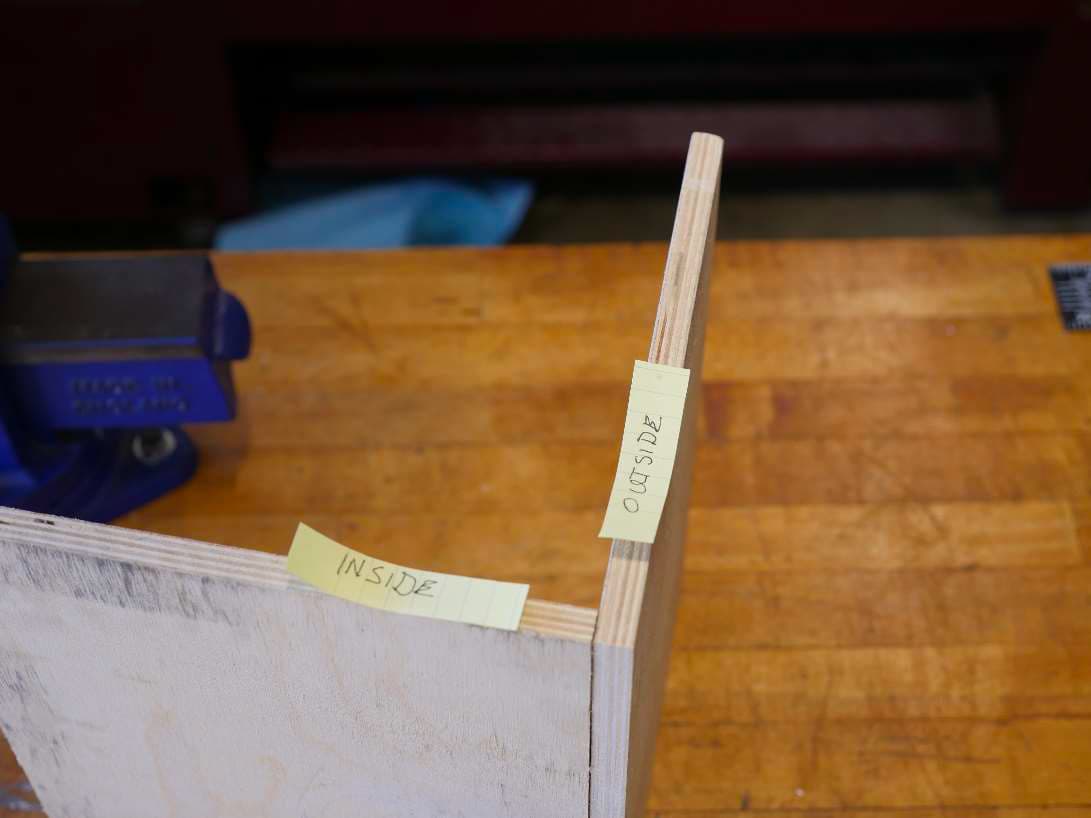
To make a corner, lay the two pieces flat on a work surface and butt the edges of the corner together so
they touch, and make sure the pieces of wood are aligned top and bottom. Now make a mark across
the two pieces about an inch and a half from the top, and another one the same distance at the bottom.
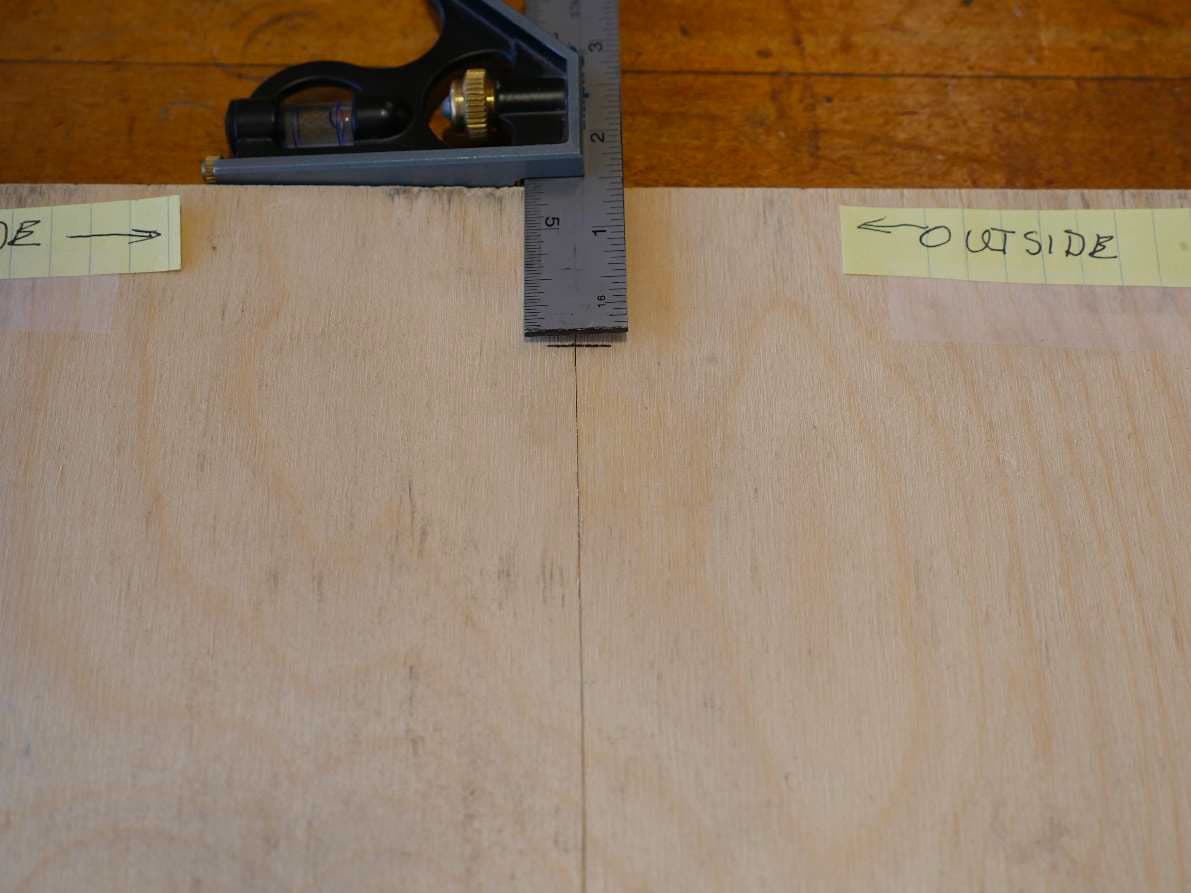
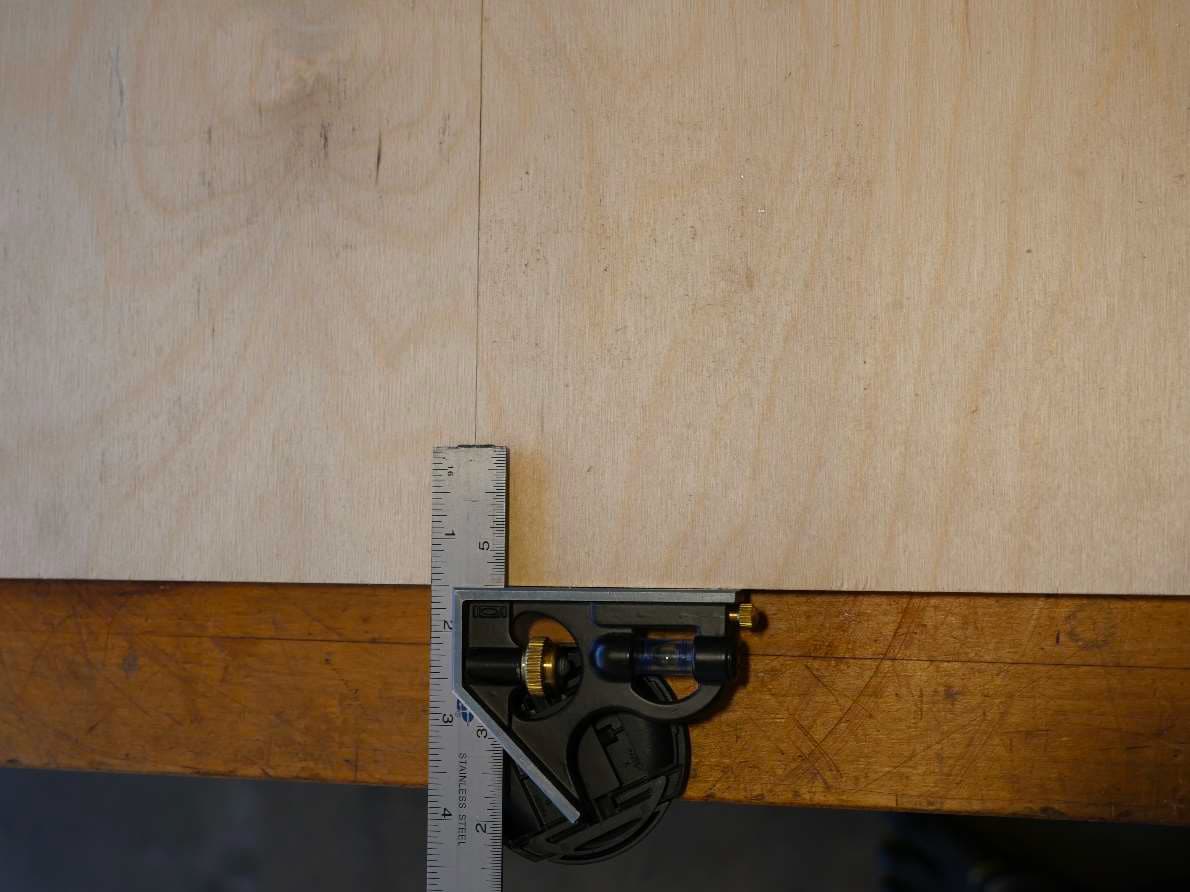
The easiest way to do this is to set the flat side of the combination square 1 ½ inches from the end and
then tighten the locking screw. Now butt the square against the top of the wood so the blade of the
ruler spans the joint between the two pieces of wood. With a pencil, mark across the top of the ruler
blade as shown.
Now flip the combination square over and mark across the joint at the bottom of the panels. Then with
a tape measure from top to bottom, make a mark crossing the joint in the middle of the panels. Try to
make these marks short and straight.
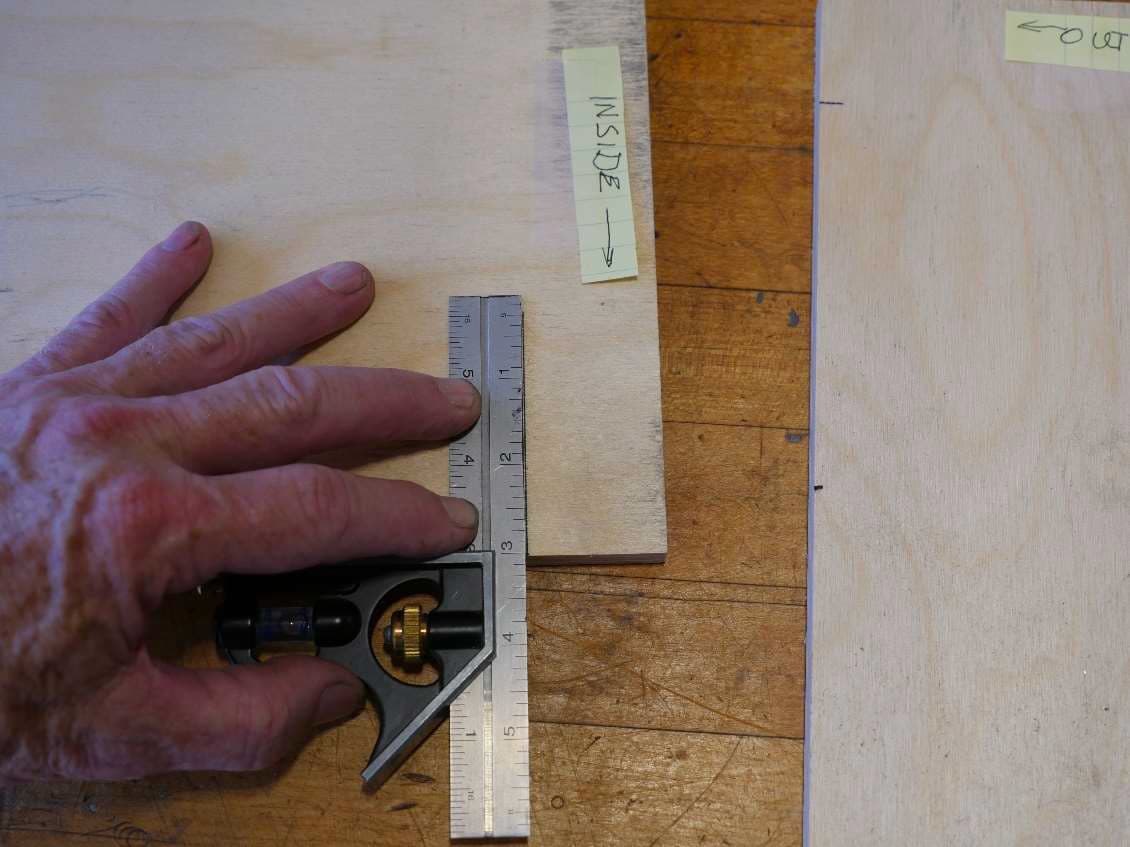
Now, extend the ruler blade on the combination square out about 2-3 inches. Separate the two pieces
of wood. Put the “inside” piece with the edge with the markings facing you. Line up the blade of the
square so the flat edge of the square is solidly against the edge of the wood and the edge of the ruler is
aligned with one of the three marks. Now extend the mark two or three inches.
Rinse and repeat with the remaining two marks.
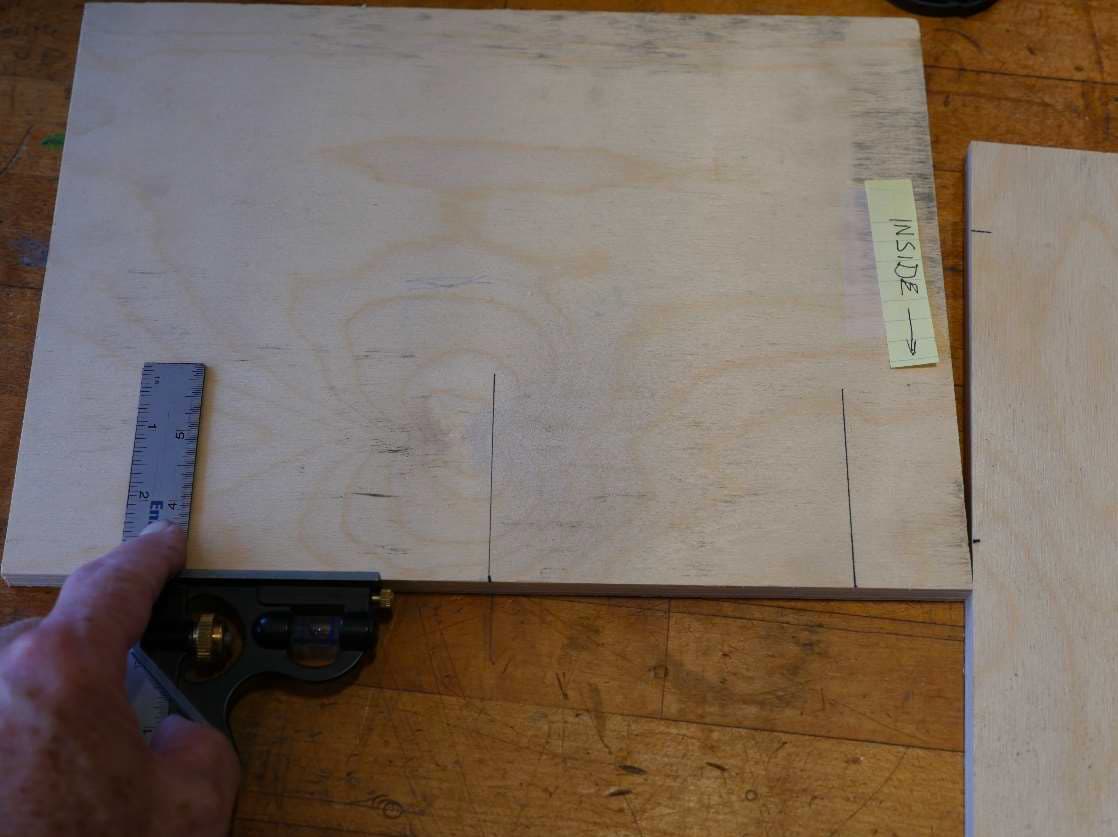
Repeat this same process with the “outside” panel. I told you the combo square would get a workout.

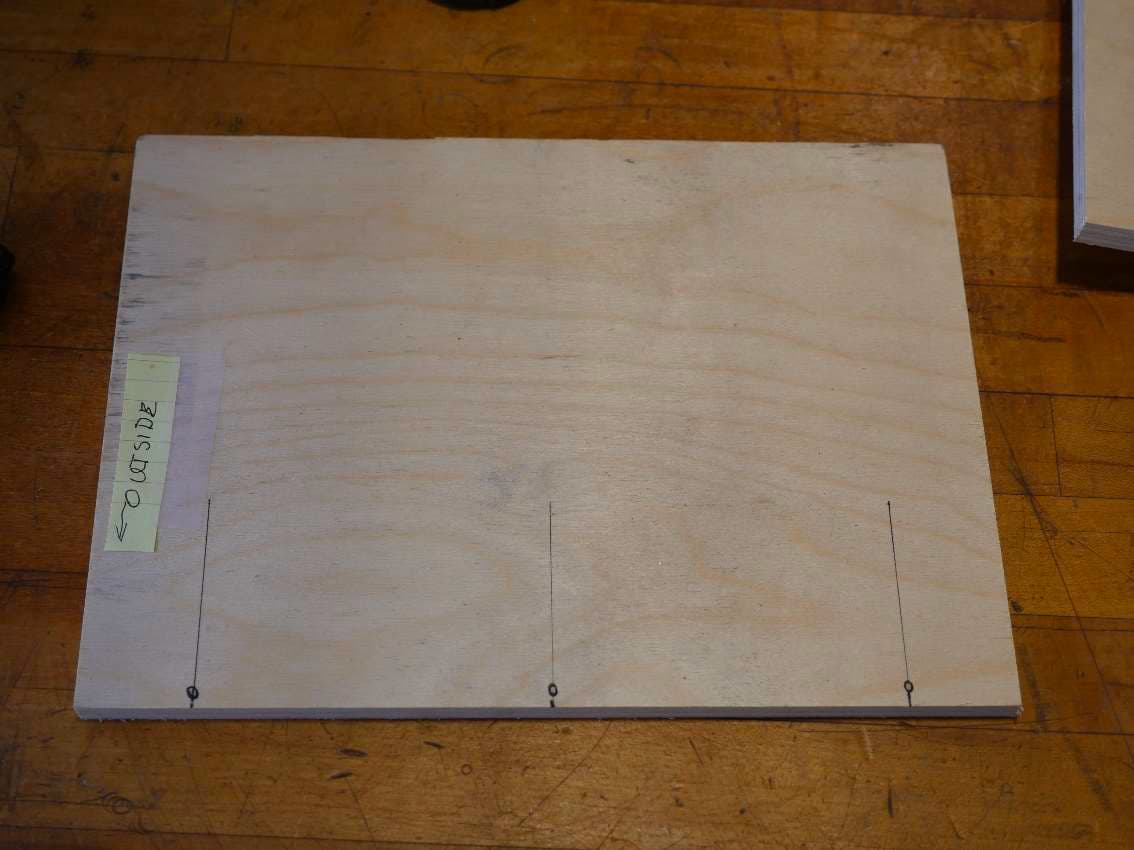
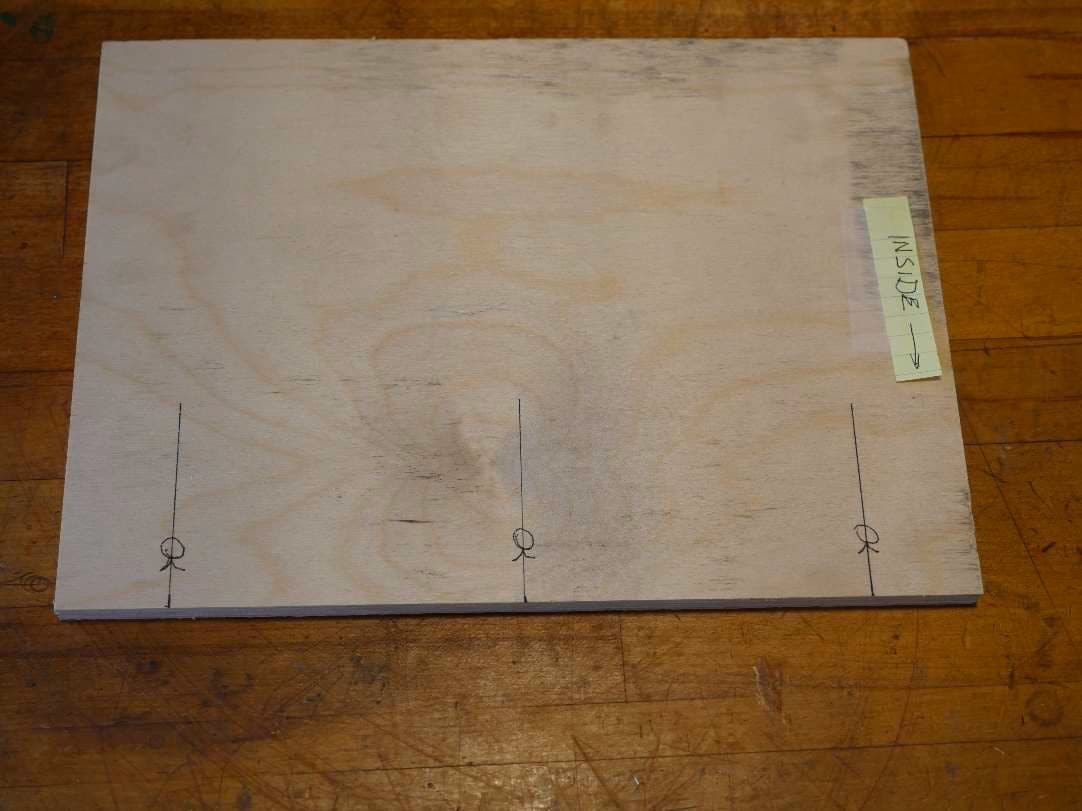
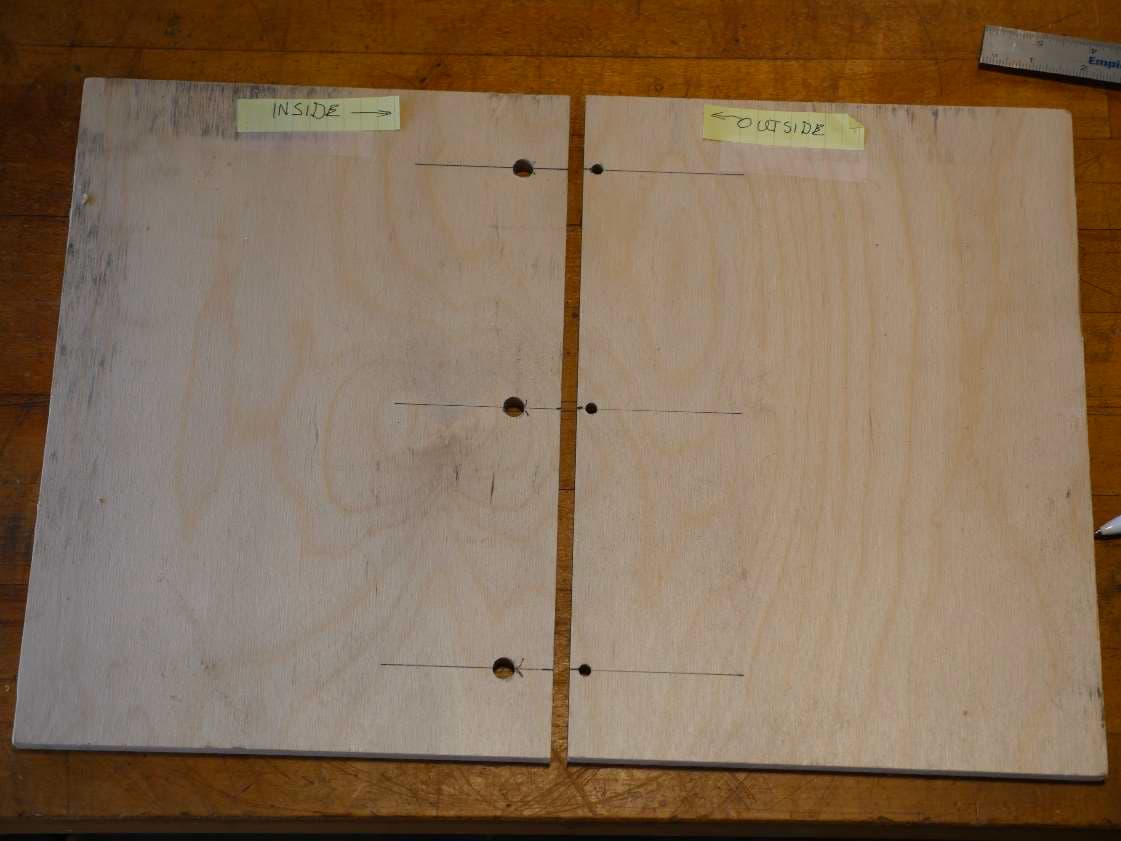
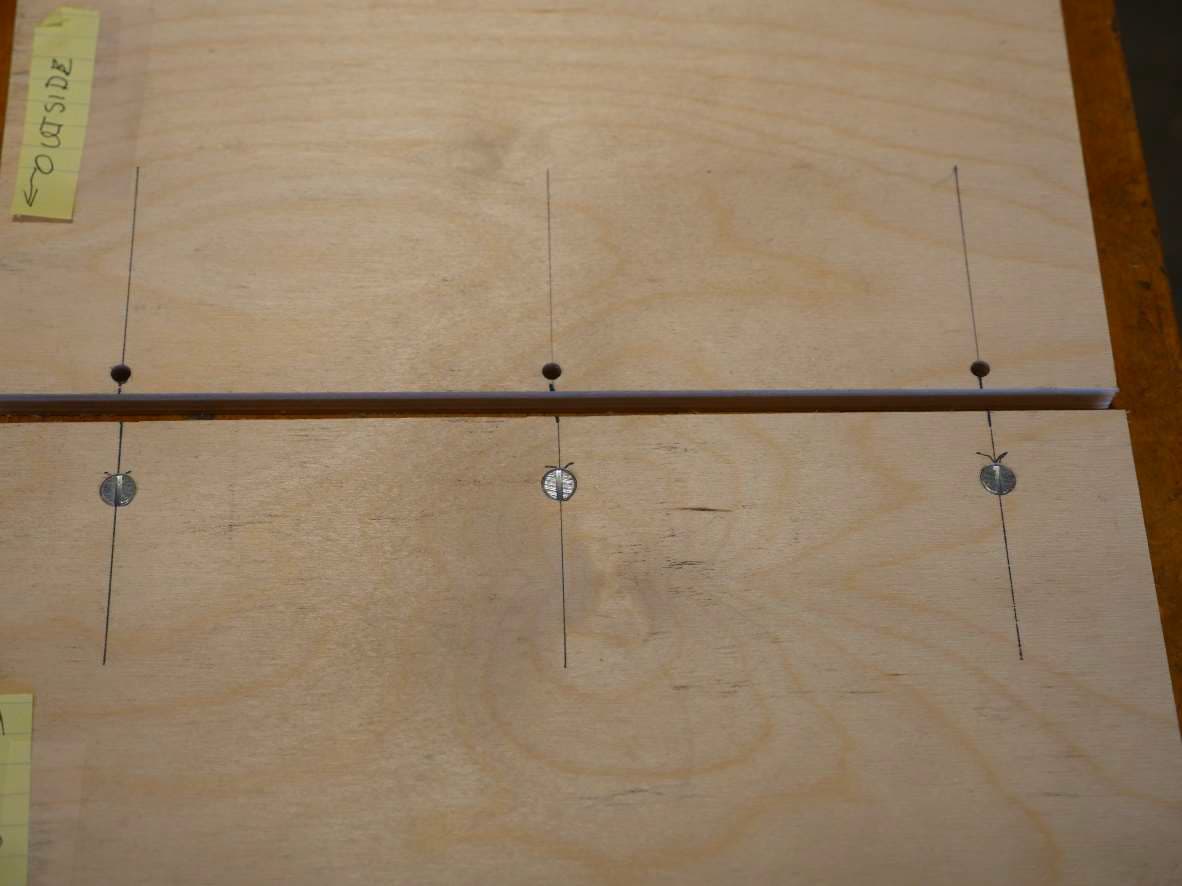
It can get really confusing as to what is “inside” and what is “outside” when all you have is straight lines
to work with. I tend to mark up an entire project and then drill everything at once. To keep things
straight I mark the lines similar to what holes will be drilled with the jig. For the outside panel I put a
small circle at the edge of the panel. This is where the jig will drill the through hole.
For the “inside” panel I put a large round circle on the layout line about an inch from the edge and then
put an arrow head on the line pointing to the circle. The large circle represents the cross dowel and the
arrow is the intersecting hole that is drilled through the edge. These markings help me keep everything
straight when I have a pile of panels to drill.
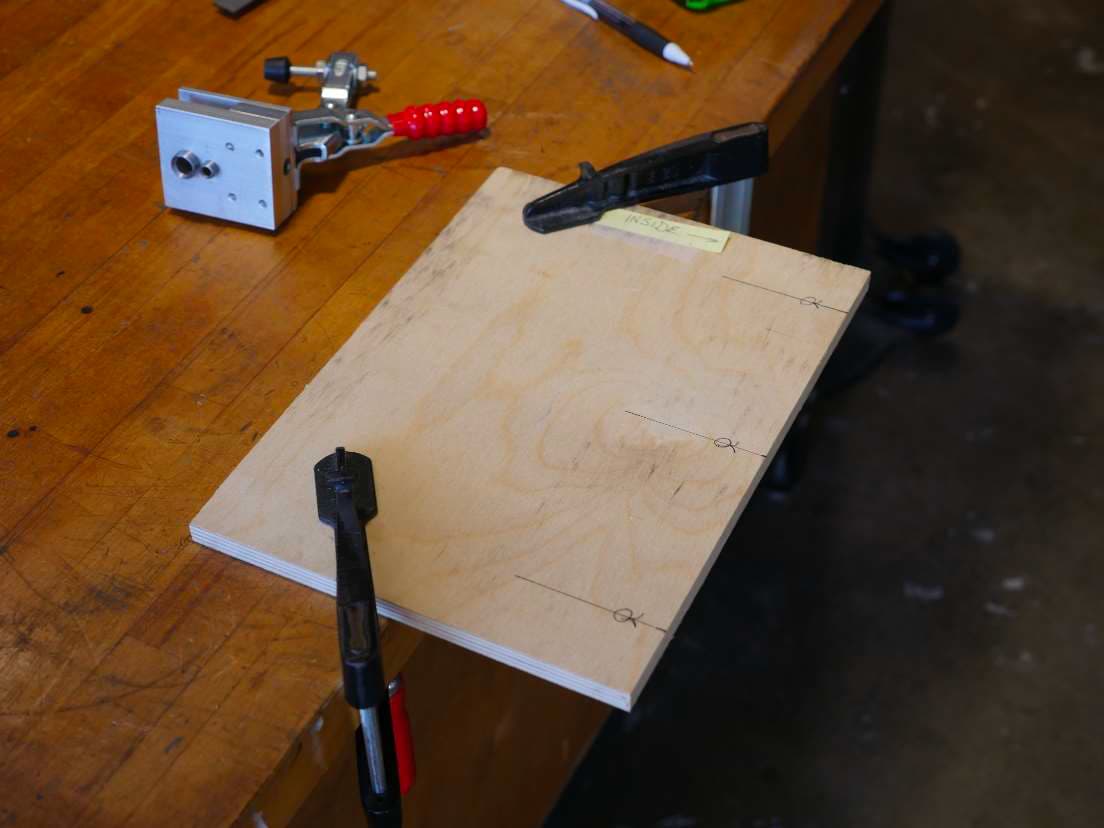
Take the “inside” panel and hang it about 3 inches over the edge of your workbench or table and firmly
clamp it in place.
Take your jig and slip it over the edge of the panel over one of the layout lines you previously drew.
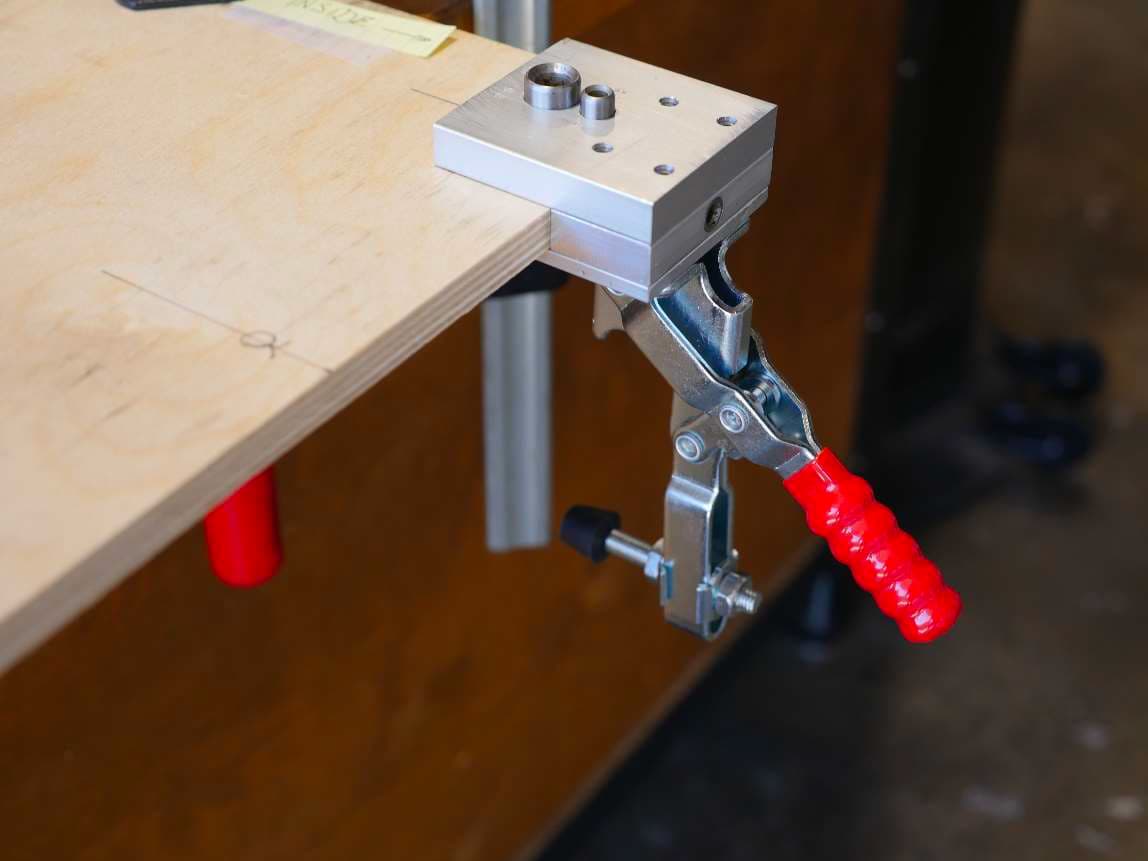
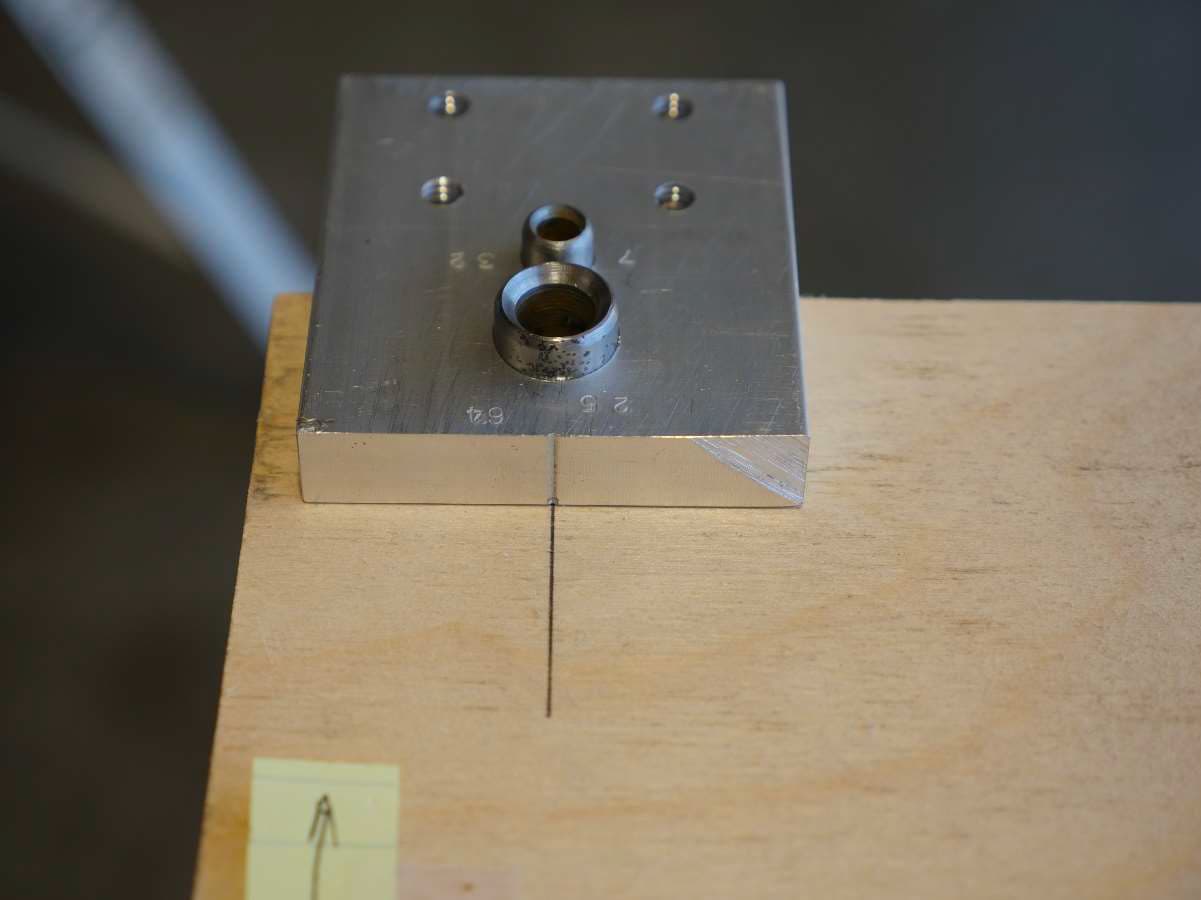
Make sure the jig is firmly against the edge of the plywood. Then line up the “witness” mark with layout
line.
Now push the red handle of the clamp until it clicks into place. This will take some effort.

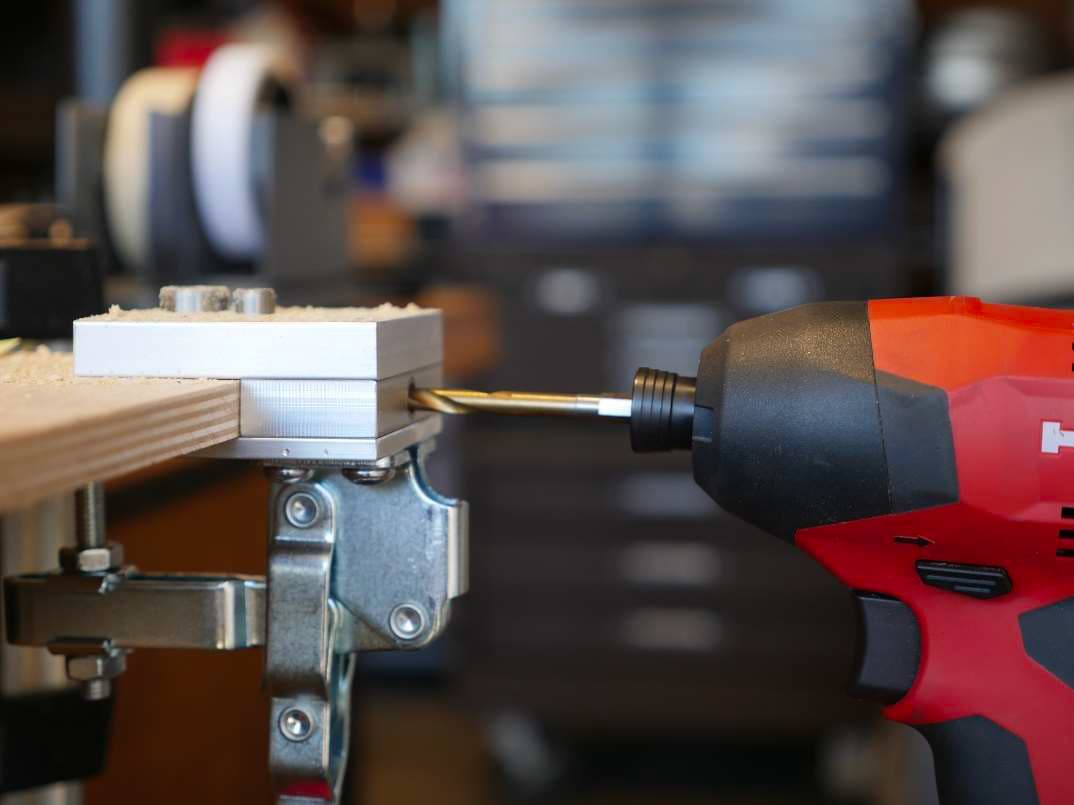
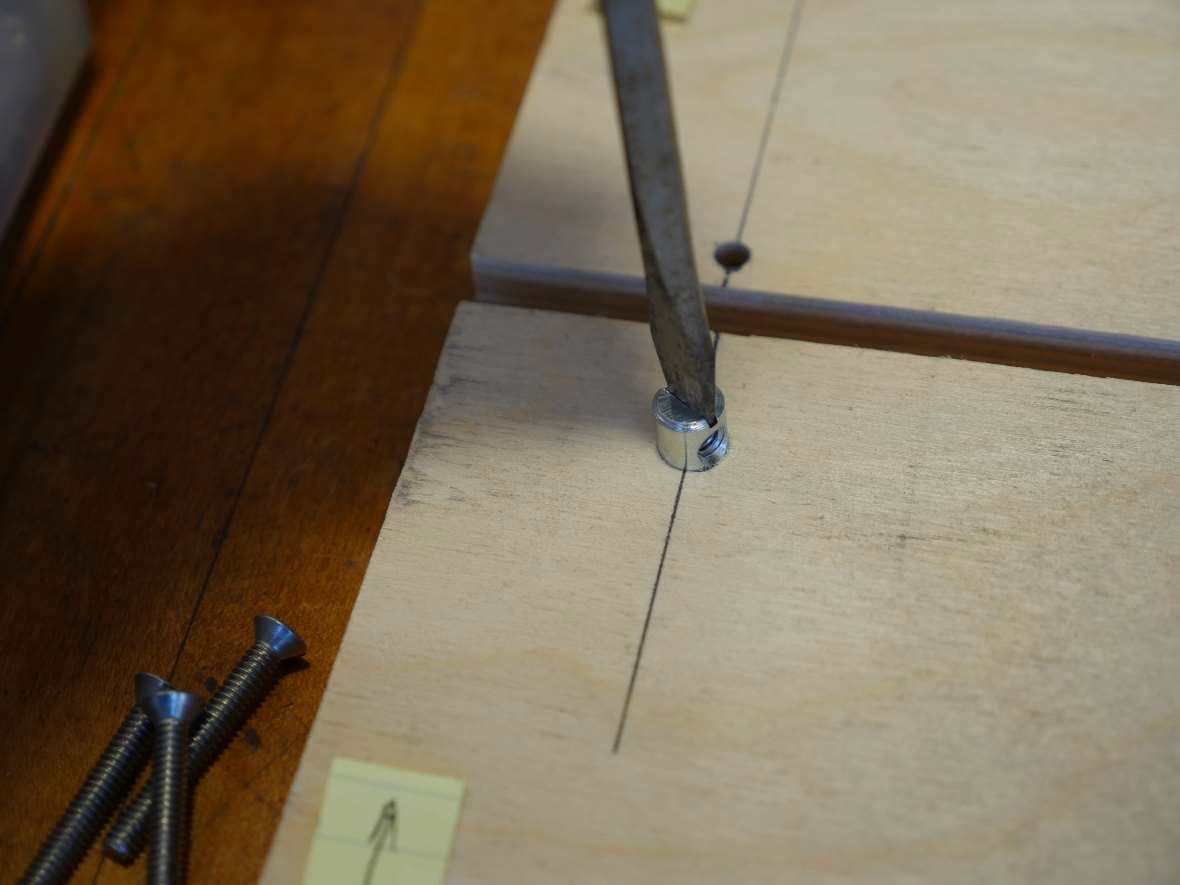
Chuck a 25/64 drill bit into your drill and carefully drill the large hole in the top of the jig. Don’t let the
drill pull you through the piece of wood. The clamp bar runs down the center of the clamp and you
could hit the clamp bar with the drill bit if you go to far. Just do your best to control the drill as it breaks
through.

Now chuck a 7/32 drill bit into your drill and drill the cross hole. Drill about a ¼ inch through and past
the larger hole. You need someplace for the end of a long screw to go if it passes completely through
the cross dowel.
The end result should look like this:
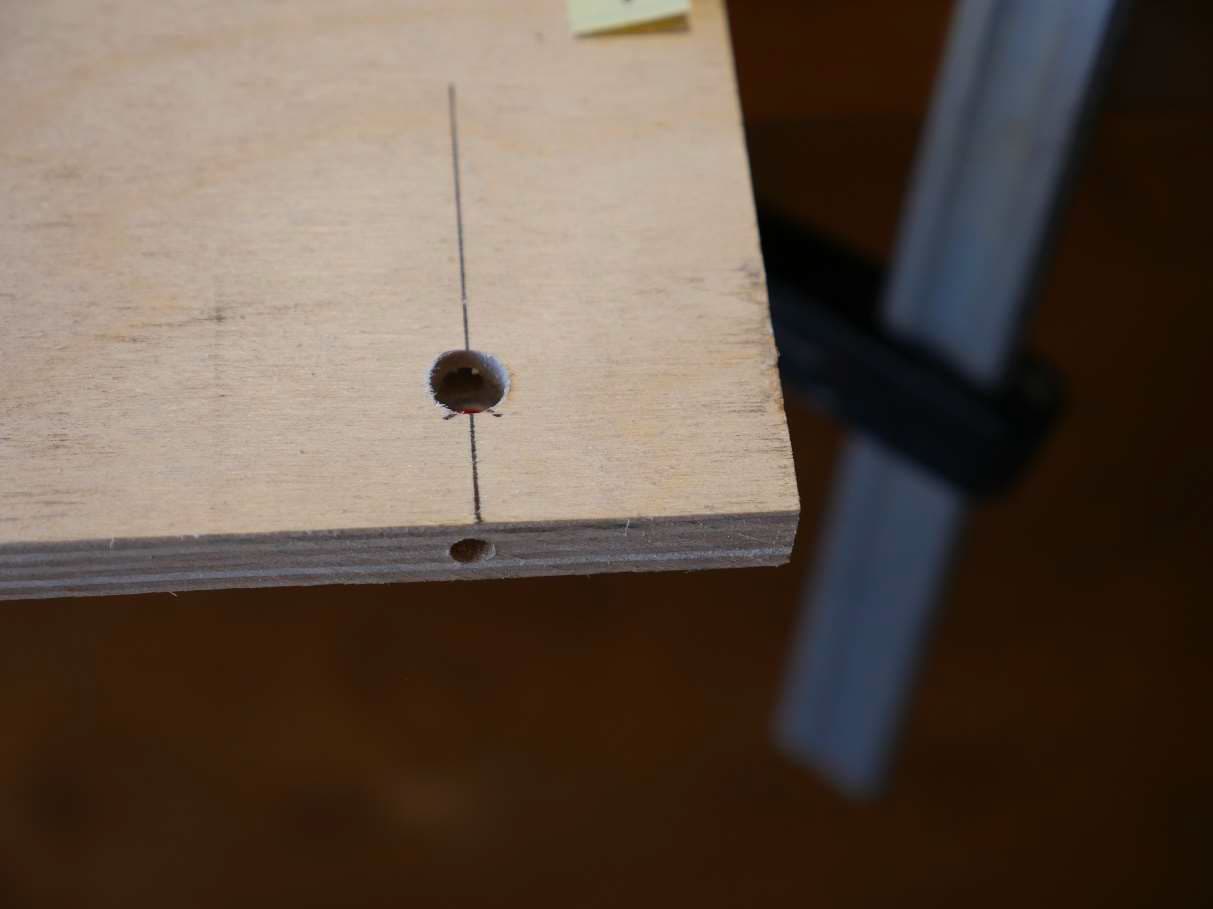
Do the same for the remaining holes on the “inside” panel.
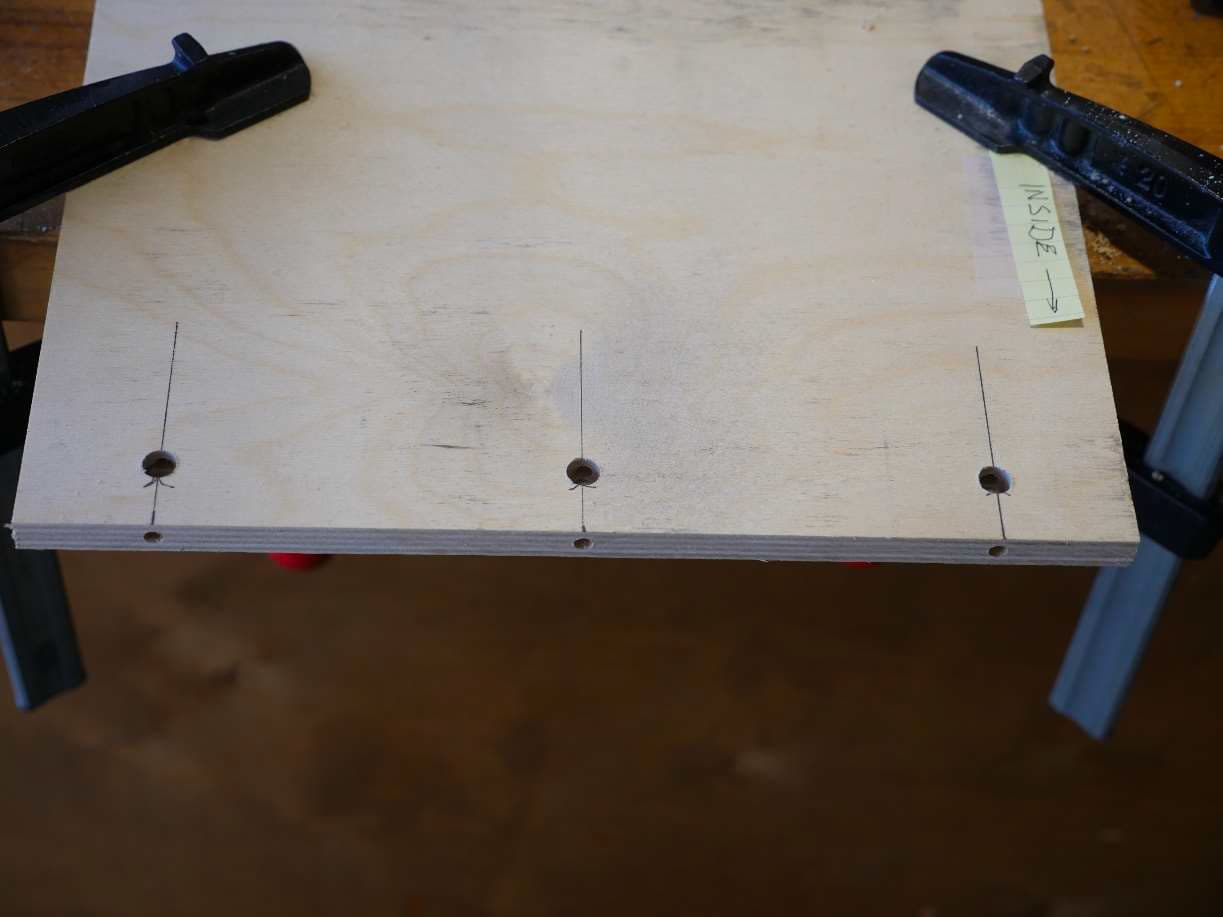
Now do the “outside” panel. For this one you set the jig up the exact same way, but this time you only
drill the small 7/32 hole in the top of the jig. The result should look like this.

Let’s set the two panels together as we did when we originally marked them up and see what they look
like.
Grab three 10-24 cross dowels and three 10-24 by 1 ½ inch machine screws. The screws can be either
flat head or pan head – up to you. Most people seem to prefer the looks of flat head screws.

Using a large flat blade screwdriver, insert and twist the cross dowels into their holes. It should be a
firm friction fit.
Line up the slot in the cross dowel with the layout line drawn on the wood. The slot lines up with the
threaded hole in the barrel nut. Install all three cross dowels.
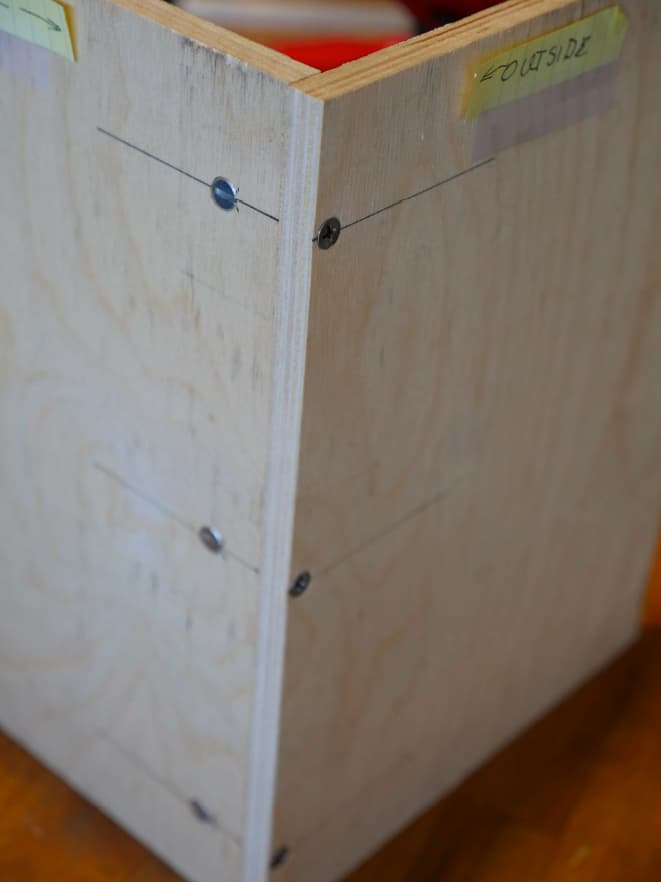
Put the joint together at its proper right angle and install the 10-24 machine screws.
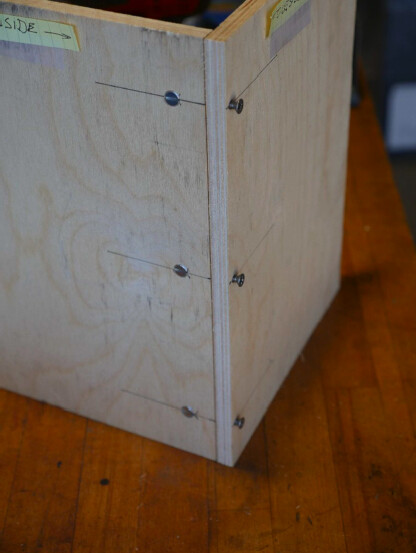
Tighten the screws until the heads are flush with the surface of the wood. Don’t cut counter sinks for
the flat head screws. They will install flush with the surface of the wood by themselves unless the wood
is very hard like maple.
Some general notes:
I purposely make the cross dowel a tight friction fit so that it won’t rotate or fall out as you assemble
and disassemble your project. Once you paint over them, they’re pretty much permanently in place.
I like to space my cross dowels about 1 ½ to 2 inches from the ends of the panels. I then divide the
space in between such that I have cross dowels spaced every 6 to 8 inches depending on the project and
how much strength is needed. Spacing of the cross dowels is up to you. They don’t need to be evenly
spaced and I seldom try to get them perfect. I just want them to LOOK evenly spaced.
Accuracy is important when aligning and drilling the cross dowel holes themselves. If you’re off by much
they won’t line up, so measure accurately. The jig helps with this.
Pan head screws with a washer make a stronger joint because of the large surface area under the head
of the screw and washer. Flat head screws have about two thirds the strength of pan head screws but
are still far stronger than any other joinery method.
That’s it for the basic Cross Dowel method. Next we’ll work on the model project and learn how to deal
with cross dowel joints that are in the middle of a panel where we can’t use the jig for the “outside”
through hole.
MORE TO COME…
3. Layout and C-channel
5. Anchoring cabinet divider panels with cross dowels