First lets look at what’s involved in adding to our existing cabinet assembly. Most other construction
methods would require building a completely separate cabinet and setting it beside the existing
cabinets. With cross dowel construction, we can continue building out new cabinet sections from where
we left off with little or duplication of effort.
Layout
We’ll proceed just as we did when we built the original cabinet, and start with the layout. We’ll use the
footboard of the bed as one side of our cabinet. We knew were going to extend the original cabinet so
we made the footboard the proper height for the new addition from the start. If we hadn’t done this,
then we’d have to replace this one panel. Even if we had to replace it, it wouldn’t be a huge problem as
all we’d need to do is remove the old one, cut a new one. Use the holes in the original panel to mark
the positions to drill the necessary holes in the new panel and then get on with the project.
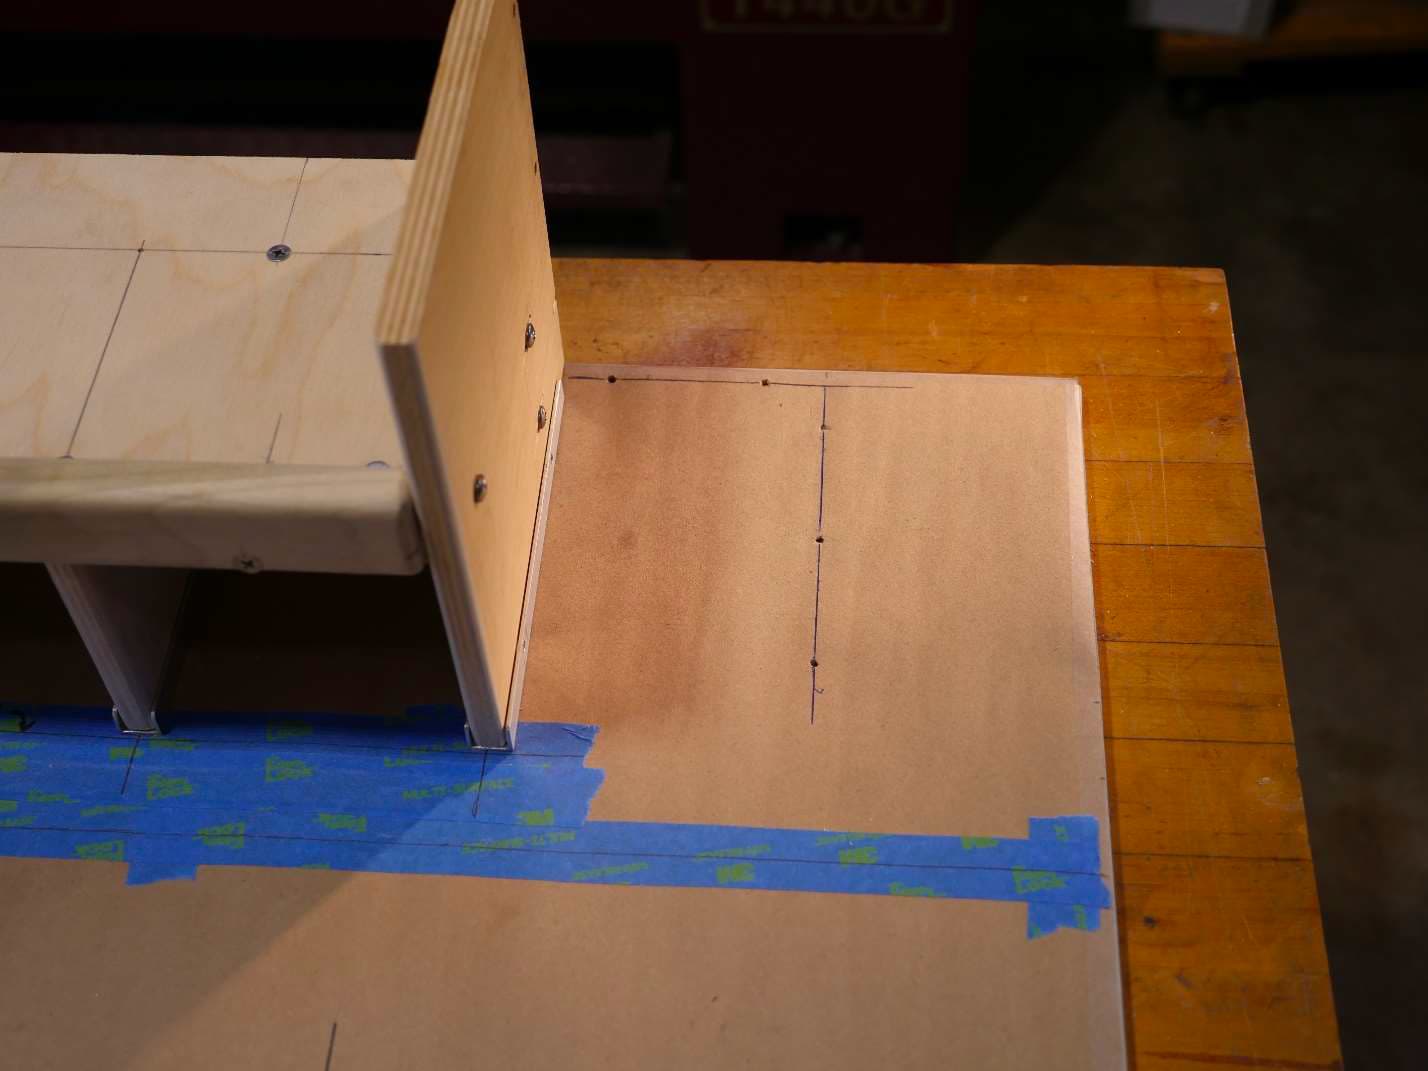
We need to draw our layout centerlines on the floor (or blue tape) for the back and right side panels of
the new cabinet.
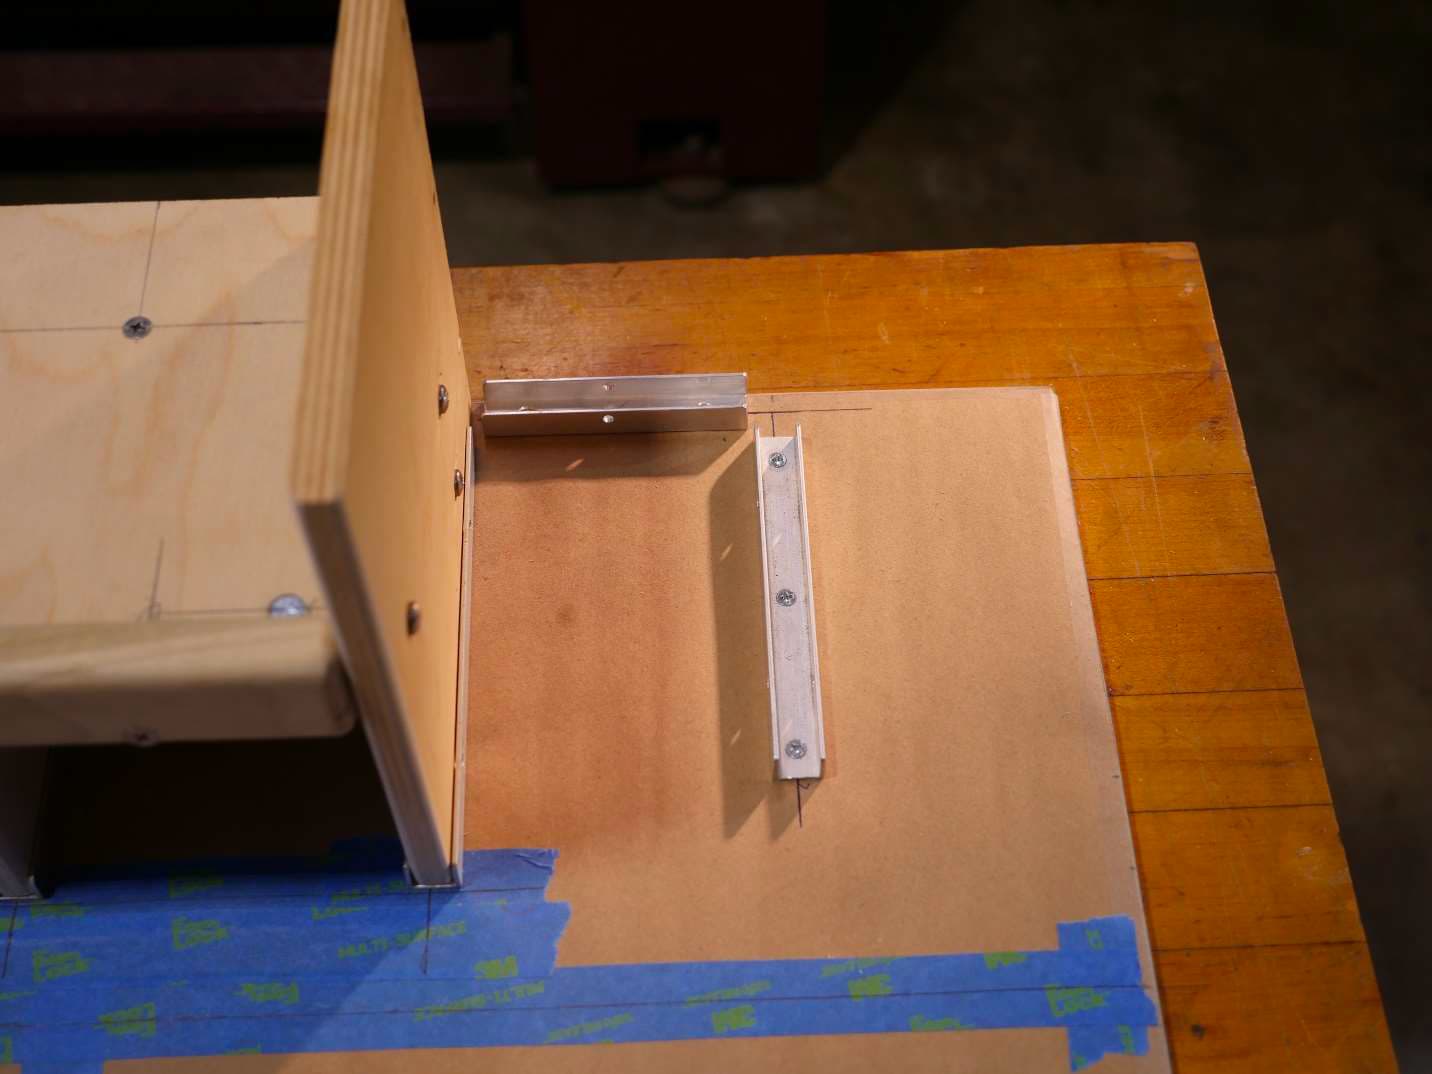
Install the C-channel
Next we need to cut and drill our C-channel sections and mount them over the layout centerlines just as
we did in tutorial 3. Layout and C-channel.
Mark, Drill, and Install Cross Dowels
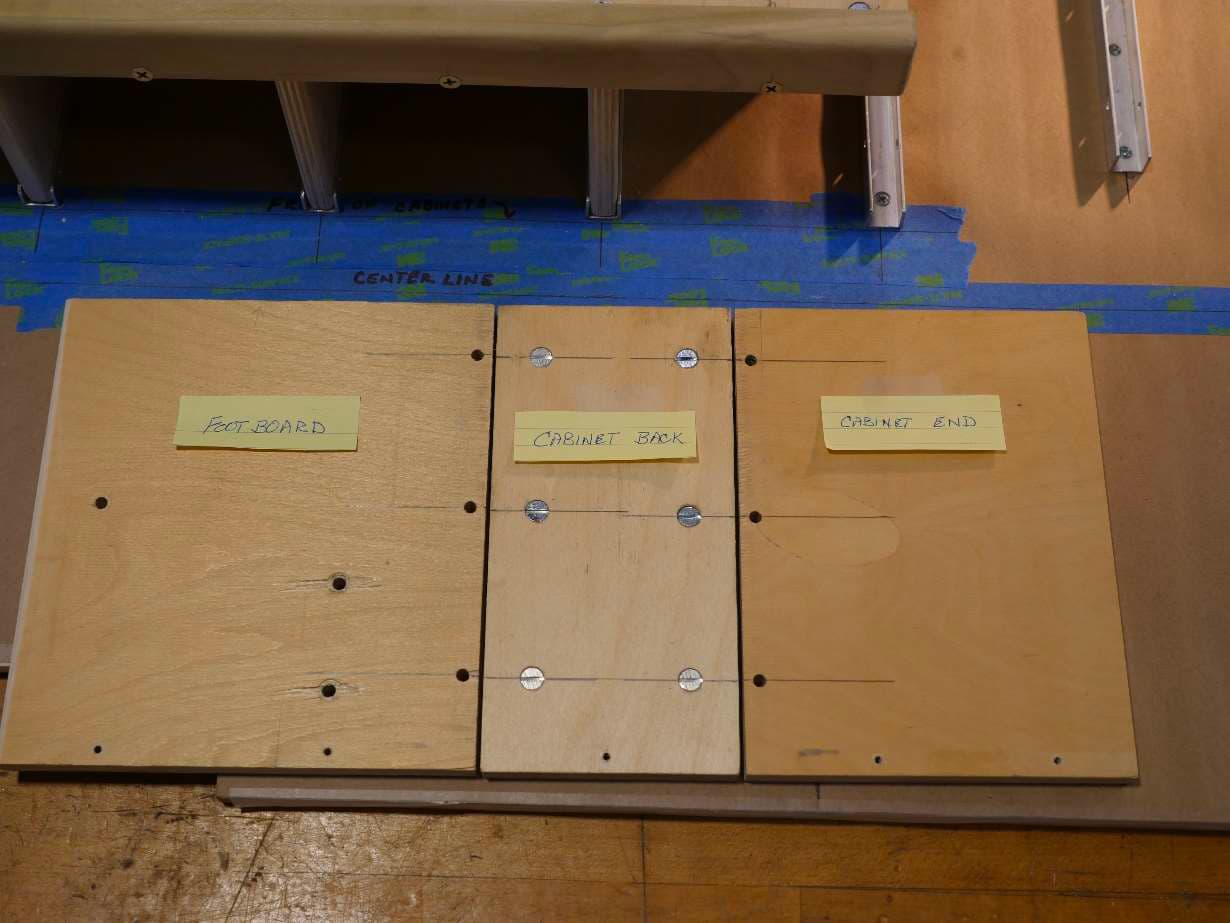
Now, disassemble the footboard panel from the bed cabinet. Cut your rear and right side panels to size.
Lay all three panels side by side, oriented with their bottoms and tops aligned, footboard, back panel,
right side panel. I made the back panel the “inside” panel so it carries all the cross dowels. The
footboard and the right side panels will have through holes. The model has 3 cross dowels on each side.
The full sized cabinet height in my van is 35 inches and I used 5 cross dowels on each side.
Mark all the positions where you want to install your cross dowels by making a short line across the
joints where the panels meet.
Extend your lines with the combo square, mark the cross dowel positions with a circle and arrow. Since
these are both corner joints you can use the cross dowel jig to drill both the cross dowel holes in the
back panel and the through holes in the side panels. Easy Peasy.
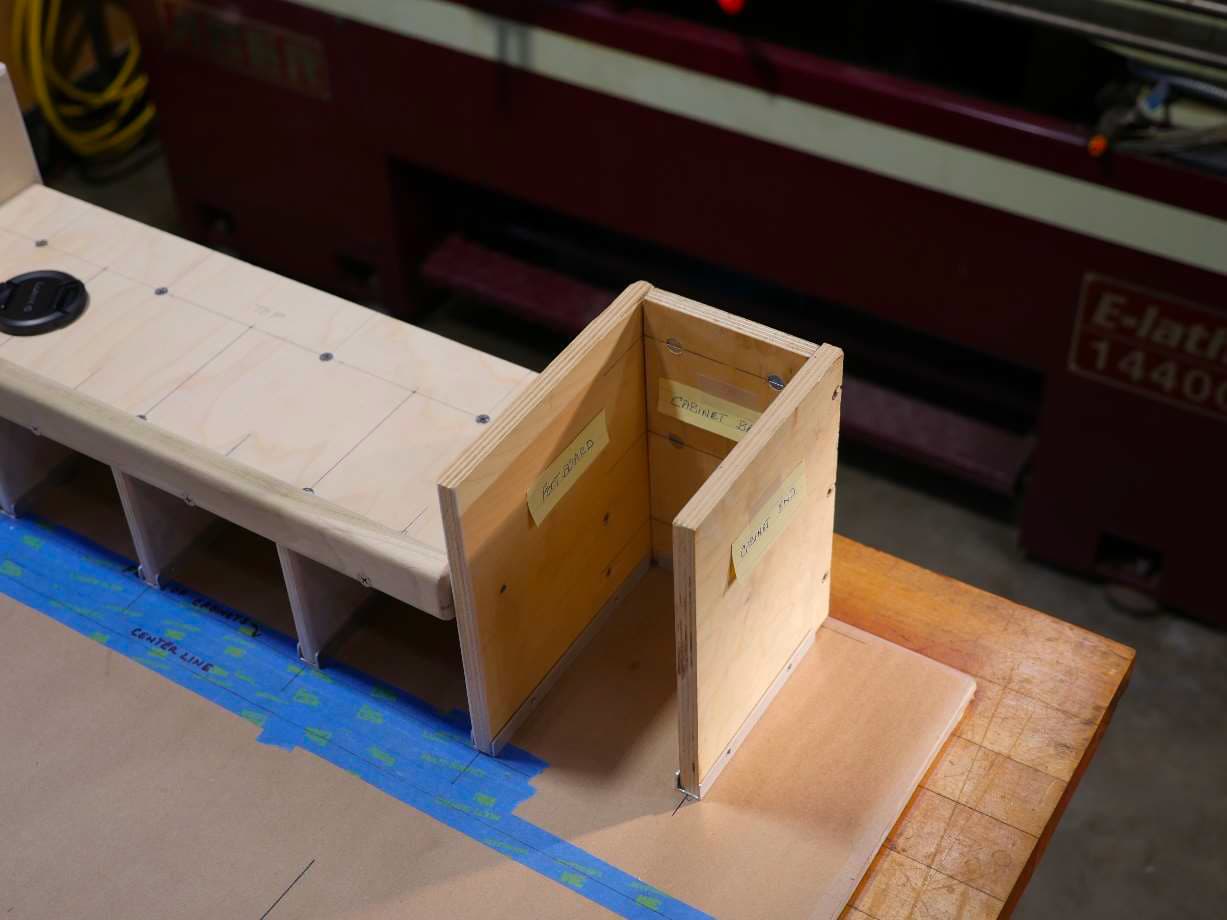
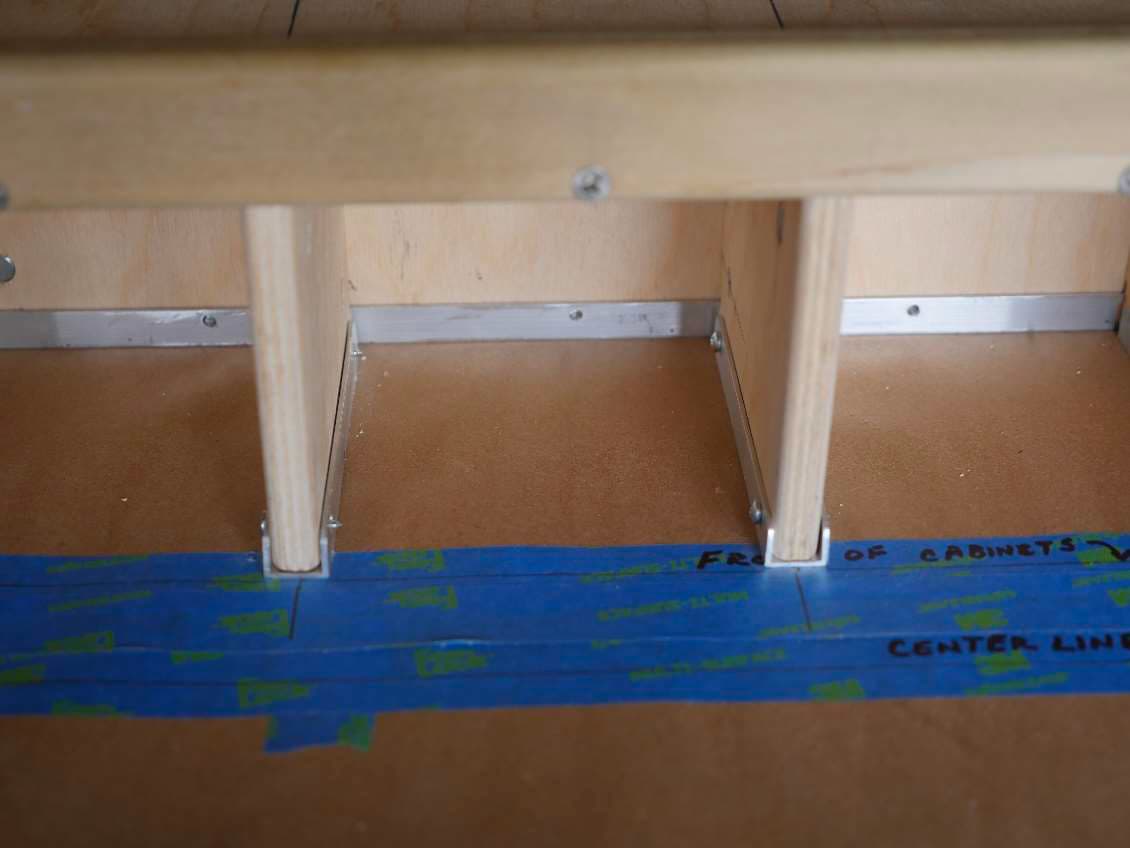
When the holes are drilled install the cross dowels in the rear panel.
Set all your panels in place, make sure the panels line up properly, and screw everything together.
We’ll work more on this new cabinet section in a future tutorial. It’s time to discuss anchoring the
cabinet to the C-channel.
Anchoring the Cabinets
I leave anchoring the cabinets in place until most of the construction is completed. It’s less to take apart
during the construction process. We’ve completed the actual construction of the bed platform and its
lower cabinets so it might serve us well to anchor this section to the C-channel. We can always
disassemble if needed – it’s just a little more work. Regardless of the method you choose to use to
anchor your panels. Make sure the cabinet is fully assembled and all the cross dowel screws are tight
before installing the anchor screws. You’ll find it easier if you use the automatic center punch before
drilling or installing the screws. It will keep the point of the drill or screw on target.
Choosing the Anchor Method
There are a couple of ways to anchor the cabinets to the C-channel: The Good way and, what I think is a
Better way.
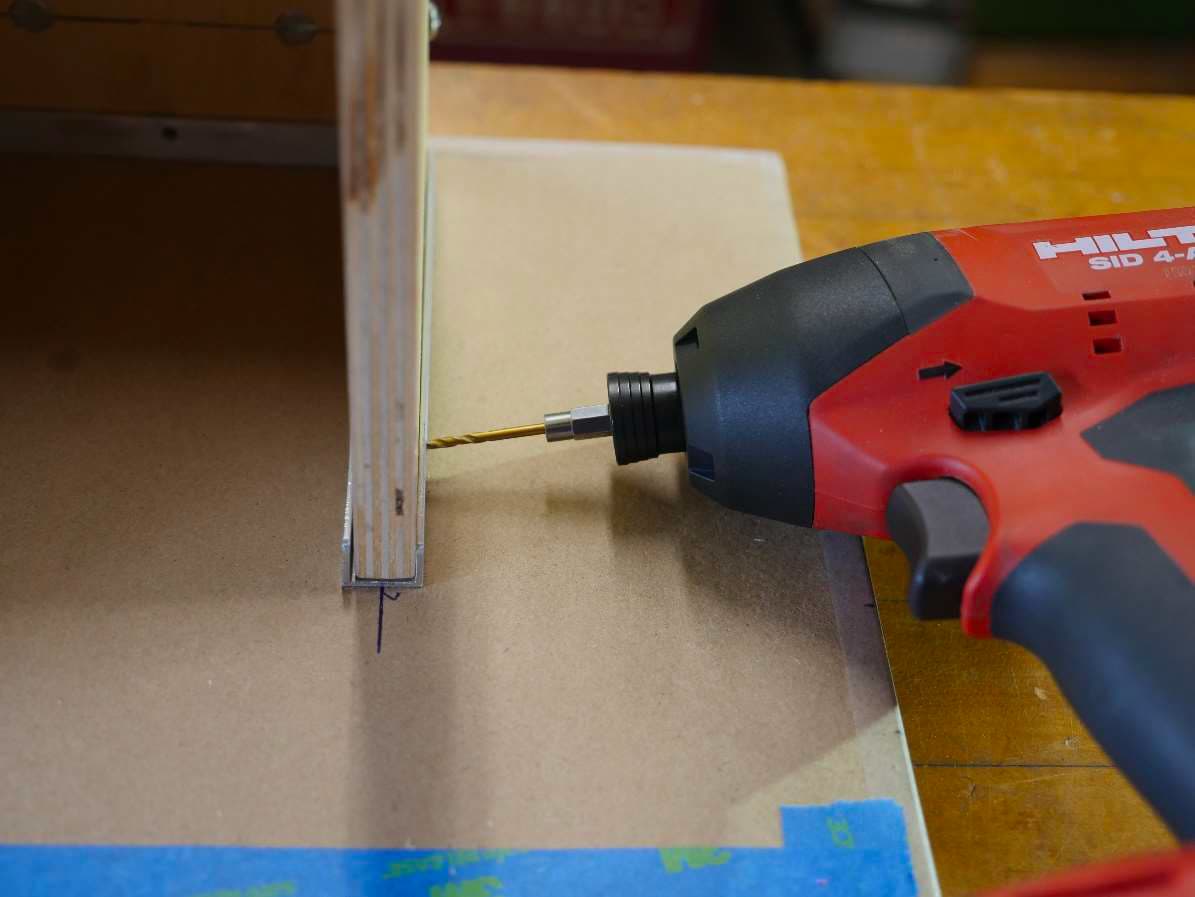
Most of us will be using a drill or electric screwdriver of some kind. The cross holes in the C-channel are
very close to the floor and the diameter of the drill or power screwdriver will tend to install the screws
at an angle.
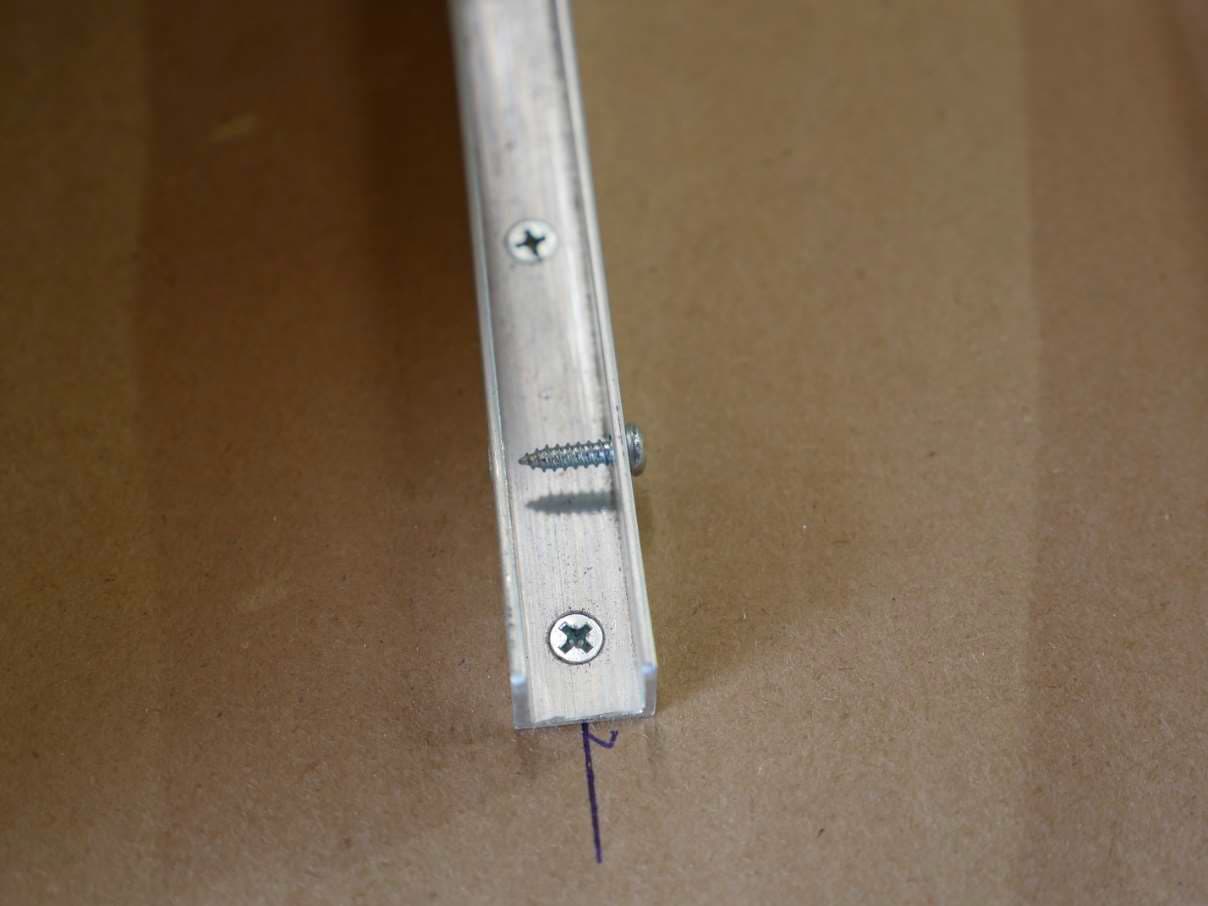
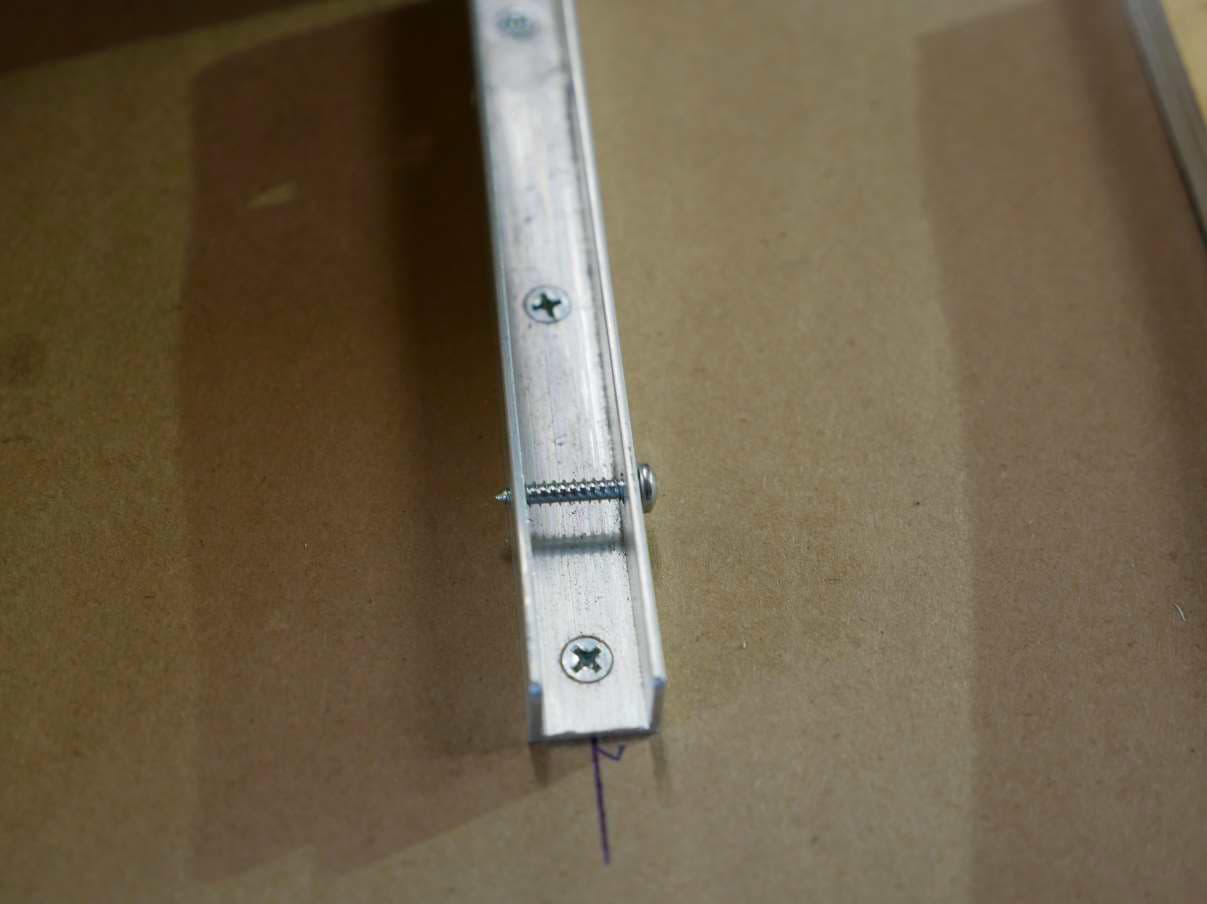
We purposely drilled holes on both sides of the C-channel so the screws would go all the way though,
locking the panel in place. With the drill angled as shown above, it is difficult to get the screws in
straight so they line up with the hole in the opposite side of the channel.
The Good method – ½ Inch #6 Philips Panhead Screw
We can get around this problem by using shorter screws so that they won’t go all the way through to the
opposite side of the channel. This allows the screw to go in at a downward angle and still adequately
secure the panel.
The draw back to this method is that it is not the best solution when you may want to fully disassemble
your cabinets several times – for painting, repair work, spring cleaning, adding wiring, or reconfiguring
something. You’ll be surprised how often you’ll find yourself pulling your cabinets apart, especially if
this is the first build you’ve done and you keep finding things you forgot to do or small changes you want
to make.
Installing and removing screws weakens the wood around the screw each time you do it. Often, after 2
or 3 cycles, theses short screws fail to tighten and just spin in place. With nothing solid holding them
they can rattle loose in your rolling earthquake. I’m not saying that you shouldn’t use this method. Just
think carefully if the quick and fast job will be worth the drawbacks. If you paint your cabinets before
you anchor them, and you’re fairly confident that you won’t want to remove them except for
unforeseen circumstances, then by all means go for it.
The Better Method – ¾ Inch #6 Philips Panhead Screw with 7/64” Pilot Hole
We drilled the holes through both of the side walls of the C-channel for a reason. It allows the anchor
screw to penetrate both sides of the channel so that the wood panel is locked in place. When a pothole
creates a force that attempts to lift the panel out of the C-channel, both ends of the screws have the
lifting force applied to them so the screw tends to stay in place. To fail, either the bottom edge of the
plywood would have to tear out, or more likely, the entire C-channel would be pulled free from the
floor. (That’s why I usually have more screws securing the C-channel to the floor than cross holes
holding the panels into the channel.)
The main problem with this method is how do we install the longer screw so it doesn’t go in at an angle
and be no better than the short screw. I’m a belt and suspenders kind of guy. I want to make sure my
pants stay up in critical situations. I’m going to use the same approach for installing these longer
screws.
The Belt
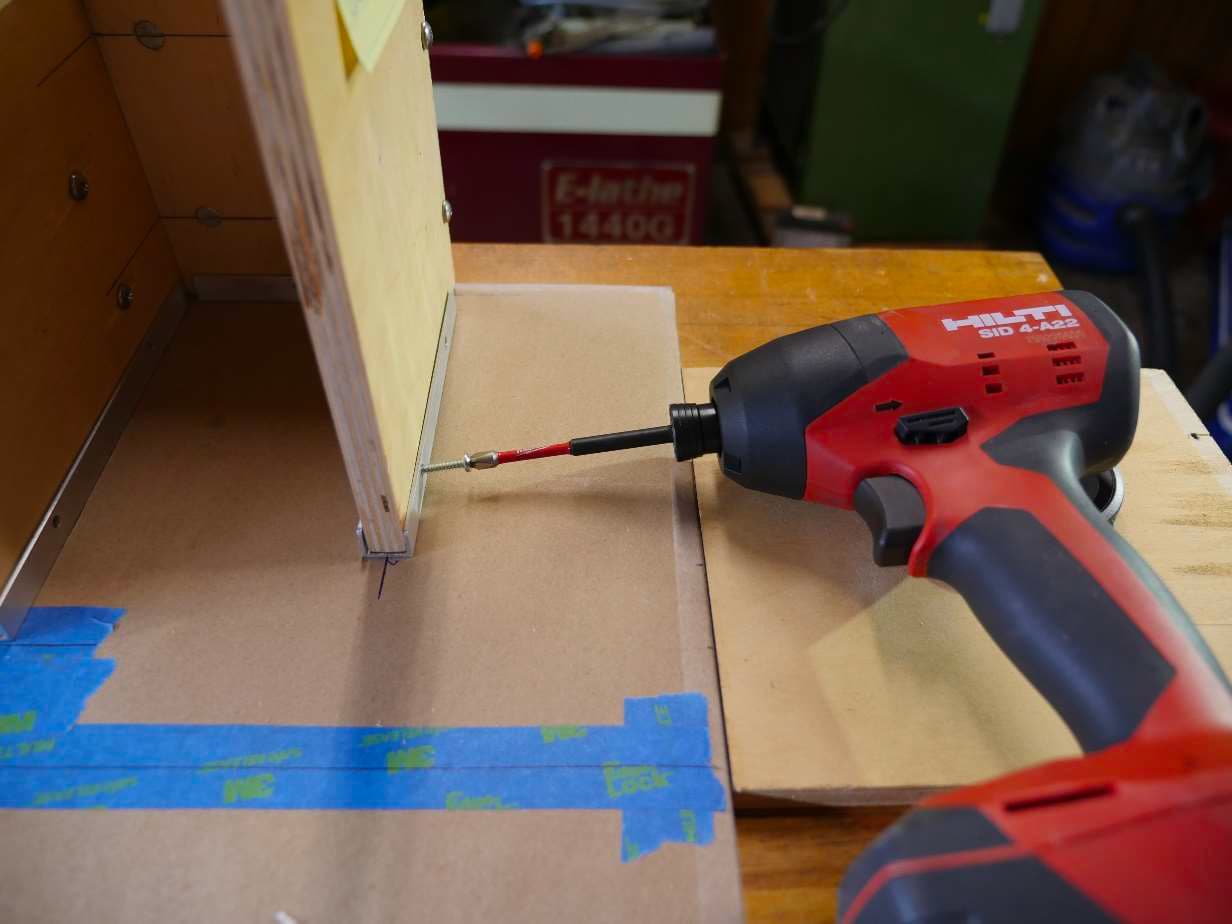
We need to reduce the angle of the screwdriver so that it is as close to parallel to the floor as possible.
You can install all these screws by hand, but that is tedious, and though I’m a glutton for punishment, I
quickly looked for another option.
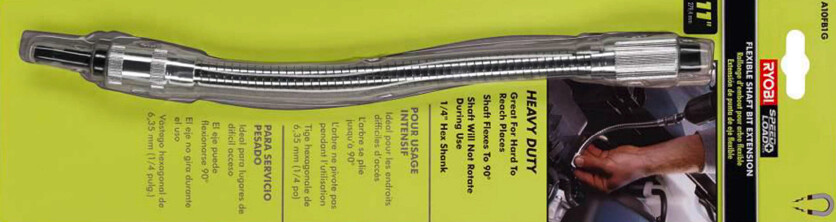
A solution that I’ve recently found is a Flexible Shaft Bit Extension. It locks into your power screwdriver
like the screwdriver bit, and the screwdriver bit snaps into the magnetized end of the Flexible Shaft
Extension. The adaptor has a much smaller diameter than the drill motor so you can manipulate it very
close to the floor. It allows you to easily drive screws straight and parallel to the floor. A Bargain at less
than $15 at Home Depot.
The Suspenders
Unlike machine screws going into threaded nuts. (or cross dowels), pointed wood screws are like
children, they tend to have a mind of their own and wander off the straight and narrow path no matter
how careful you are. They just don’t want to go in straight.
The best solution I’ve found for taming a screw’s wandering proclivities is to drill a pilot hole for the
screw to follow. You want the pilot hole to be slightly smaller than the diameter of the screw you are
using. A #6 screw is about 1/8th inch in diameter. We’ll drill our holes 7/64ths which is one size smaller.
This hole needs to be drilled as accurately as possible starting at the pre-drilled hole on one side of the
C-channel, through the wood panel, and (hopefully) out the pre-drilled hole on other side of the
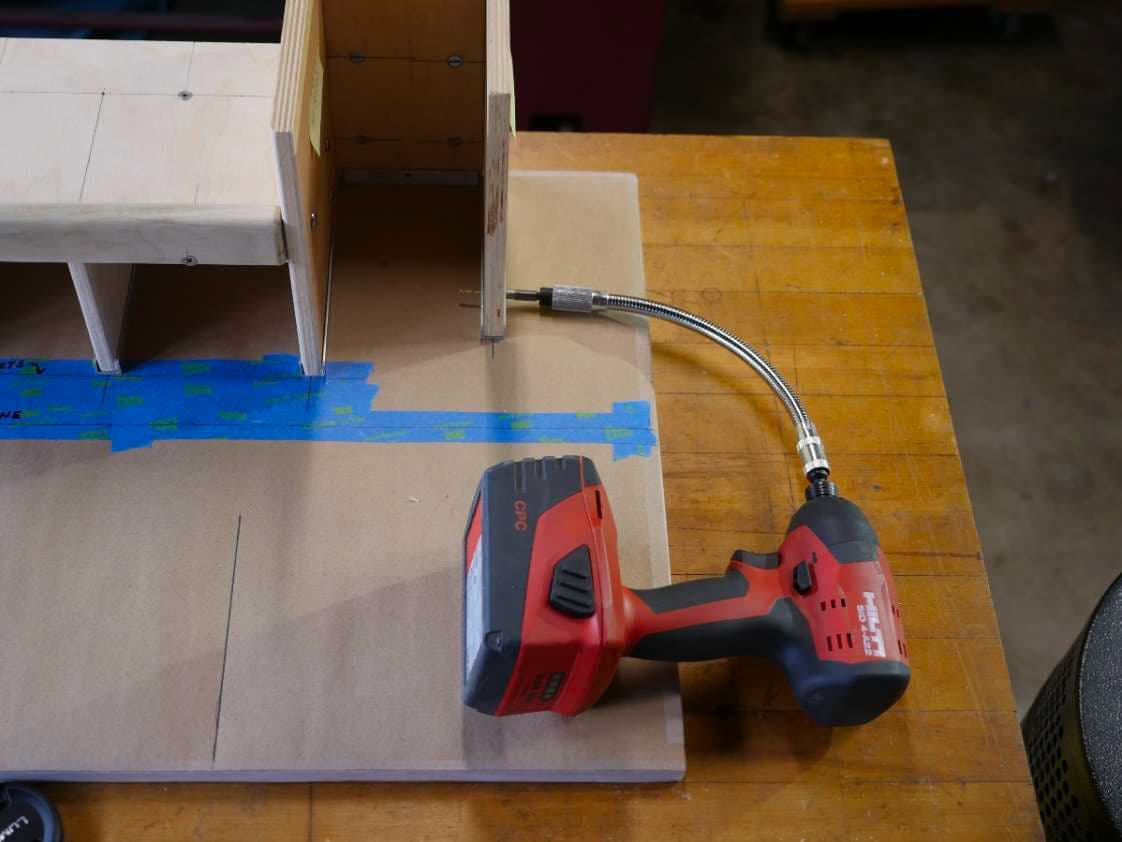
channel. To do this you’re definitely going to need the Flexible Shaft, for your drill. The photos below
should clearly demonstrate this point.
Nope. No go. Way too much of an angle.
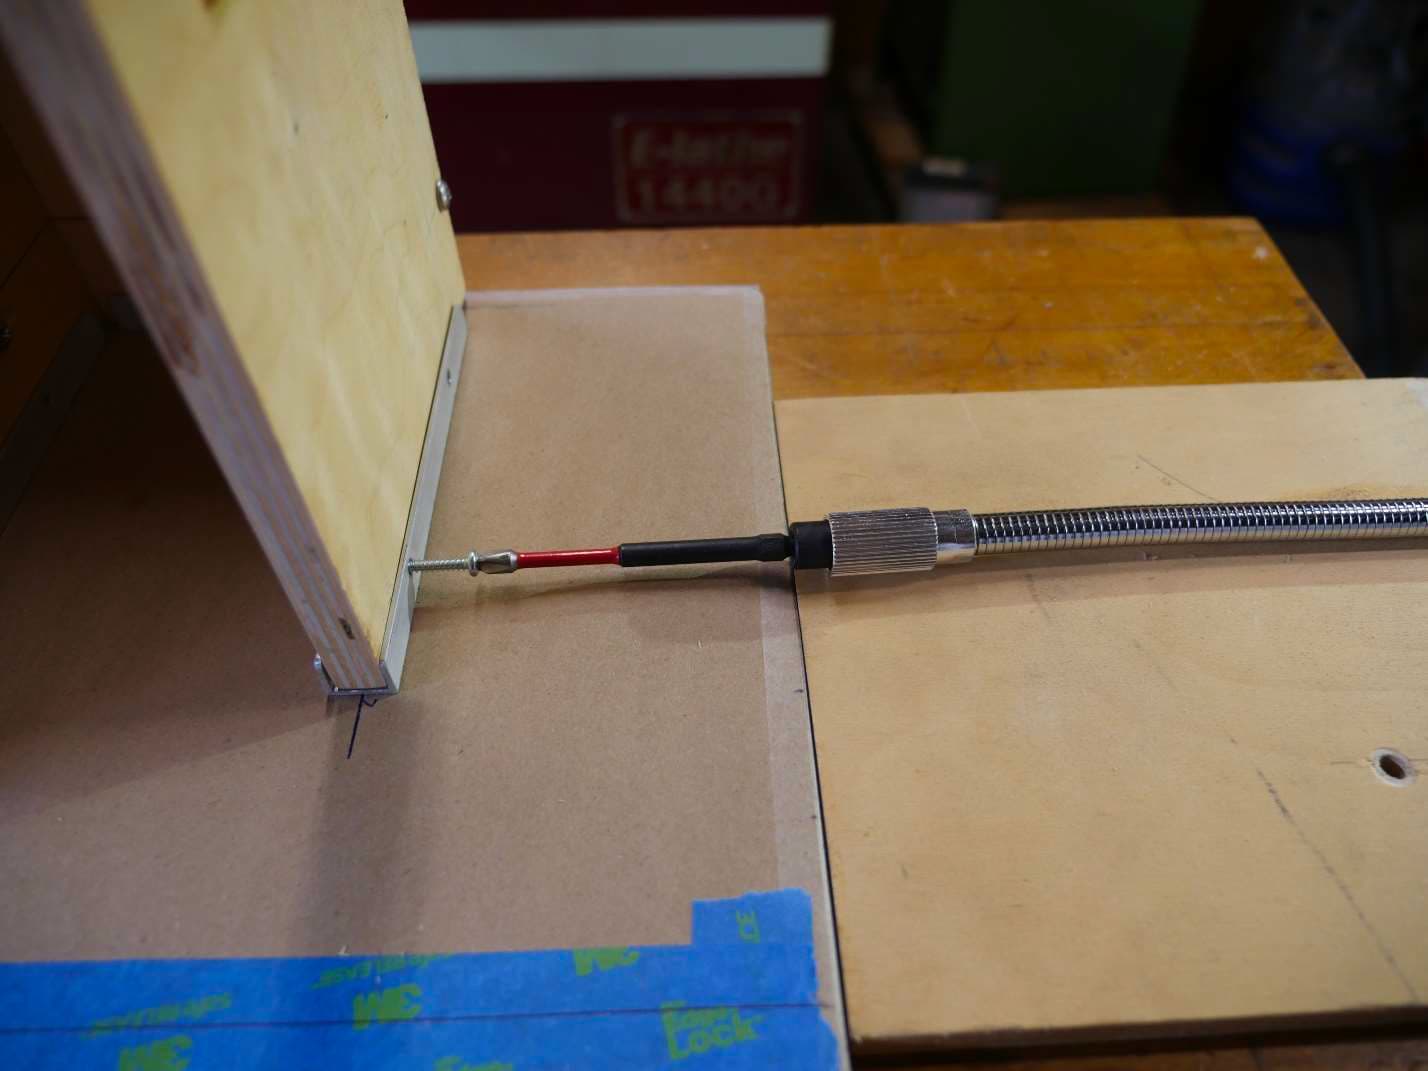
BINGO! The Flexible Shaft scores a touchdown for the win.
For the Flexible Shaft Extension to work, you’ll need a 7/64ths inch drill bit with a ¼ inch hex shaft. I
purchased mine at Home Depot – two on a blister pack for about $5.
Go ahead and drill all your pilot holes, then, using the Flexible Extension, exchange the drill bit for a #
Philips screwdriver bit and install your screws. See how they solidly pin the cabinet panels in place?
Summary
So here’s the overall procedure for installing cabinet anchor screws:
- Completely install the entire cabinet that you are going to anchor.
- Make sure all cross dowel screws are tight
- Make sure all wood panels are seated solidly in their C-channels
- Choose the method you’re going to use – short screw or long screw.
- Center punch your hole location before installing your screws or drilling your pilot holes. Don’t
expect the soft aluminum of the C-channel to properly position the screws or drill bit. - If you’re using the long screw method, drill your 7/64th pilot holes.
- Use your power screwdriver to carefully install the screws.
- Go slow and maintain control or you risk striping the hole
- Tighten the screws just snug, don’t over tighten or you’ll risk striping the hole.
MORE TO COME
9. Adding a Face Frame to the Bed Platform
11. Dividing Cabinet Space