After driving around in my van for several months, I was constantly annoyed by the mattress slowly
slipping off the bed platform and landing in the isle way as I bobbed and weaved around corners and did
my best to destroy my suspension on potholes.
I decided the answer was to put a raised ledge across the front of the bed platform to keep the unruly
mattress in place. As in everything else associated with building a camper van, the idea is simple but the
execution is filled with compromises.
My first thought was that this ledge was going to be permanent so no need to bother with cross dowels.
I can just nail and glue it into place – cheap and effective. Fortunately, my conscience won the day since
one of my purposes was to demonstrate the flexibility and benefits of cross dowel construction. No nails
or glue allowed in my conversion! (I did compromise on this a bit as well. I haven’t used nails or glue
but you’ll see where I used some angle brackets and screws to strengthen things here and there.)
My first attempt looked great and did the job perfectly but the lip was so high that it was uncomfortable
to sit on the edge of the bed. Oh yeah, I used cross dowels. Just take it apart, cut a couple of inches off
the top edge and reinstall. Took all of 20 minutes. Easy peasy.
So let’s look at some of the options I considered and the route I chose. You may choose a different
approach depending on the woodworking tools you have available. There is no right or wrong way.
Choosing a Way to Attach the Front Frame
I wanted the frame to be ¾ inch thick. This would add to the strength of the front edge of bed platform
and the top edge could be nicely rounded so there would be no sharp edges.
My first thought was to attach it to the top of the front edge of the bed platform. This way the front
face of the frame would be flush with the front of the entire cabinet assembly. I started to do this and
found a couple of problems. First, cross dowels would need to be mounted in the frame piece and the
through holes would be on the bed platform. Hmmmm, my jig doesn’t fit ¾ inch wood. Second, I didn’t
particularly like the look of the plywood edge of the bed platform showing beneath the solid wood
frame. There had to be other options.
Next I considered installing the cross dowels in the front edge of the bed platform with the through
holes in the ¾ inch fame. Much better, but now I have this piece of wood sticking out into the isle way
almost an inch in front of the front of the cabinet assembly. With the isles being narrow as it is, I
wanted as little additional intrusion into this area as possible. Back to the drawing board.
My next thought was to remove the bed platform and cut ¾ inch off the front edge and then install the
face frame as in the second option. I wasn’t terribly excited about this idea. The bed was already pretty
narrow and I didn’t want to reduce its width any further.
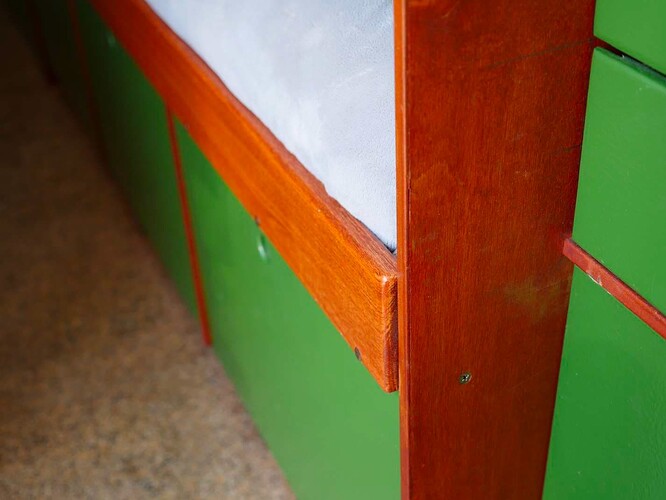
I finally decided on installing the face frame onto the front edge of the bed platform as in the second
option, but using a rabbet joint to reduce the intrusion into the isle way from ¾ inch to 3/8 of an inch.
The bed platform itself would remain intact. A compromise. Here’s the actual bed frame as it is in my
van.
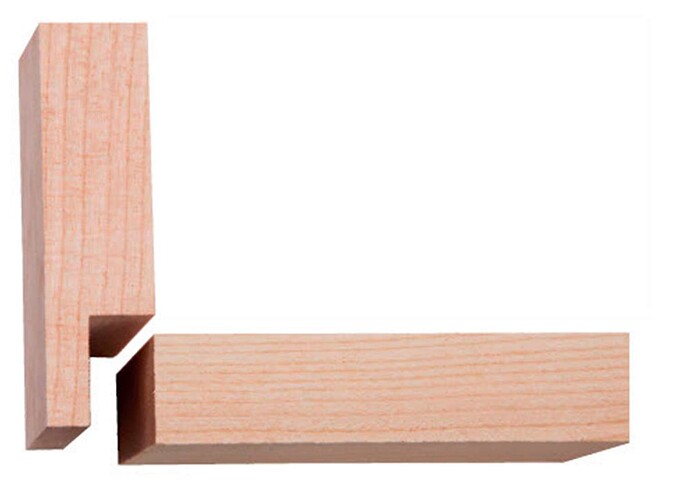
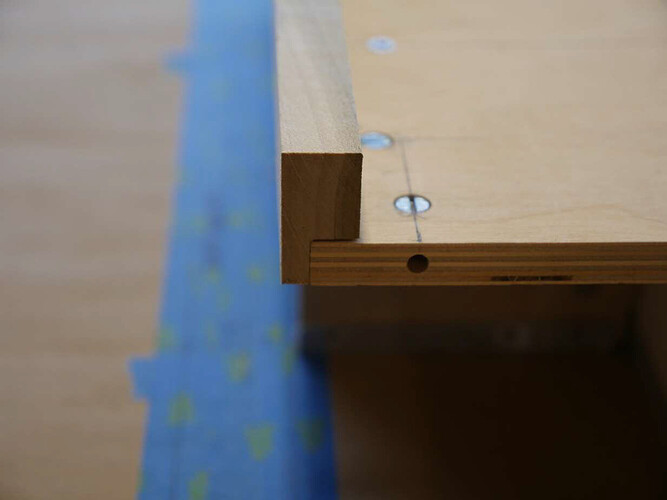
A rabbet joint is nothing more than cutting a notch in the bottom of the solid wood frame piece so that
it covers the front edge of the plywood bed platform. Here’s a graphic I stole from the web.
Building the Front Bed Frame
I’ll be using full ¾ inch thick wood for the frame. It will look ridiculous on the small model, but it will
allow me to demonstrate the exact steps and measurements needed to build and install it. I’ll make it 1-
½ inch high so it doesn’t overwhelm the model, but the critical measurements for cutting the rabbet and
installing the cross dowels will be exactly the same as if it were full height.
The full sized front bed frame in my van is ¾ inch thick by 3 ½ inch high. This might seem excessively
high, but there is a reason that I settled on this final dimension which will be covered later in this
tutorial.
Cutting the Initial Work Piece
Choose a nice piece of either 1x4 or 1x3 hardwood lumber. Make sure it is long enough to cover the
entire length of the bed. Don’t use soft pine as it is very weak and will split and crack easily. For my
bottom bunk I used Poplar, which is readily available at the big box hardware stores. If I were to do it
again, I’d choose Hardrock Maple. It is a much stronger and denser wood. The front edges of beds take
a beating and I’ve learned that in some cases the less expensive wood is false economy. My top bunk
framing is all 1x4 Maple.
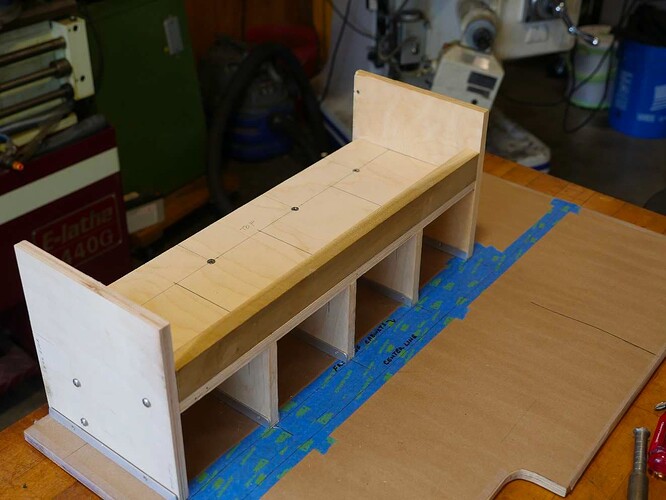
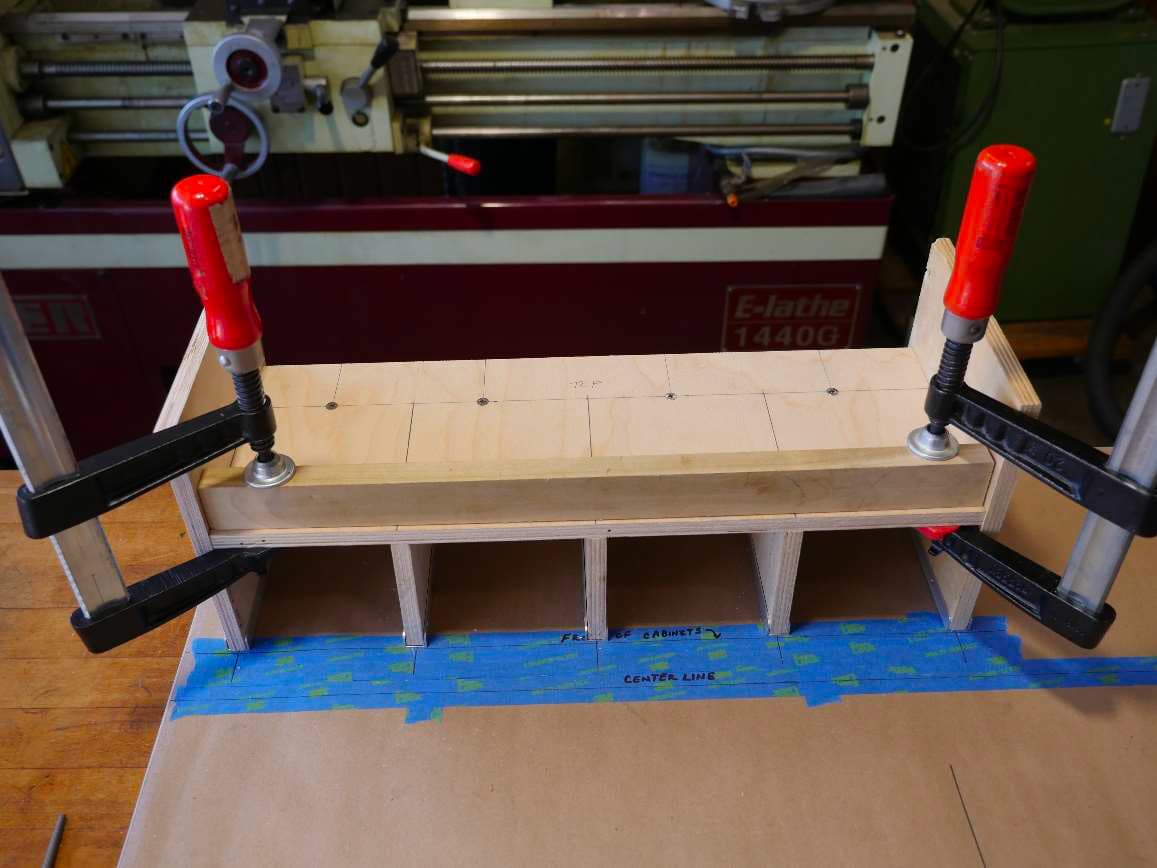
Cut the piece of wood for an easy fit between the head and foot boards. Don’t make it real tight. It
should slip into place easily between the head and foot boards.
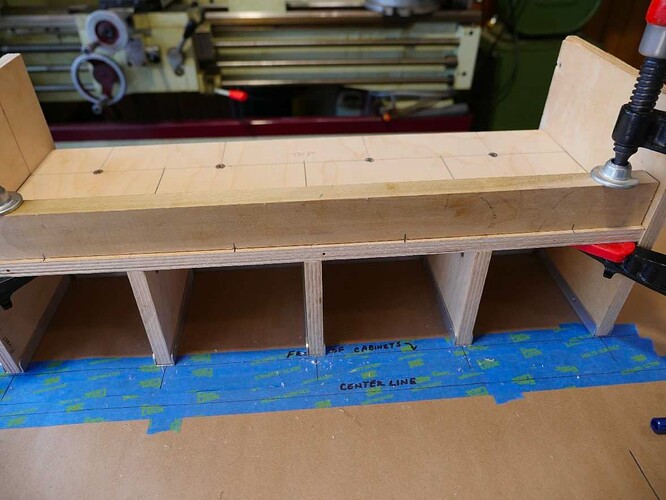
Move it back away from the front edge about ¼ inch and clamp it in place at both ends.
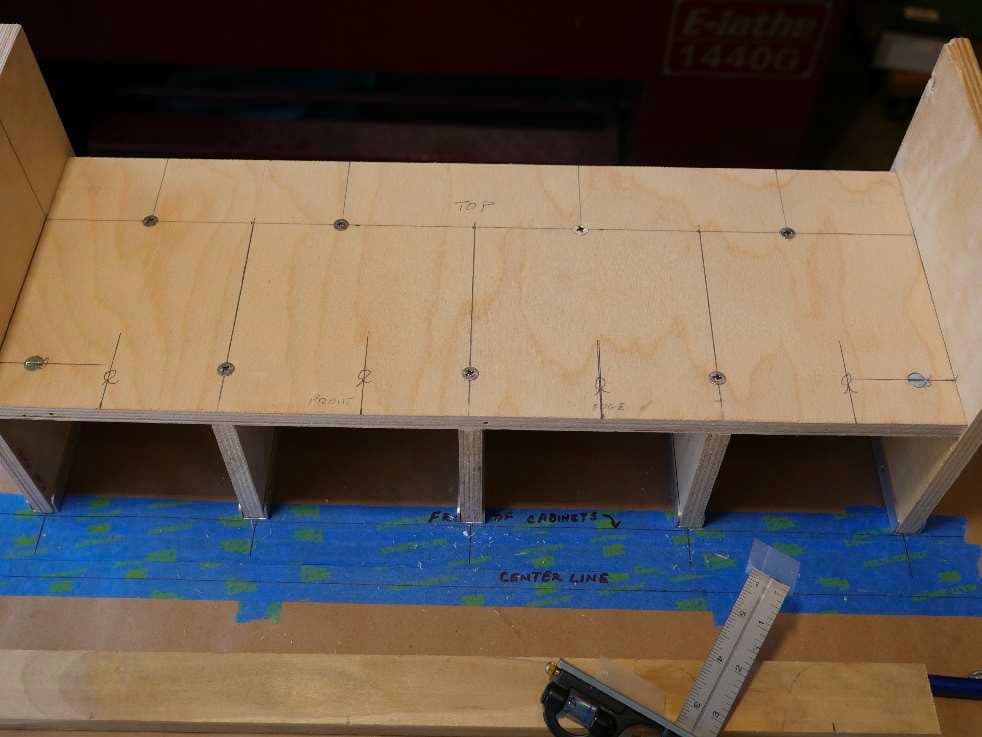
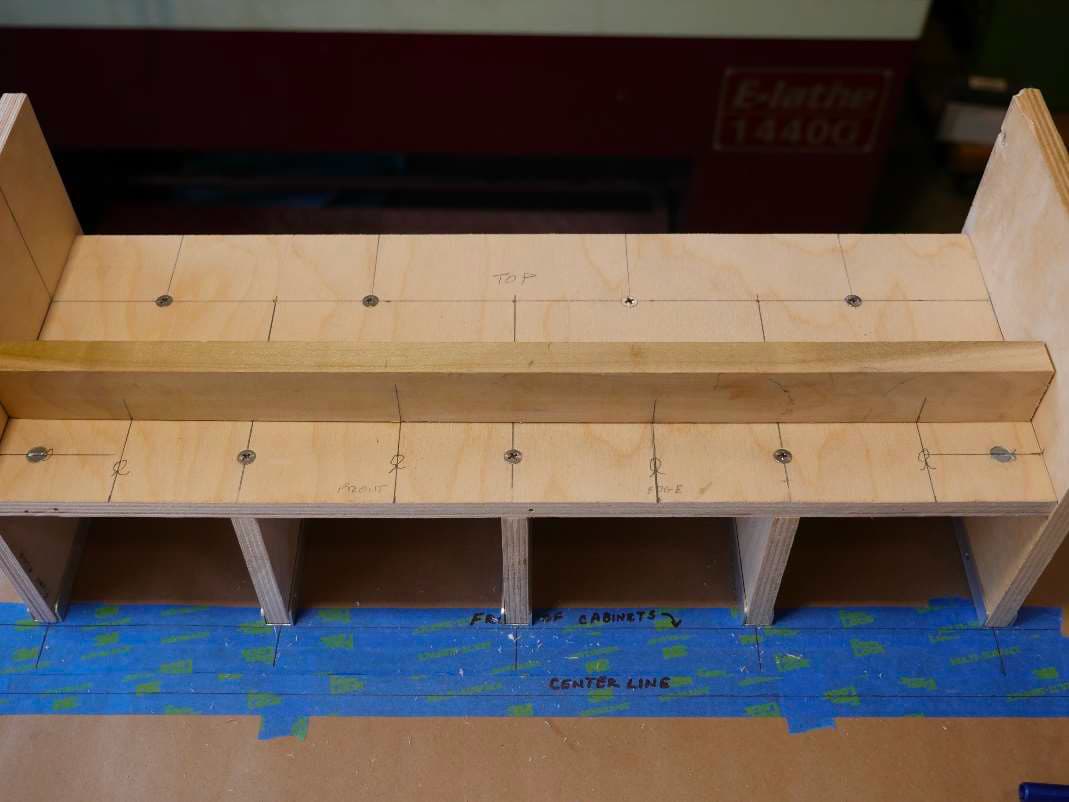
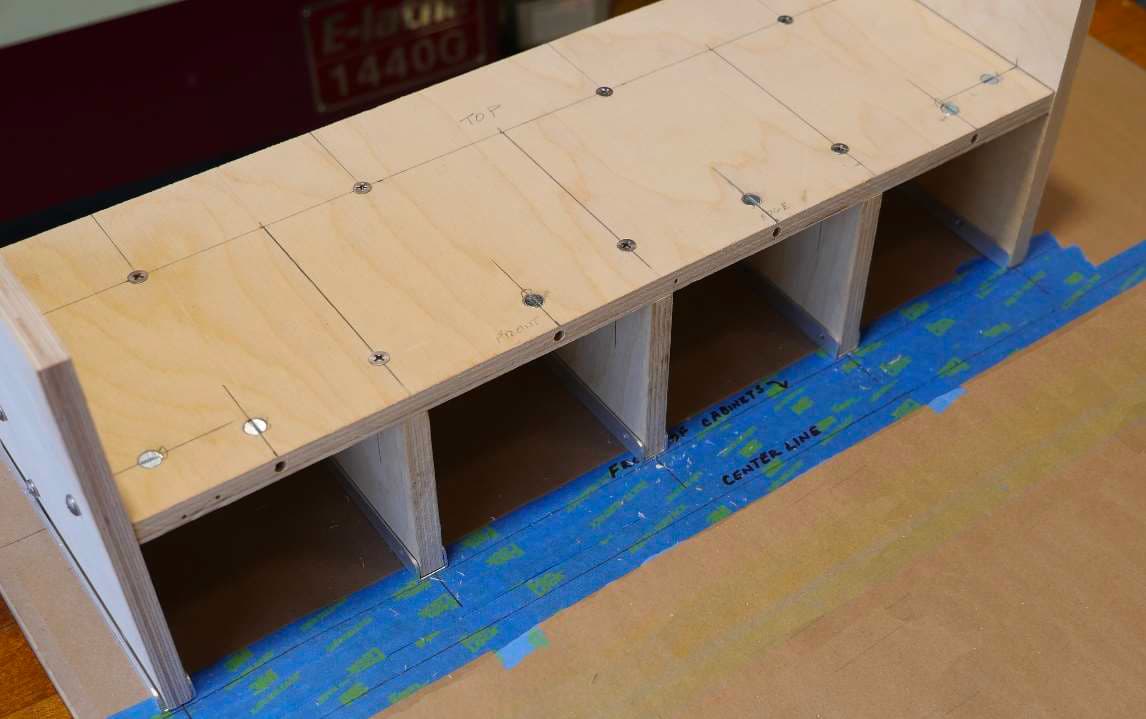
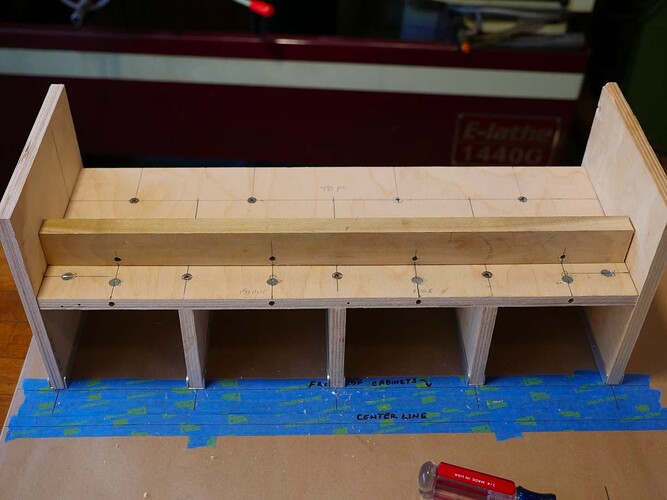
Now mark both the bed platform and the front of the frame piece at the places you want to install cross
dowels. I recommend every six to eight inches along the front edge of the bed platform. The bed in my
van is 84 inches. My 12 cross dowels are spaced 7 inches apart.
Using your 6” combo square, extend the marks on the front of the bed platform and mark them with the
circle and arrow to show that these are cross dowel locations.
Using your combo square, extend the marks on the frame board about one inch. You don’t need to go
all the way across the board. The board is too thick for us to use the jig for drilling the through hole, and
even if we had a jig for ¾ inch thick wood, the piece is too narrow for us to use the “witness” mark to
properly align the jig. So on to plan B…
Set the marked up fame piece on top of the bed platform and make sure all the cross dowel layout lines
match up.
Remove the bed platform from the cabinet assembly. Using the cross dowel jig, drill all the cross dowel
locations and install the cross dowels.
Now we need to locate and drill the through holes in the front frame. We know where to drill along the
length of the frame because we marked those positions when we marked the cross dowel positions on
the bed platform. Now the question is how far up from the bottom of the frame do we drill?
Our bed platform is ½ inch thick. The holes for the cross dowels are in the exact center so that would be
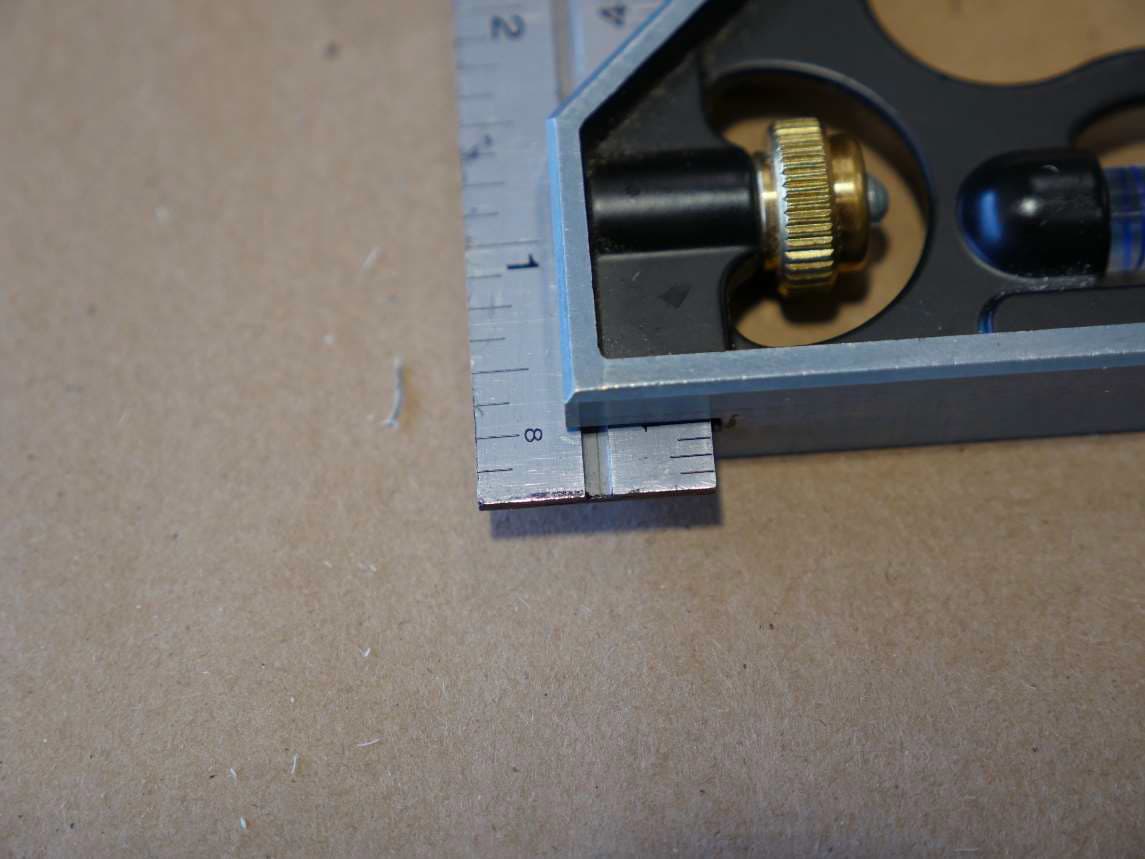
¼ inch up from the bottom of the frame. Set your combo square to ¼ inch as shown in the photo.
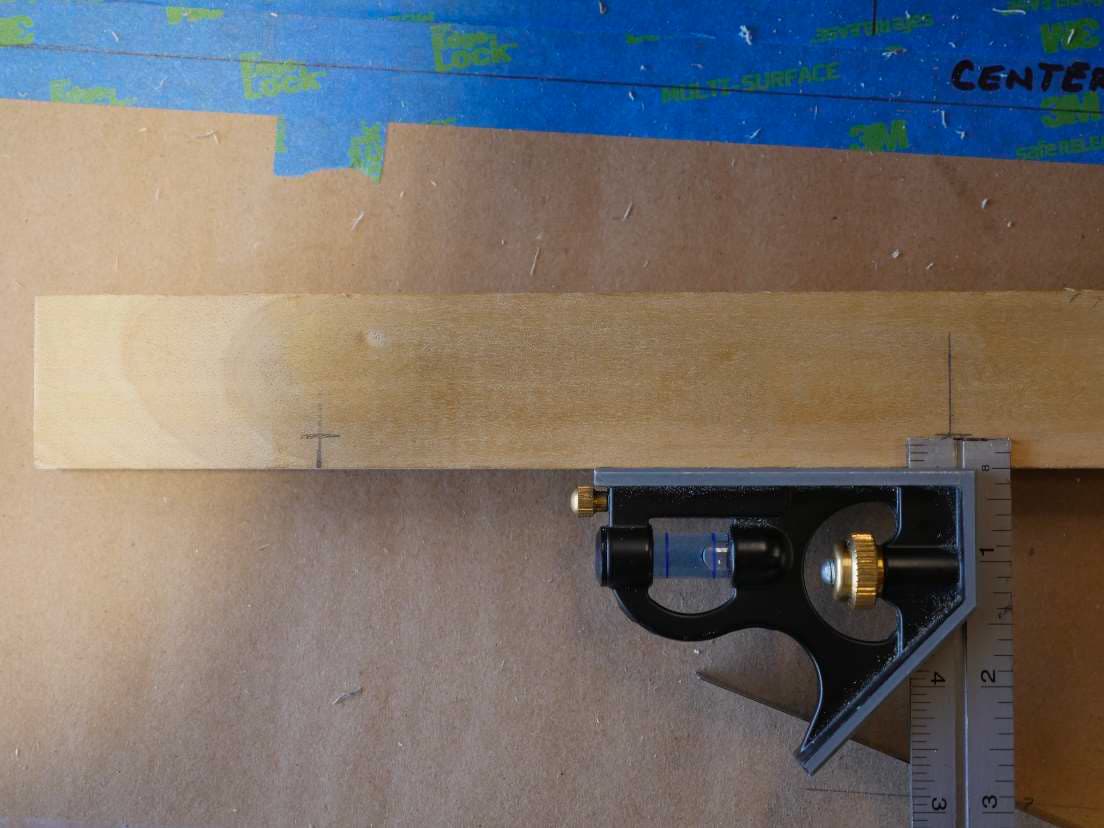
Now place the combo square against the bottom edge of the frame board and make a mark across the
top of the ruler blade at each of the cross dowel layout lines.
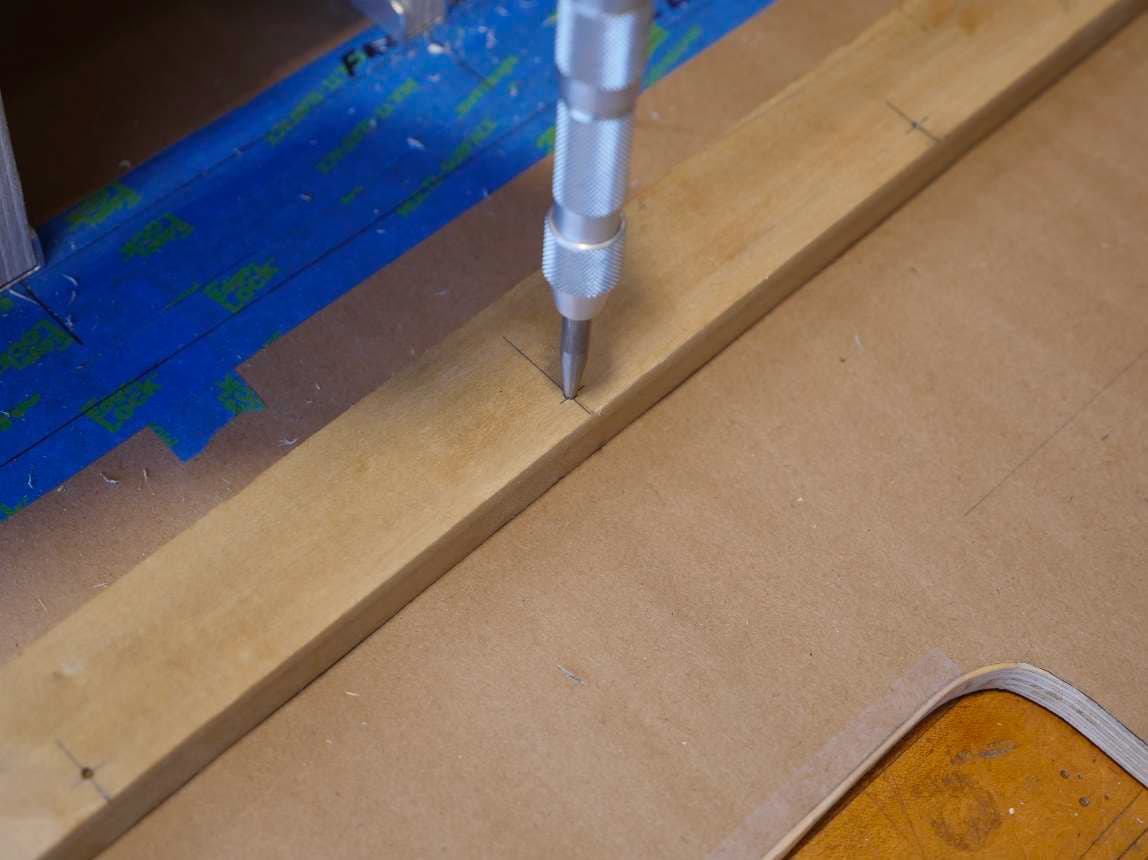
Using your automatic center punch. Make a punch mark at each cross dowel location where the layout
lines cross.
Carefully drill a 7/32 hole as perfectly perpendicular to the face of the frame board as you can. If you
have a drill press, use it. If not, try to have someone help you keep the drill exactly vertical as you drill
each hole. If the hole slants, it wont line up properly with the cross dowel in the bed platform. When all
the drilling is complete, line up the work pieces to make sure everything matches.
Cutting the Rabbet
It’s time to cut the rabbet (or notch) in the bottom of the frame. You can purchase a rabbet bit for your
router, (you did buy a router didn’t you?), but if you have a table saw it will do as well. We’ll use the
table saw to cut our rabbet.
Raise the blade on the table saw until it is exactly the same height as the thickness of the bed platform –
in this case, ½ inch. I’m using a piece of 1/2 inch Baltic Birch to set the blade height.
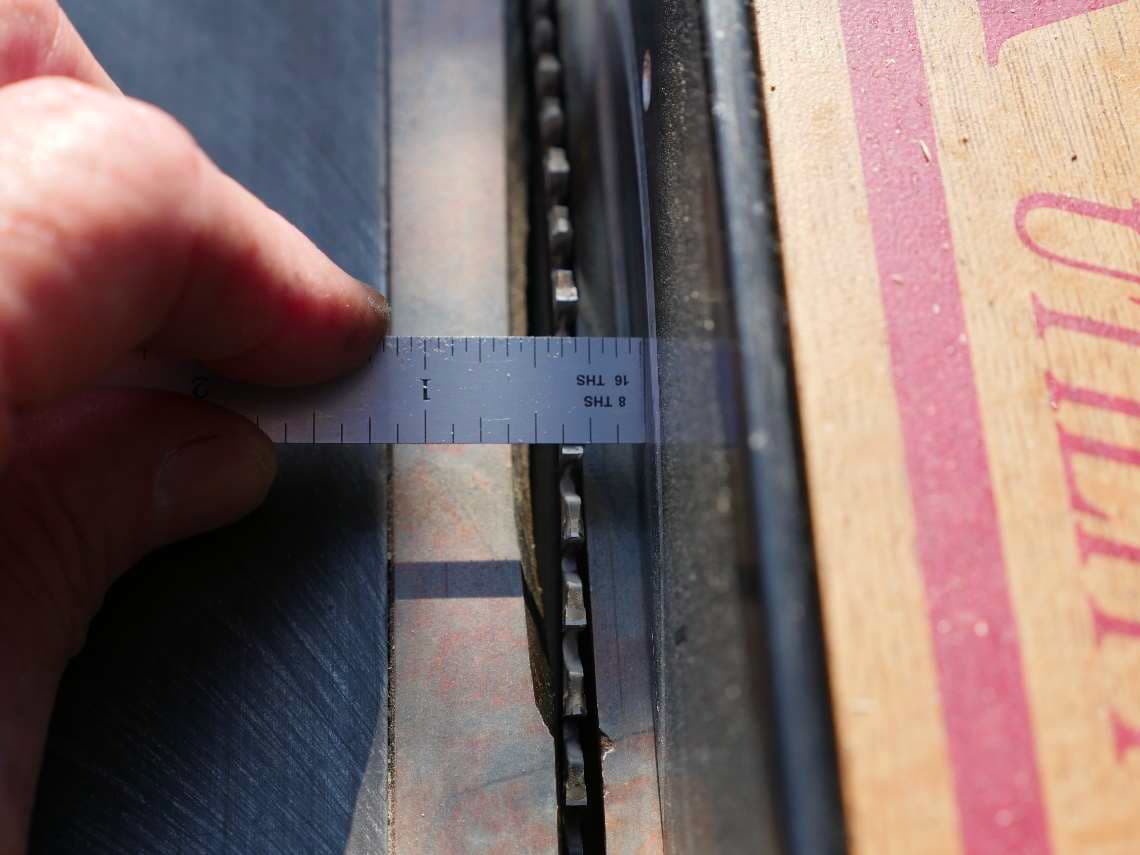
Move the saw’s fence towards the saw blade until the distance from the fence measures 3/8 of an inch
to the far side of the blade. In other words, the 3/8 inch includes the thickness of the saw blade. Lock
the fence in place.
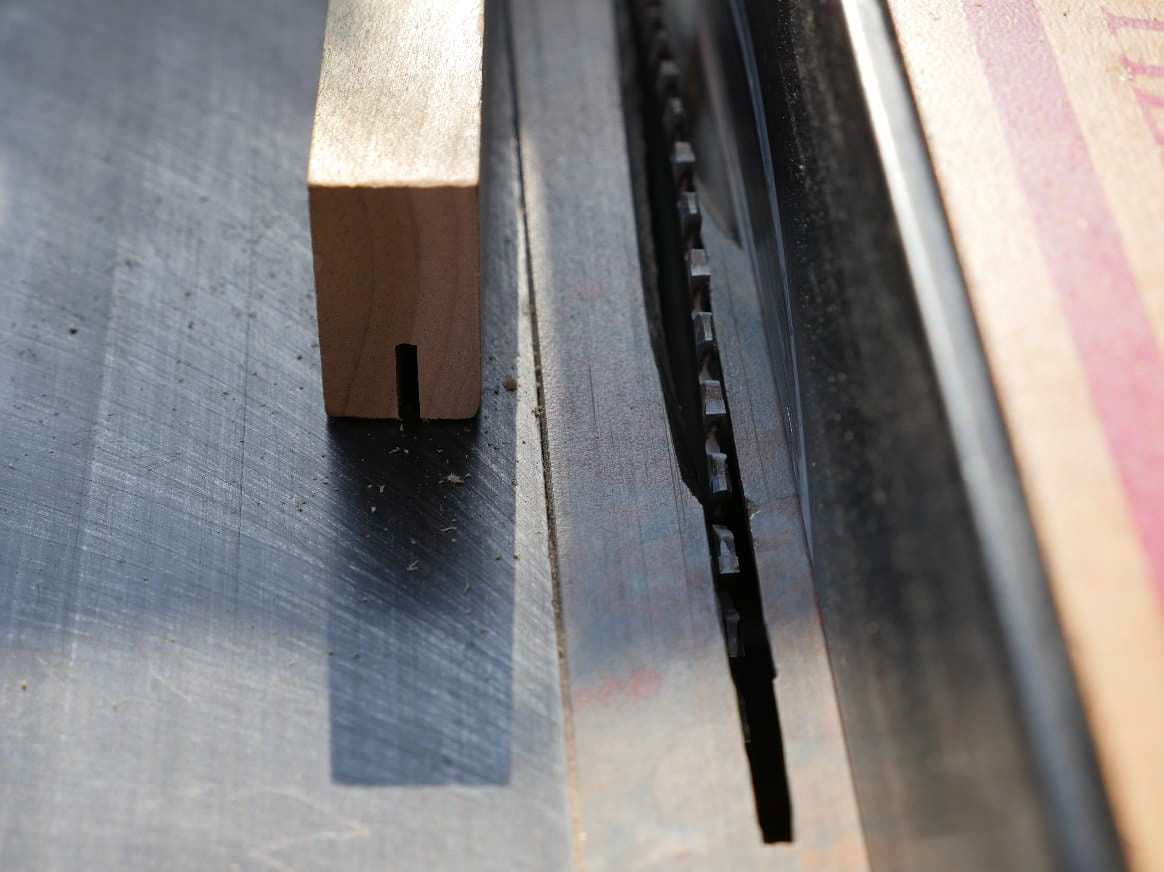
Now run your frame board through the saw, bottom edge down, making sure it is firmly against the
fence as you guide it through. You should end up with a narrow slot about ½ inch deep.
Using a small piece of your ½ inch plywood as a guide, reset your fence so that the distance from the
fence to the outside of the blade is exactly the same as the thickness of the ½ inch plywood.
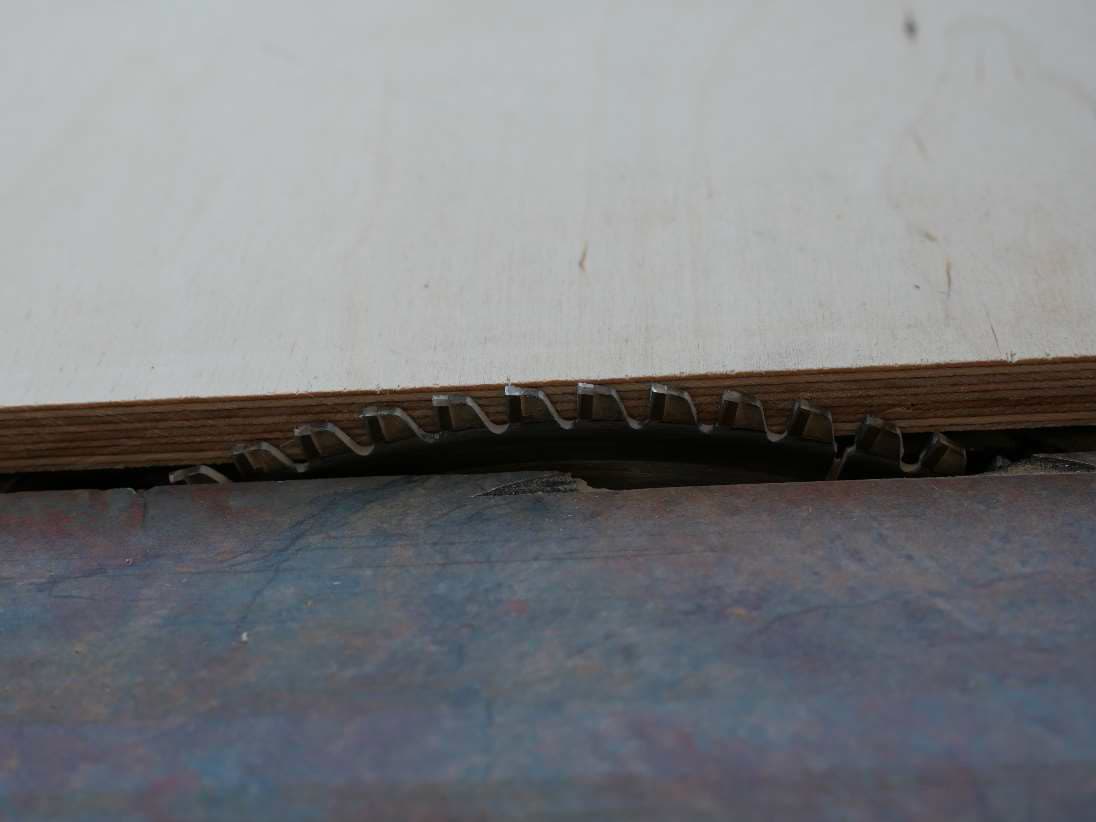
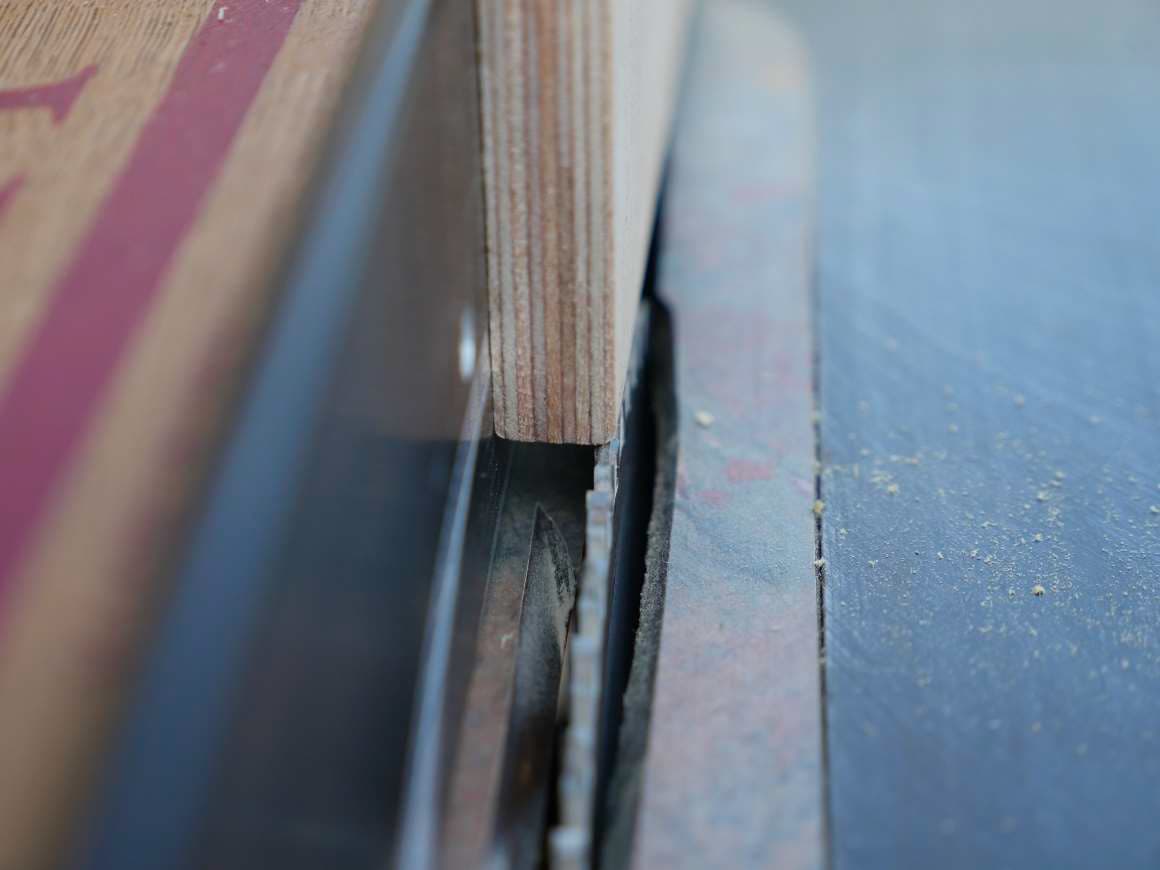
Next, with the back side of the frame board down, front side facing up, and the bottom resting against
the fence, reset the height of the saw blade to the top of the narrow slot you previously cut. Look
closely at this photo. The front of the frame board that would face the isle when installed, is facing up.
The back side that would face the bed platform is down. The blade height just comes to the top of the
previously cut slot.
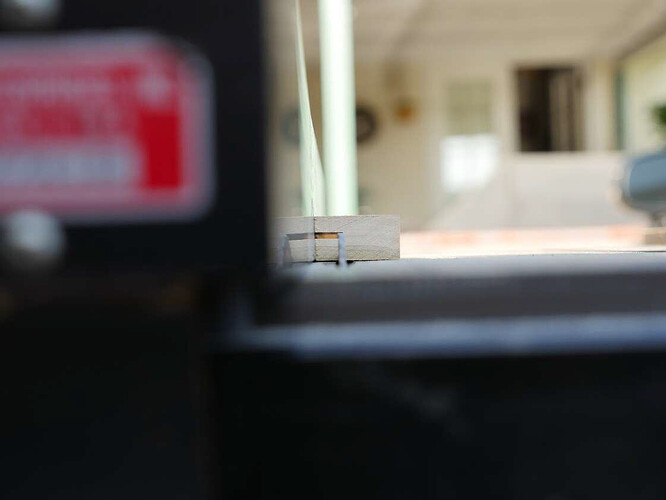
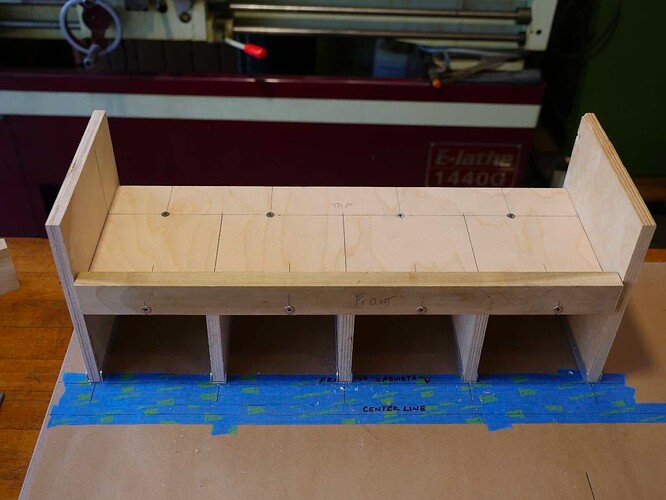
When you’re happy with the setup, run the piece through the saw. The end result should look like this.
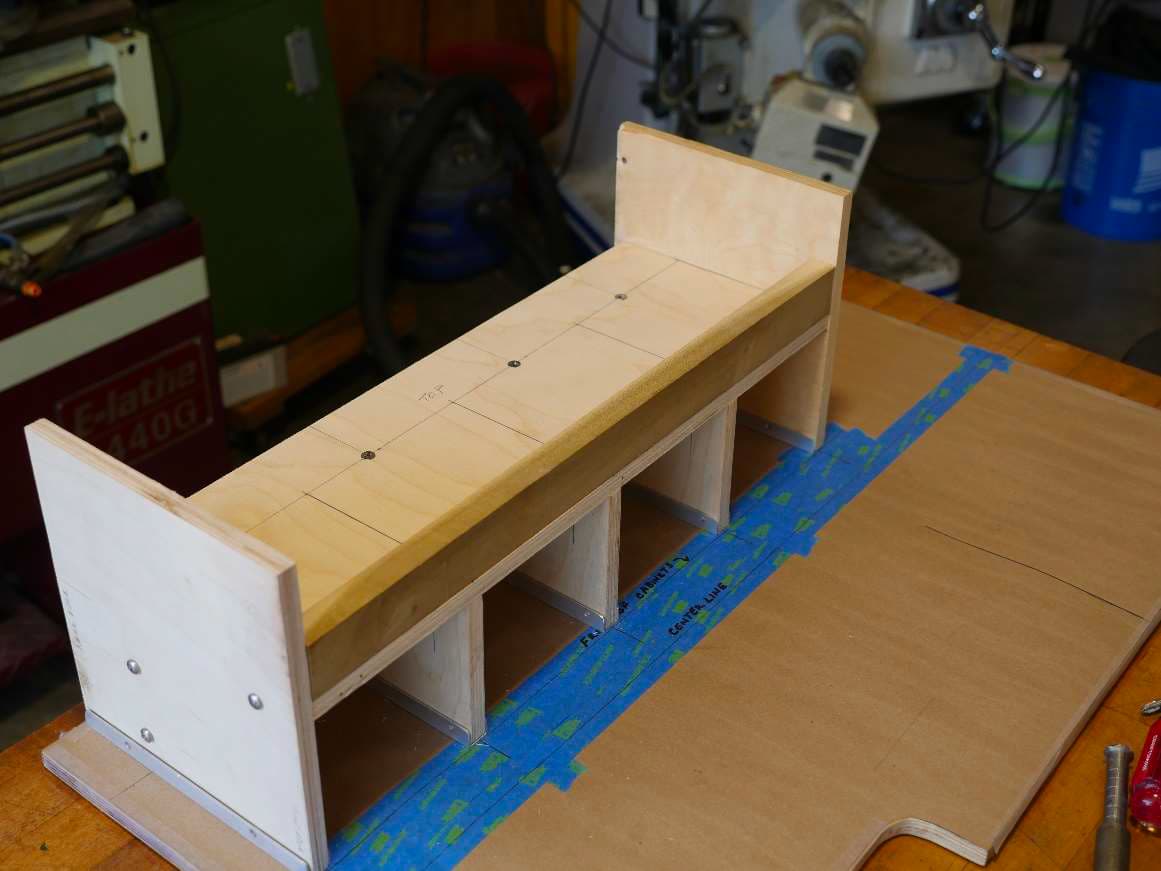
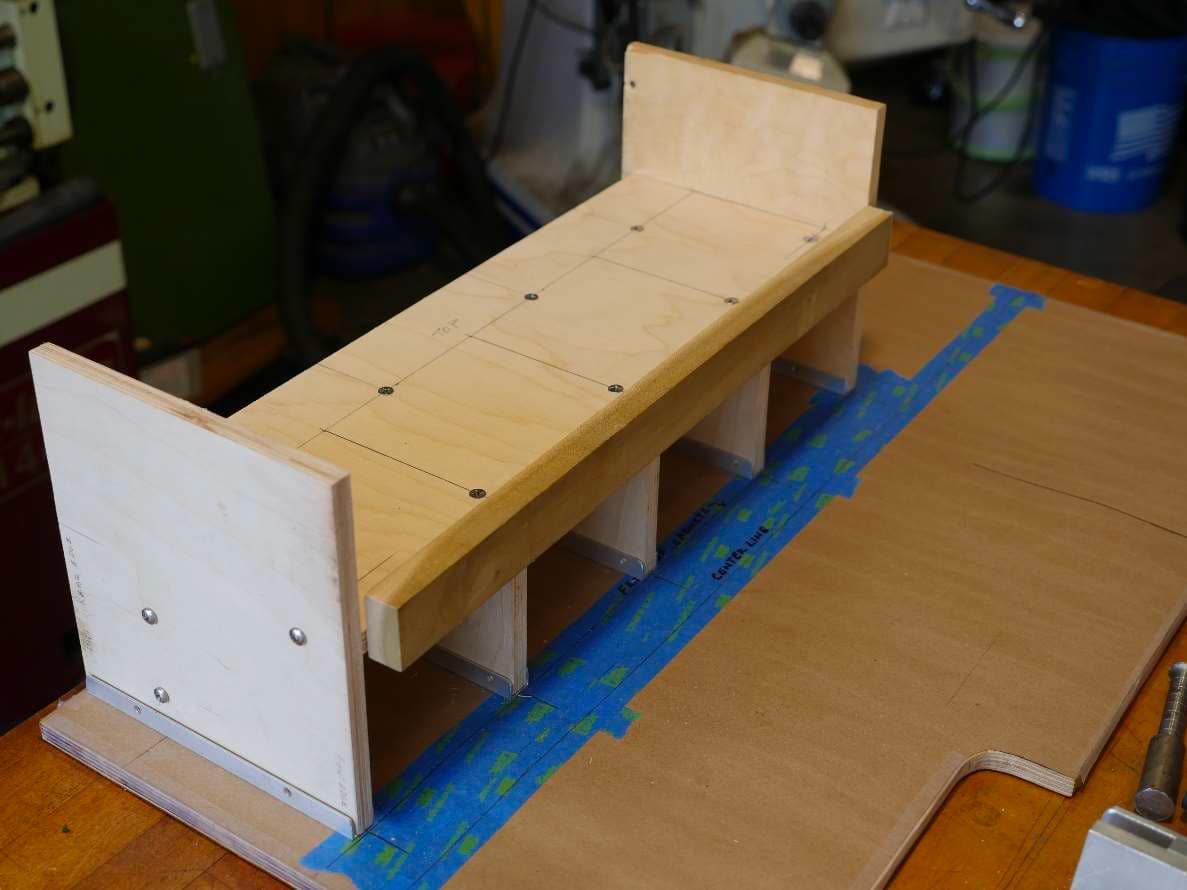
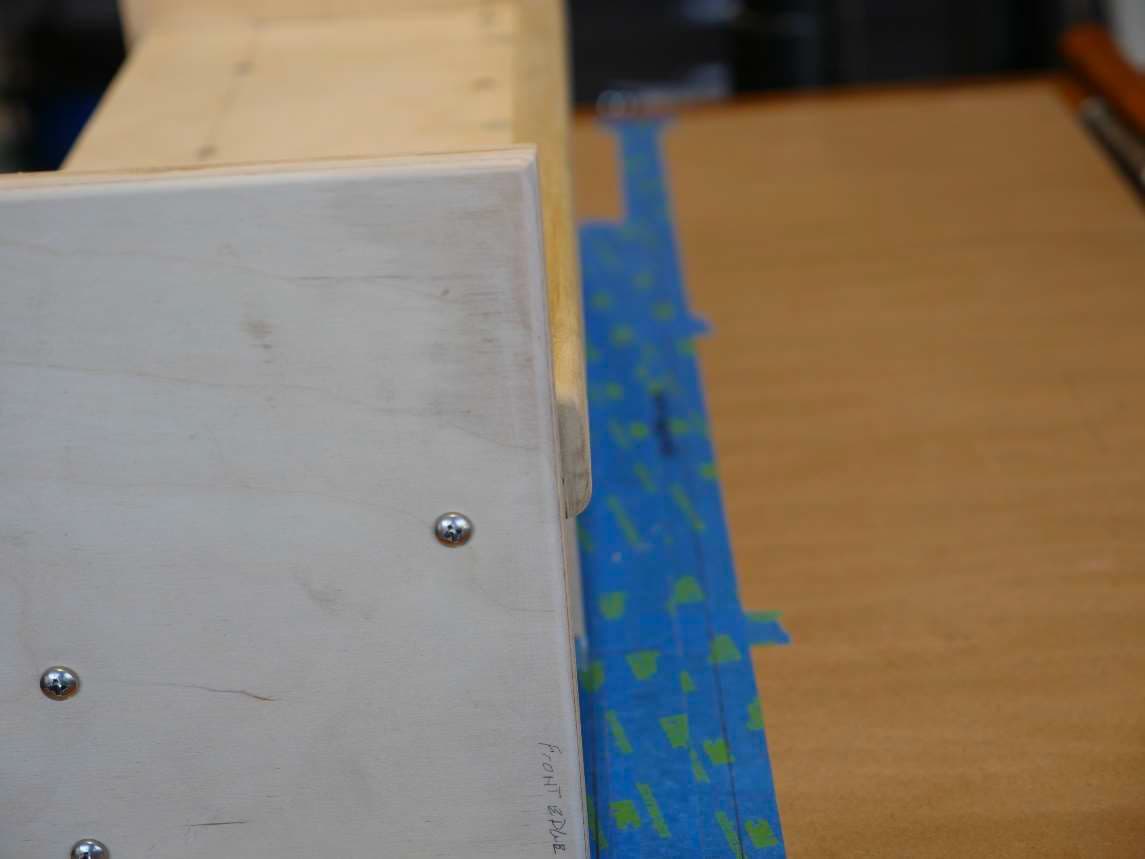
Install the frame piece to the front edge of the bed platform. Prefect!
Here’s an end view with the footboard removed. Nice huh?
Using a Router to Round Off Sharp Edges
Remember when I suggested that you bite the bullet and purchase a small trim router? That was back
in tutorial #1 when we cut the splines for the floor. Well, pull it out and dust it off. It’s time to do a little
finish work.
I’m going to use a ¼ inch radius rounding bit and round both top edges of the bed frame, the outside
bottom edge of the frame, and the ends of the frame. I’ll then give it a quick sanding job with some 220
grit sandpaper and call it good- ready for staining.
I’m then going to use a 1/8th inch radius rounding bit on all the vertical front edges of the plywood
headboard, footboard and dividers. I’m also going to round the top and back edges of the headboard
because we’re finished with that piece.
I’m leaving the top and rear edges of the footboard untouched. We’ll be doing more work on that end,
and we want to leave the sharp edges on the wood until we’re finished with that work. It is difficult to
make accurate measurements against a rounded edge so we want them sharp until we’ve finished
making changes.
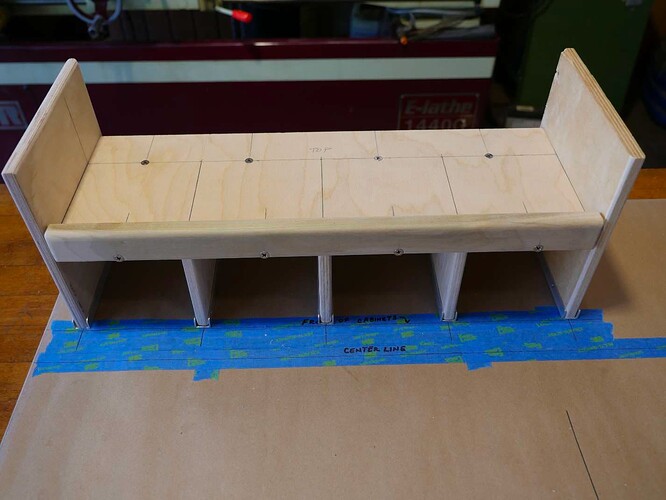
Here’s what the cabinet looks like with all the edges rounded and ready for staining. I only stain the
edges of the plywood and paint the flat surfaces.
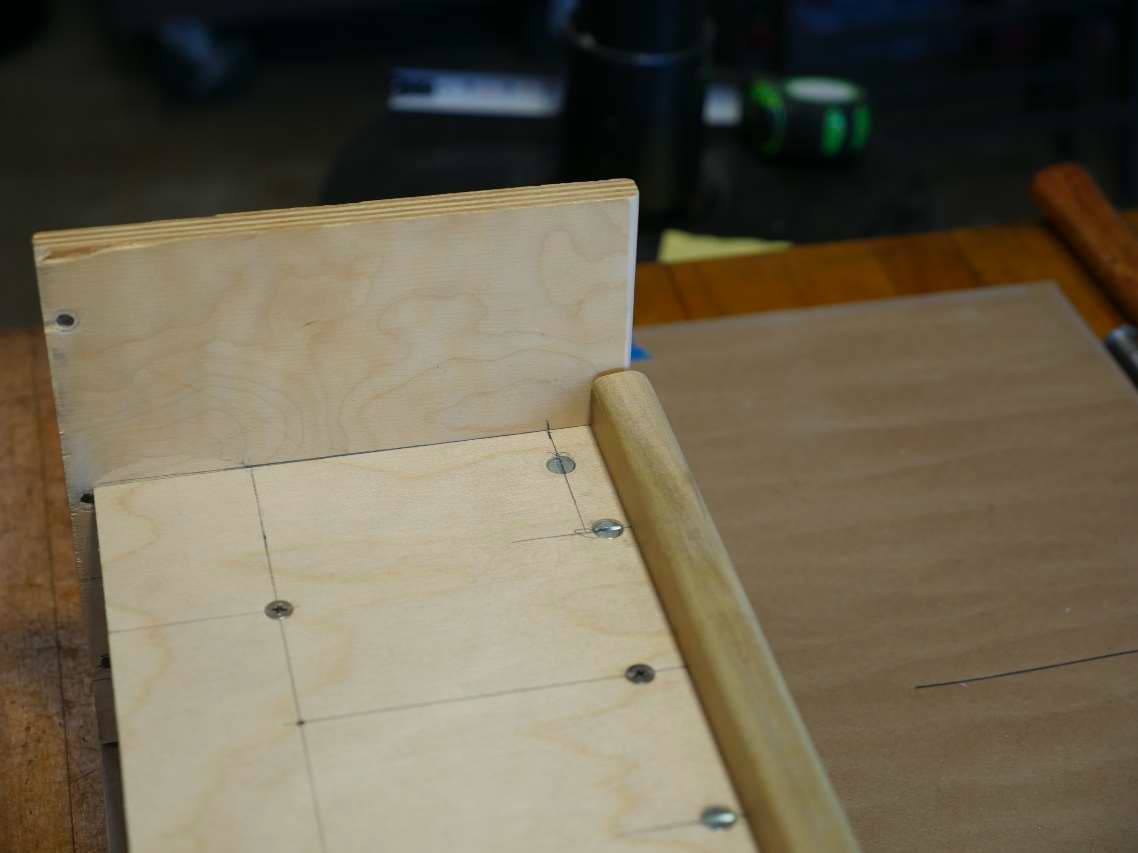
This is from the ends of the cabinet showing how the frame board we installed on the front edge of the
bed platform looks. It intrudes slightly into the isle, and also onto the bed platform. A good
compromise.
This completes the bed platform and lower cabinet assembly.
How Do You Level a Stealth Camper?
This may seem a strange topic in a tutorial on bed platforms, but I think you’ll see that it fits in nicely.
Many of us don’t sleep well when our bed isn’t level. There are lots of solutions out there and I’ve
purchased several of them only to find out that they are pretty much worthless when stealth camping
on city streets. You just can’t pull into a neighborhood at 11pm, pull out your leveling blocks, spend 20
minutes running around the outside of your vehicle getting everything to your liking, and expect no one
to notice. Those neon yellow or fire engine red levelers under your wheels don’t help either. They’re a
bright beacon just beckoning for a 2am knock on the door. Stealthy they’re not.
After months of pondering the subject I began to realize that much of the problem was caused by the
mattresses we use in our rigs. Those $4,000 twenty inch thick mattresses we have at home are
constructed with a denser foam around the edges than in the middle. If they didn’t do this, when you
rolled over near the edge of the mattress, the edge would collapse and you’d end up on the floor.
Our mattresses are usually a soft single density foam, often just a mattress topper, and only a few inches
thick. To compound the problem, we park on city streets where the road slants towards the curb for
water runoff. Many of our vans are significantly higher in the back than in the front because the
suspension is designed to carry thousands of pounds before it levels out.
I’ve come up with a simple solution that seems to work well for me and everyone else that has tried it.
I’m tall so my bed runs along the side of the van on the driver’s side. The worst possible design for
parking on city streets. When parked, the van is tilted towards the curb. My bed is only 25 inches wide
so I’m already very close to the edge. If I move towards the isle at all, the edge of my 4 inch thick foam
mattress begins to collapse and I feel like I’m going to fall out of bed. Very unsettling and it always
wakes me up.
I struck upon the idea of firming up the edge of the mattress along the isle. I tried stuffing pool noodles,
pillows and other flotsam and jetsam under the mattress, all of which proved unsatisfactory. Then I tried
something a little more subtle and it worked beautifully.
It is simply a piece of ½ inch or ¾ inch plain PVC pipe from Lowe’s or Home Depot, cut to the length of
the bed or mattress, and an 8 inch wide piece of ¼ inch plywood cut to the same length.
I went back to a wider piece of wood for the front edge of my bed frame. I mounted it with cross
dowels exactly as described above, but I also reinforced it with 4 L-brackets equally spaced along the
length of the bed.
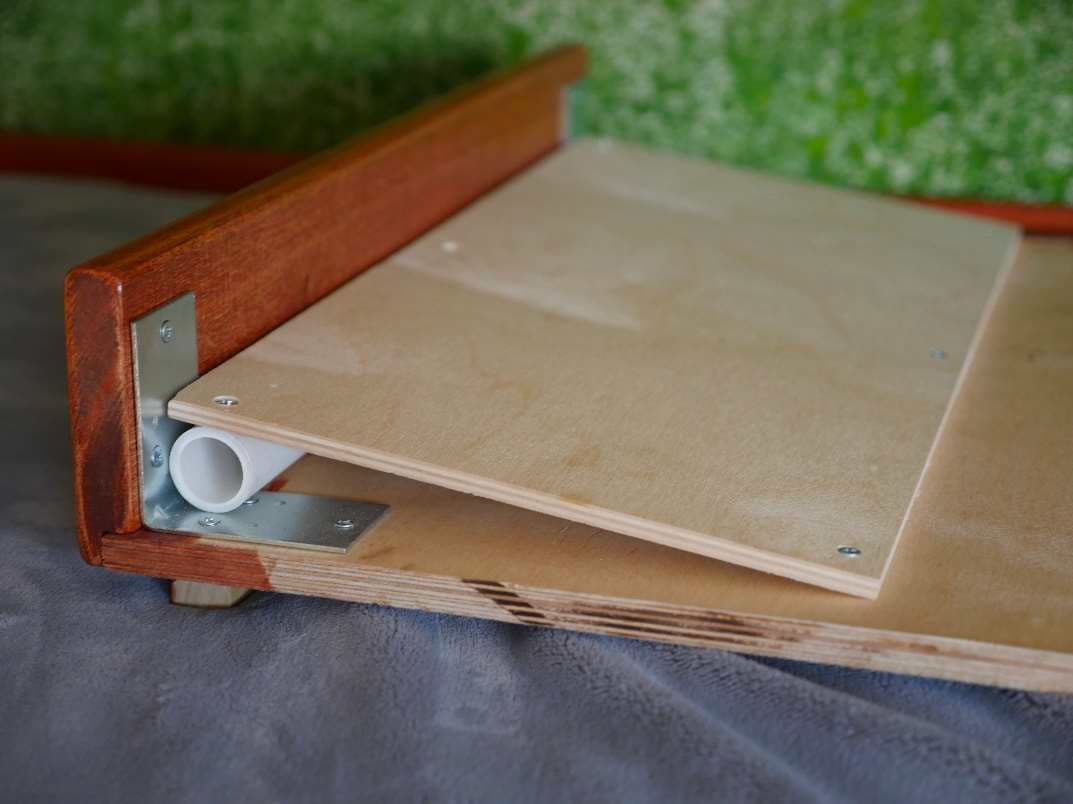
I then mounted a 7 ft long piece of ¾ inch PVC pipe against the inside edge of the bed frame and
platform. I covered this with an 8 inch wide piece of ¼ inch plywood so that the plywood slanted from
the front edge of the bed back towards the center of the bed.
In this photo you can see the front frame board mounted with a rabbet joint using cross dowels. Then
the L-brackets to provide extra strength, the PVC pipe, and the ¼ inch plywood slanting towards center.
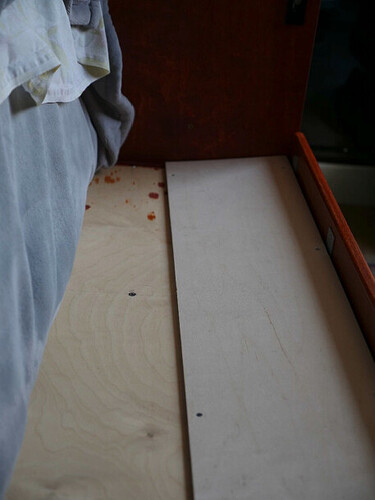
Here’s a photo showing the entire length of the bed.
The results are astounding. When the mattress is in place it looks absolutely flat. You would never
know that the front edge is raised over an inch above the rest of the bed.
When you lie on the bed you don’t feel the slant at all. Even if the vehicle is perfectly level. You feel like
the bed is perfectly flat.
When the vehicle is parked against a curb the slight rise of the platform beneath the mattress makes the
edge of the mattress feel firmer and you don’t have the sensation of falling out of bed.
I sleep with my head at the rear of the van with feet towards the front so my head is level or slightly
higher than my feet in that direction.
Bed across the back of the van
A friend has his bed across the back of the van. He can sleep with his head on either side depending on
the slant of the road so you’d think he wouldn’t have this issue.
Like most of us, he uses a mattress topper. When he would turn over and roll towards the front of the
vehicle the foam would give way and he’d feel like he was going to fall out of bed. We installed this
simple ramp and BOOM – no more problem.
Give this simple idea a try. I think you’ll like it.
MORE TO COME
8. Locating Points
10. Extending the Cabinet & Anchoring Cabinets to the C-Channel
