Let’s get back to our new cabinet addition. This is a tall cabinet at around 35 inches. The question is
how do we want to divide up the vertical space, and how do we keep our measurements consistent
when we have to duplicate them around the inside of the cabinet.
I often want to do the layout of my cabinets when they are assembled in their designated position in the
vehicle. It’s difficult to visualize what something is going to look like, or decide if a shelf or cabinet space
will fit that jumbo sized box of laundry detergent that I got on sale at Costco, with the panels lying flat
on the garage floor.
Levels are out because our vehicle is not level in any dimension. Tape measures and rulers are probably
useful for some measurements, but if we use them to duplicate every measurement we make, we’re
just asking for errors from misreading the tape. To get around some of the problems and make life as
easy as possible I like to use small blocks of wood and a modified version of the old-fashioned
Carpenter’s Story Stick.
I’ve built a cabinet that is 25 inches high and 16 inches deep so that I can work with something closer to
full sized. Here are the photos of the process. You should be very familiar with this by now.
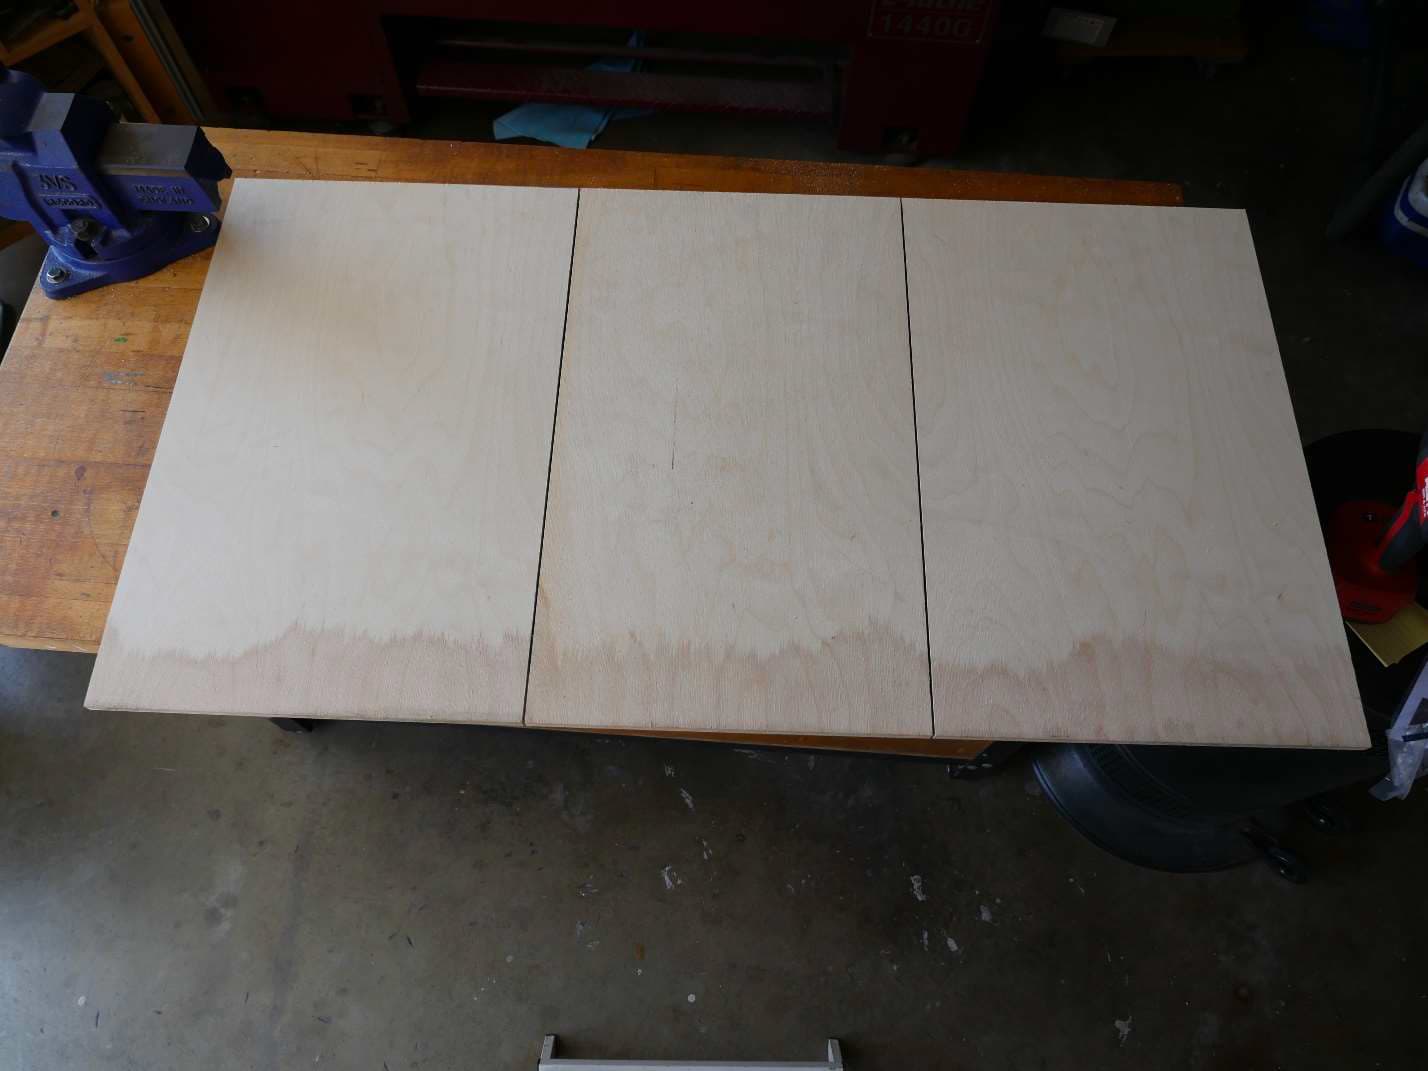
I made a base for the cabinet and laid it out just as I would on the floor of a van.
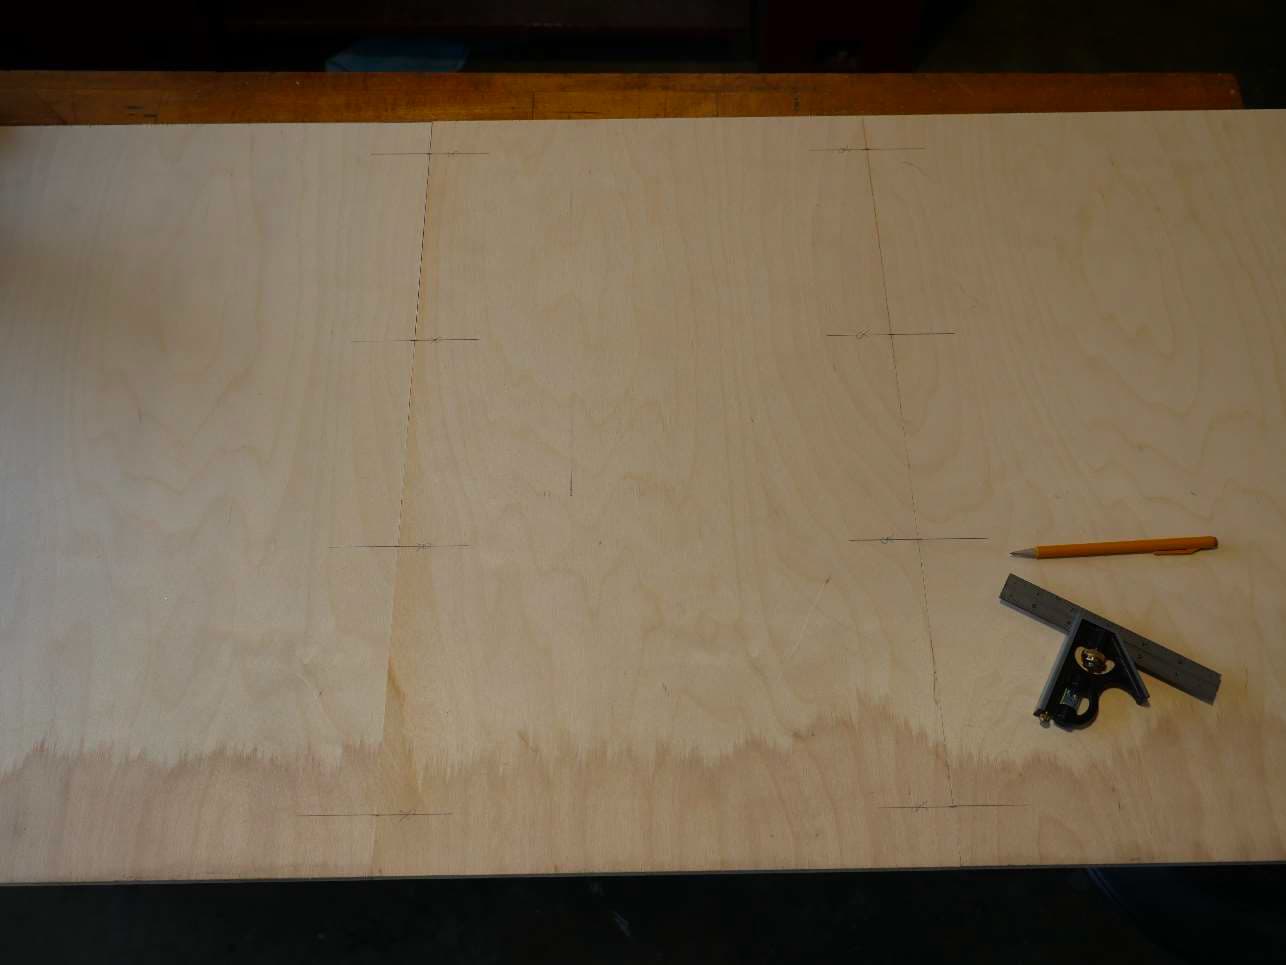
I drew centerlines to locate the positions of the cabinet sides.
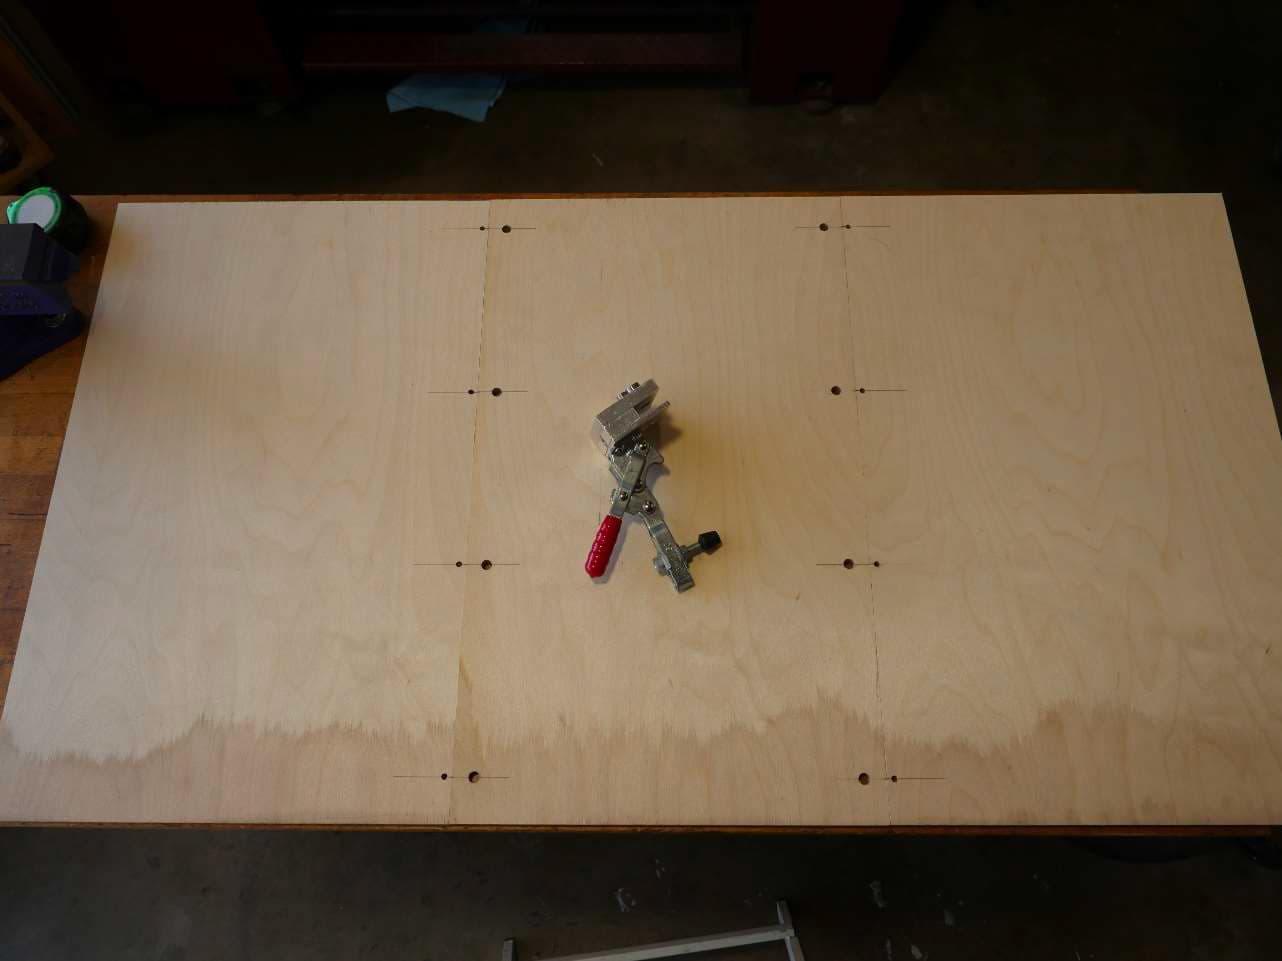
I then installed the C-channel.
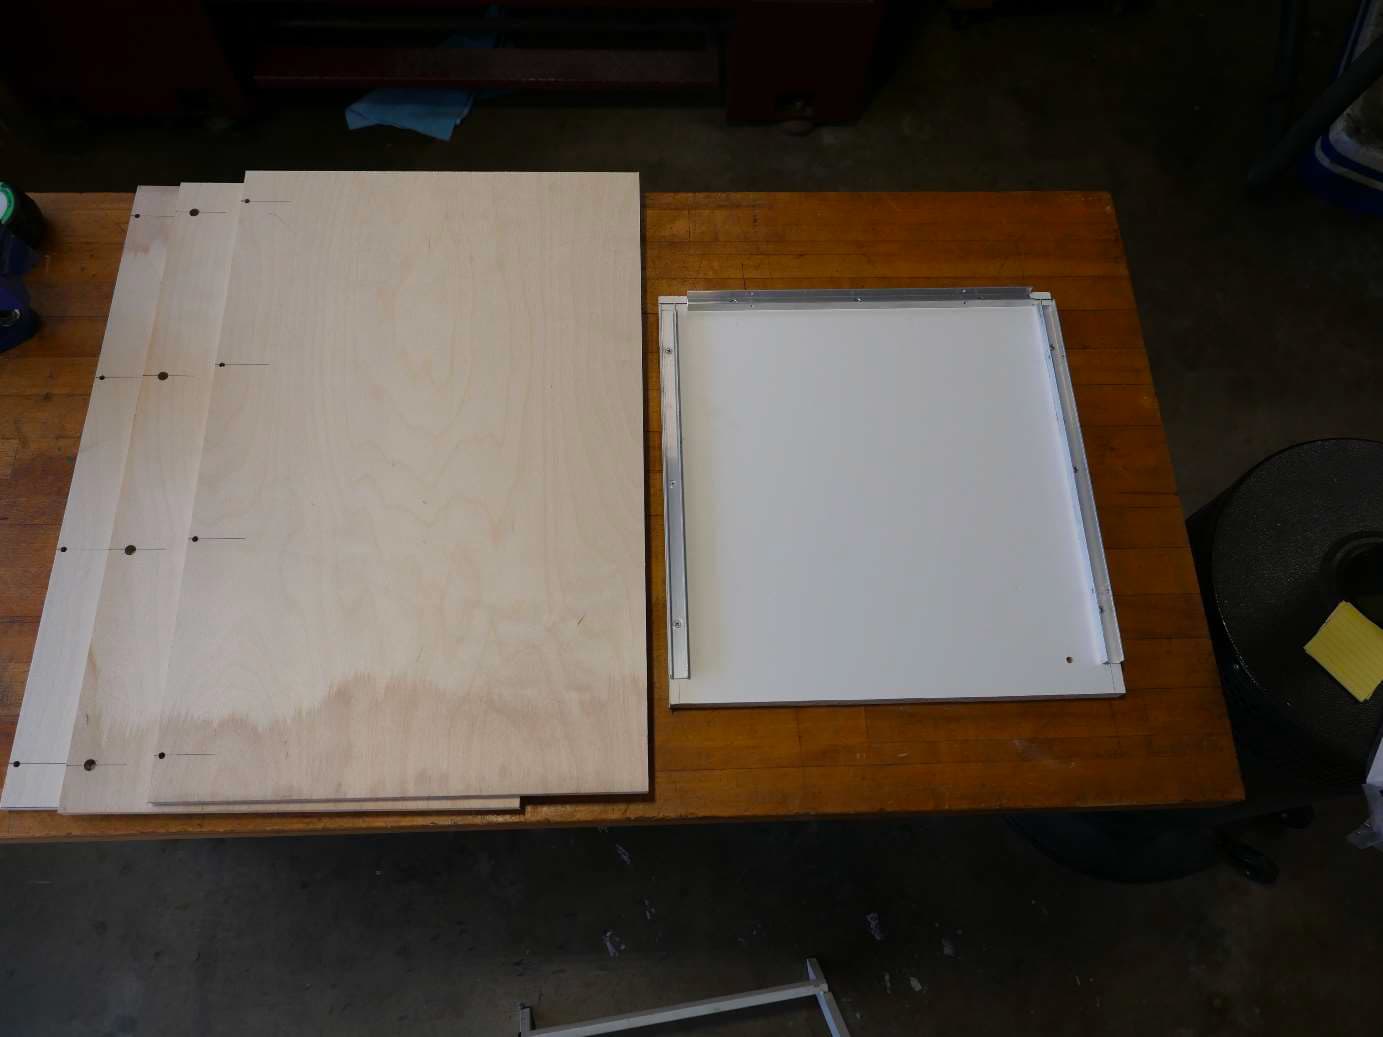
This is a photo of the completed cabinet floor and the cabinet panels ready for assembly.
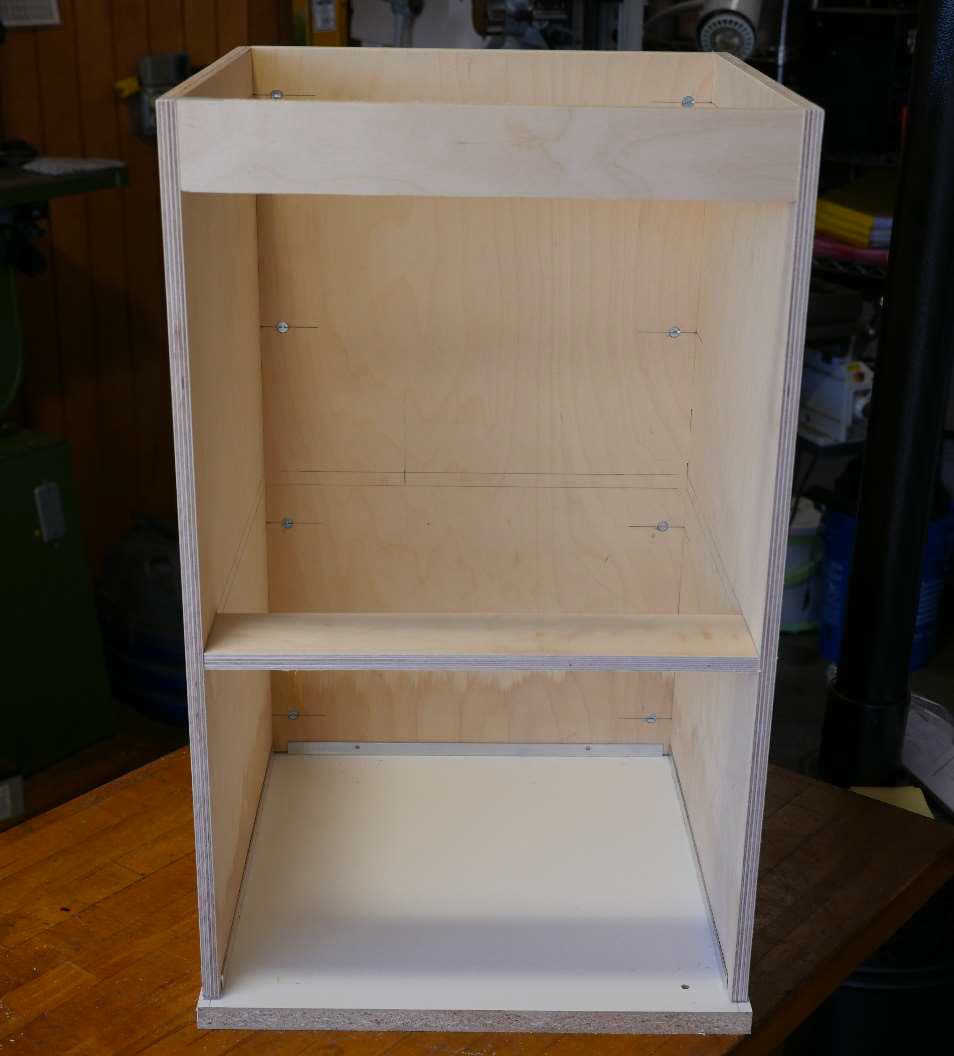
The assembled cabinet.
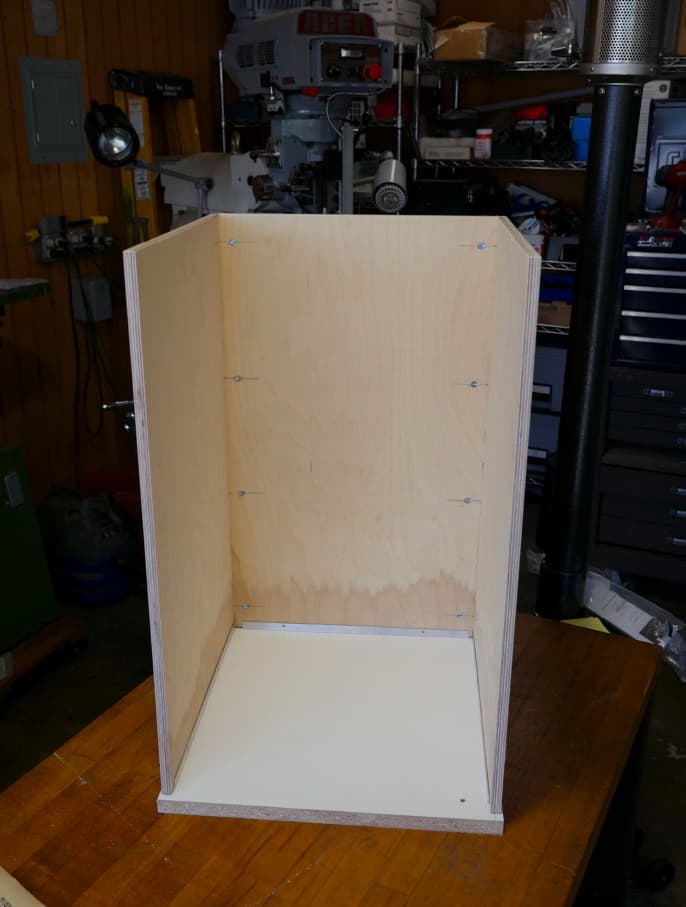
Except for the MDF scrap that I used as the floor, the cabinet is made from ½ inch Baltic Birch plywood.
Baltic Birch is very strong, but ½ inch is fairly light and with the large open front, the plywood could bow
or warp – especially if we have drawers or shelves filled with heavy items.
Drawer slides are not structural items. They’re designed to allow drawers to glide easily in and out.
They are not designed to be structural elements to hold the cabinet sides together. On the contrary,
drawer slides are persnickety little devils that insist on being mounted to a solid structure that won’t
vary by more than 1/32 of an inch or they refuse to operate properly. They seem to look for any excuse
to either bind or pull apart. Not good in a rolling earthquake.
Cabinets on dry land suffer the same fate over time as they are used and abused by their owners.
Cabinet makers solve the problem by adding face frames between drawers and shelves that hold the
front edges of the cabinets to correct dimensions. Face frames are typically 1 ½ to 2 inches wide. This
wastes a lot of space since the top, bottom, and sides of the drawers must clear the face frames. In a
camper van every inch is precious, so the standard face frame is out.
The rest of this tutorial will show the layout process. I won’t actually drill the holes because I’ll be using
this same cabinet to show several different processes. I don’t want a lot of holes from previous layouts
to confuse things.
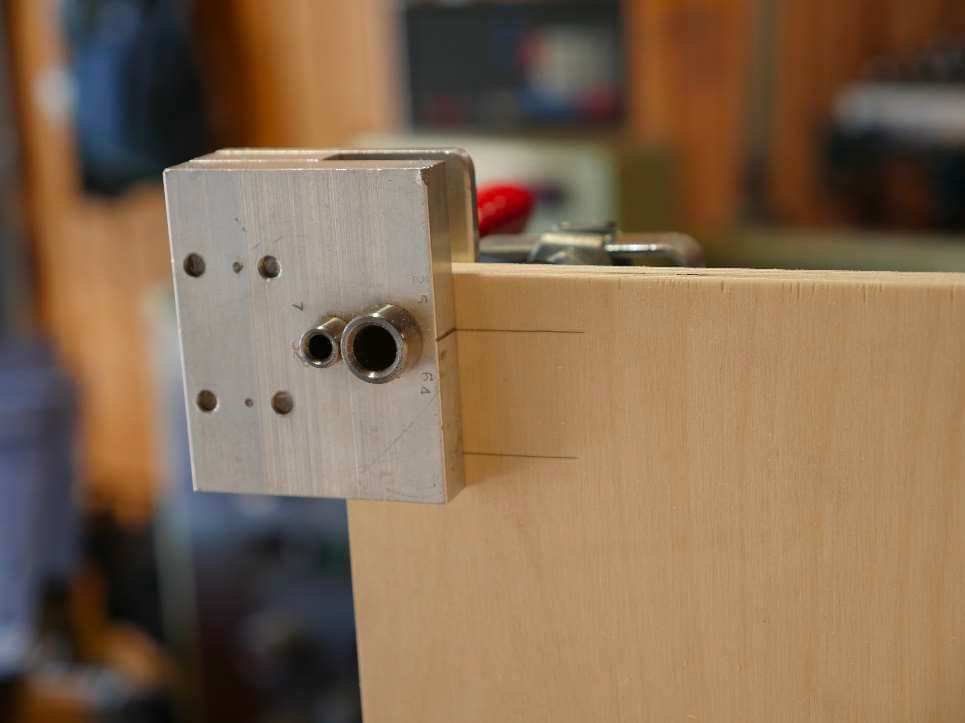
Besides, layout is the tricky part. Drilling the holes is easily managed by the cross dowel jig where the
cross dowels are to be installed, and either the jig or a center punch to drill the through holes. When it
comes to drilling holes, we won’t be doing anything that hasn’t been covered in a previous tutorial. In
any case, I’ll show you exactly what to do, I just won’t be doing it. Yeah, yeah, I know… do as I say not
as I do.
Bracing the front of the cabinet.
Let’s assume that you want your cabinet to be all drawers. As previously mentioned, drawer slides need
cabinet sides that are held firmly in place. We need a “face frame” type element but we don’t want to
take up 2 inches.
The inside width of my cabinet is 14 ¾ inches. If I make a 2 inch wide by 14 ¾ inch long face frame from
½ inch plywood and then lay it on its side. Voila, the frame now takes up ½ inch of usable space instead
of 2 inches.
Even though it’s laying on its side, and we want this to take up as little room as possible, we want our
wood piece to be at least 2 inches wide so that we can put two cross dowels to hold it at each end. We
want two cross dowels so it can’t twist out of position. You can make it much wider or even put in a full
partition or shelf. It’s up to you. We’ll discuss this more as we go along.

The question now becomes, how do I mount this piece of wood across a cabinet such that it is exactly
the same height on both sides? We could use a ruler or tape measure, but we’d have to make sure
we’re accurate to 1/16th of an inch or better – a royal pita. I’m going to do the entire installation
without a tape measure. I will use the Framing square, but only as a straight edge – any straight edge
would do as well.
Layout using wood blocks.
I use this method all the time. I may use a tape measure or ruler but only to cut the wood to a specific
size if needed. Most of the time I just eye-ball it.
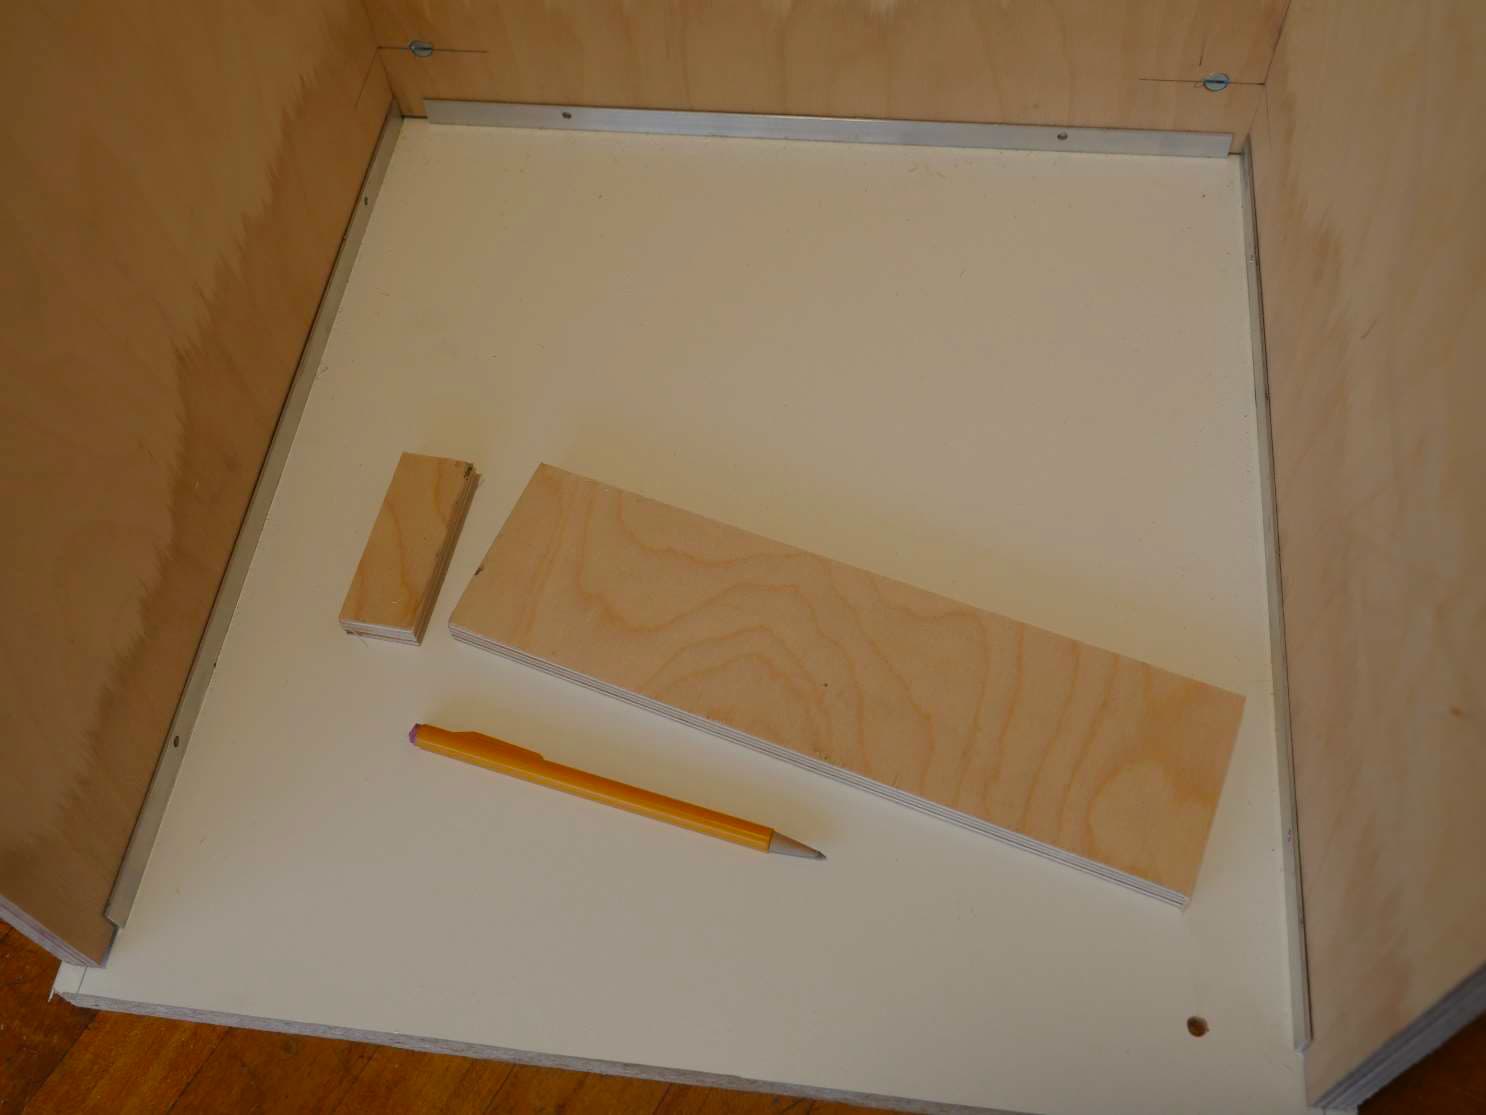
Decide how high up from the floor you want your frame or shelf. I want mine 11 inches up from the
bottom. Cut a piece of scrap plywood to this length. I usually use something about 2 inches wide and
cut it so the length of the plywood matches the height where I want to mount my shelf or face frame.
Next cut a small block of ½ inch plywood about 1 inch wide and 2 inches long. We’ll use these two
pieces of wood and a pencil for most of our work.
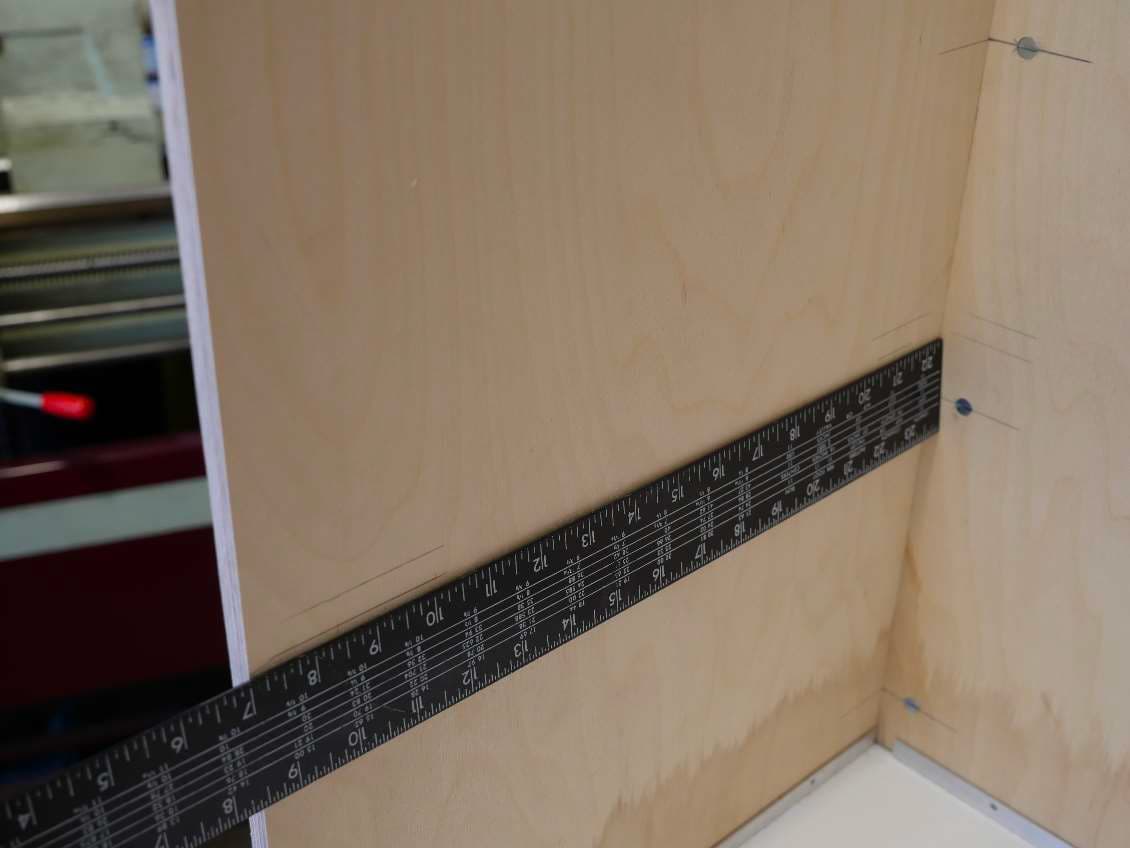
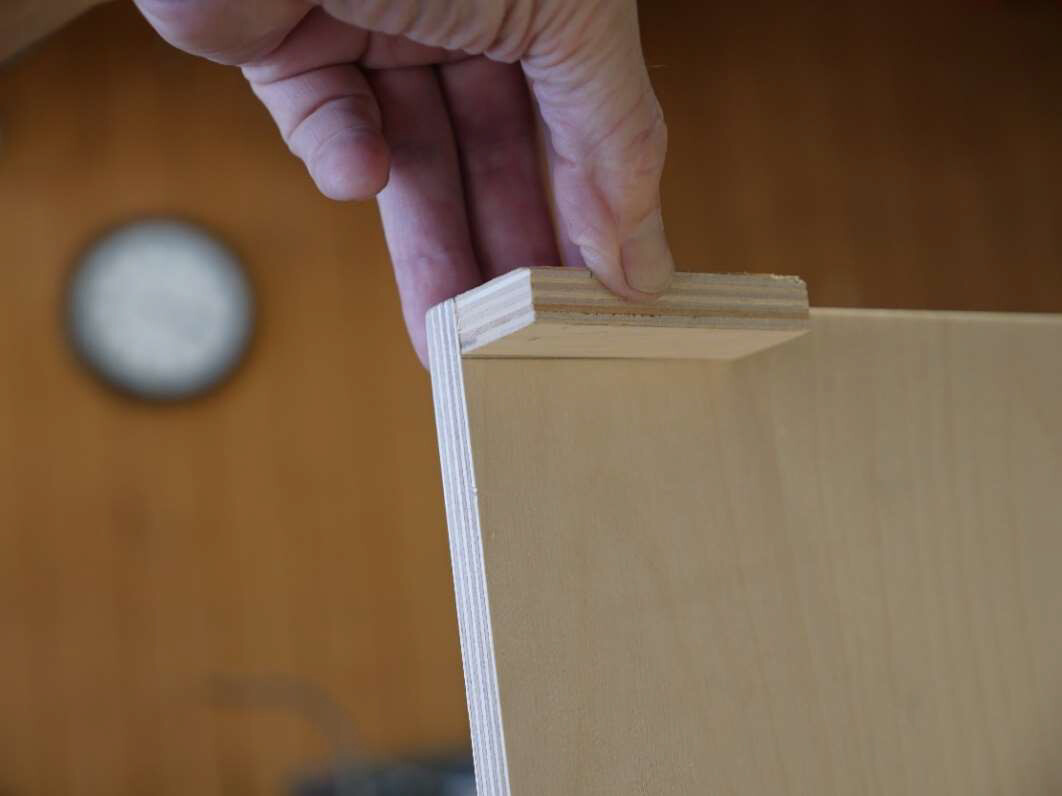
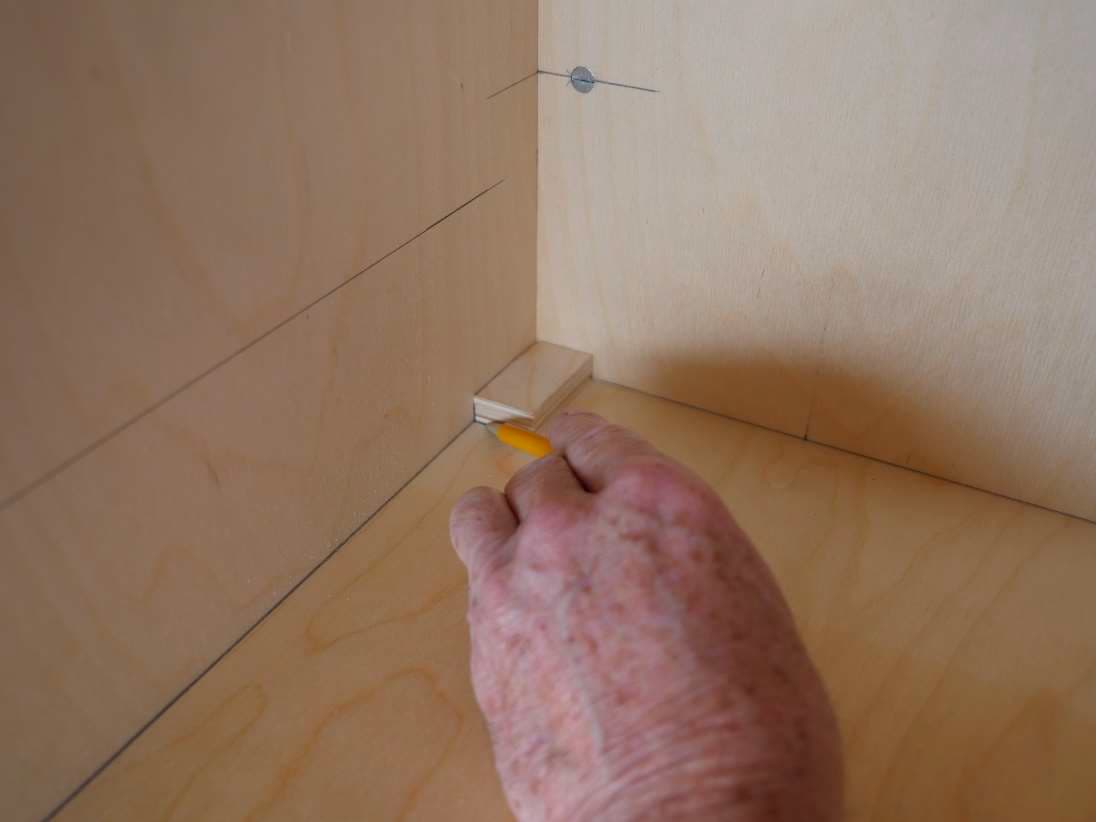
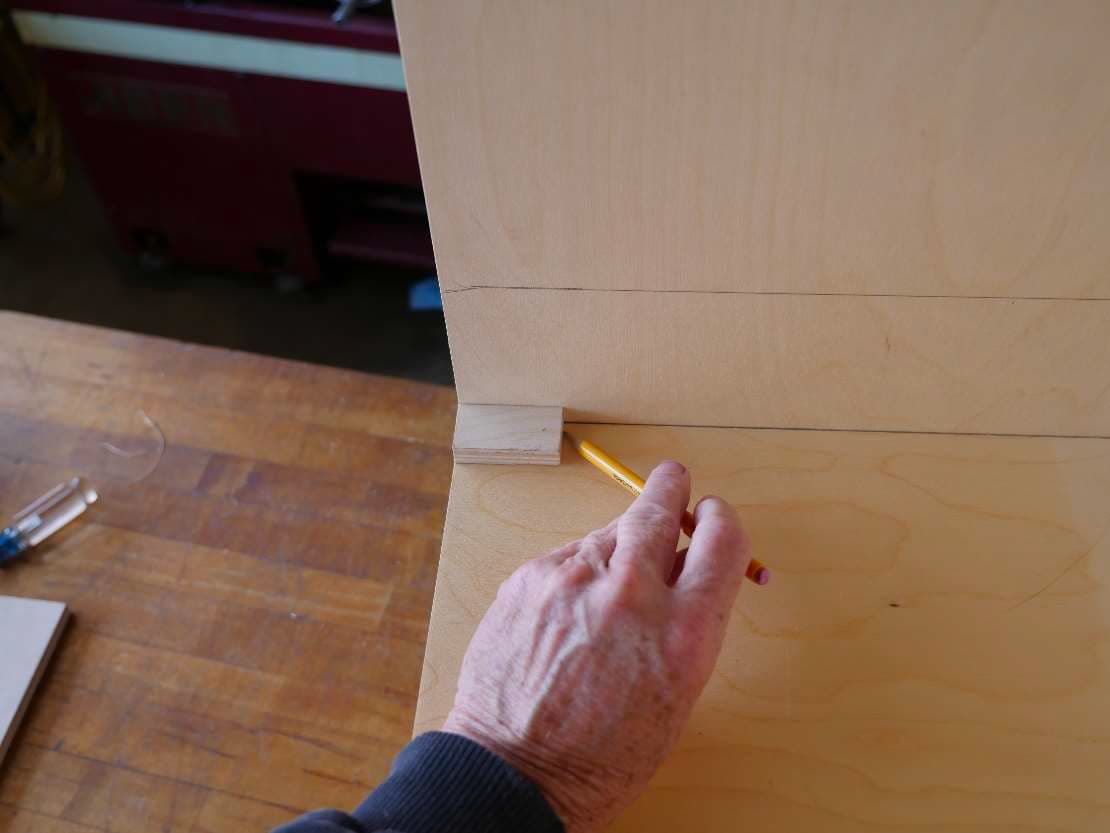
Now take your “height gauge”, set it firmly on the floor, and lay it up against the front inside edge of the
cabinet. Mark the cabinet across the top of the gauge with a pencil.
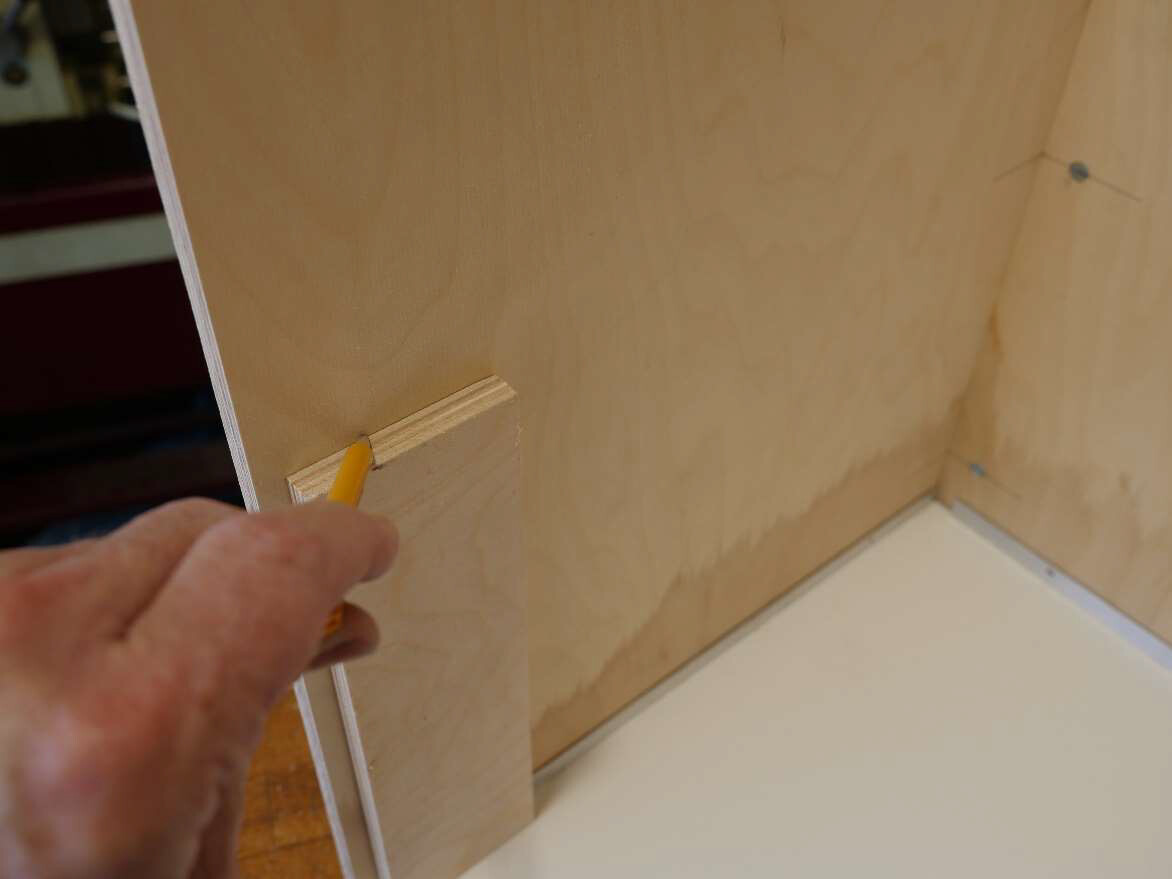
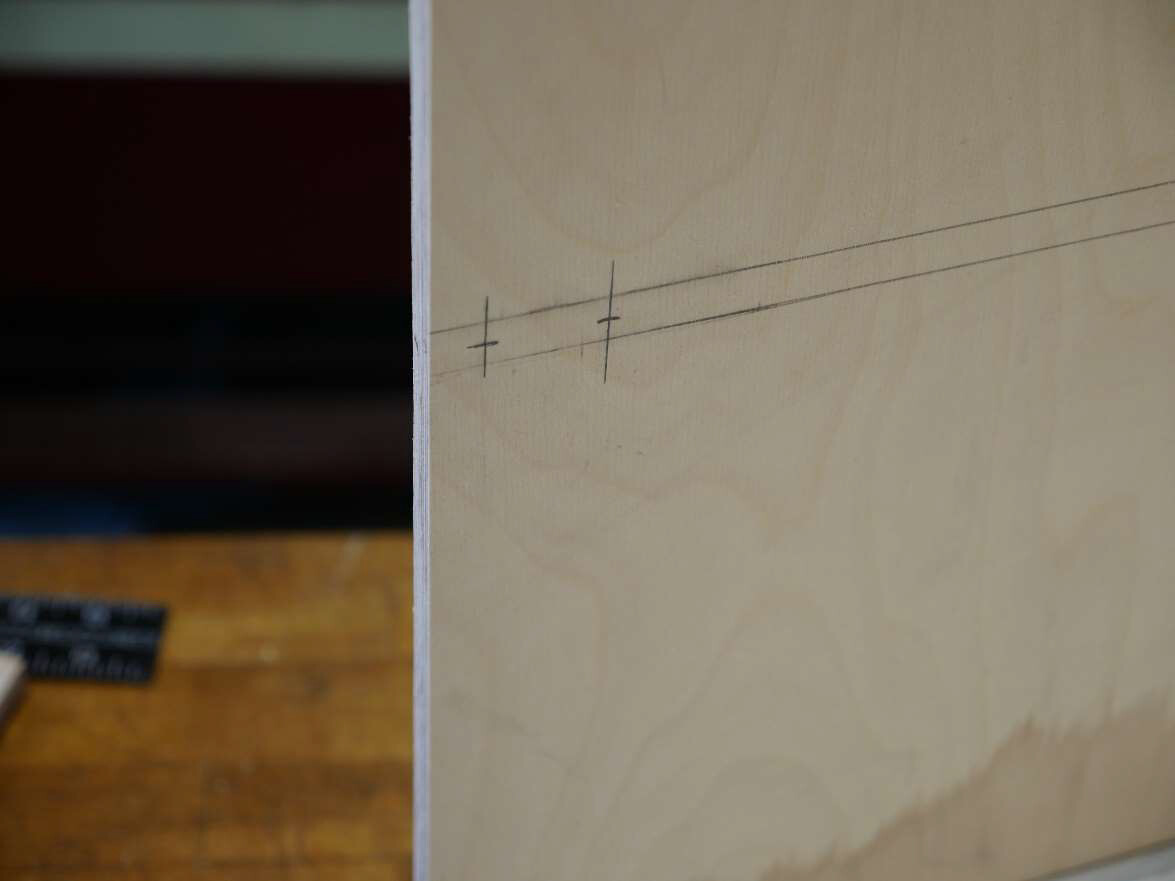
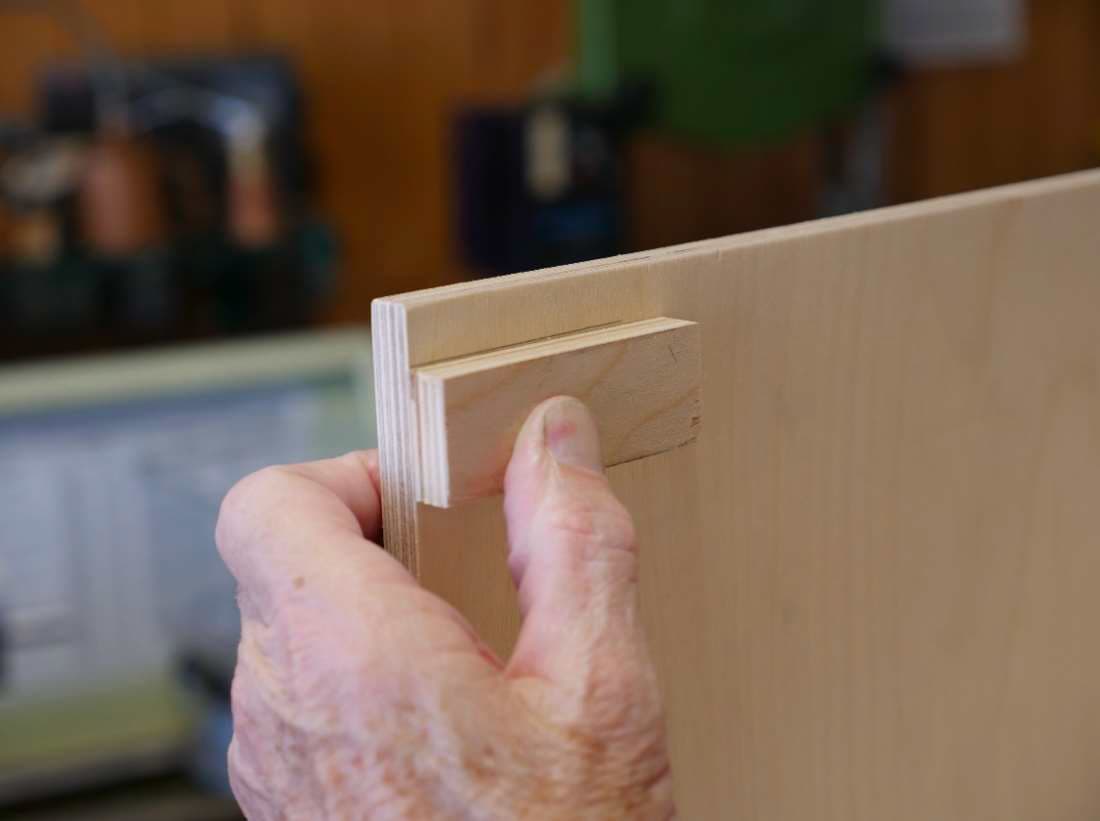
Leaving the gauge in place, lay your small ½ x 1 x 2 inch piece on top of the gauge so that it adds ½ inch
to the top of the gauge. Mark with a pencil.

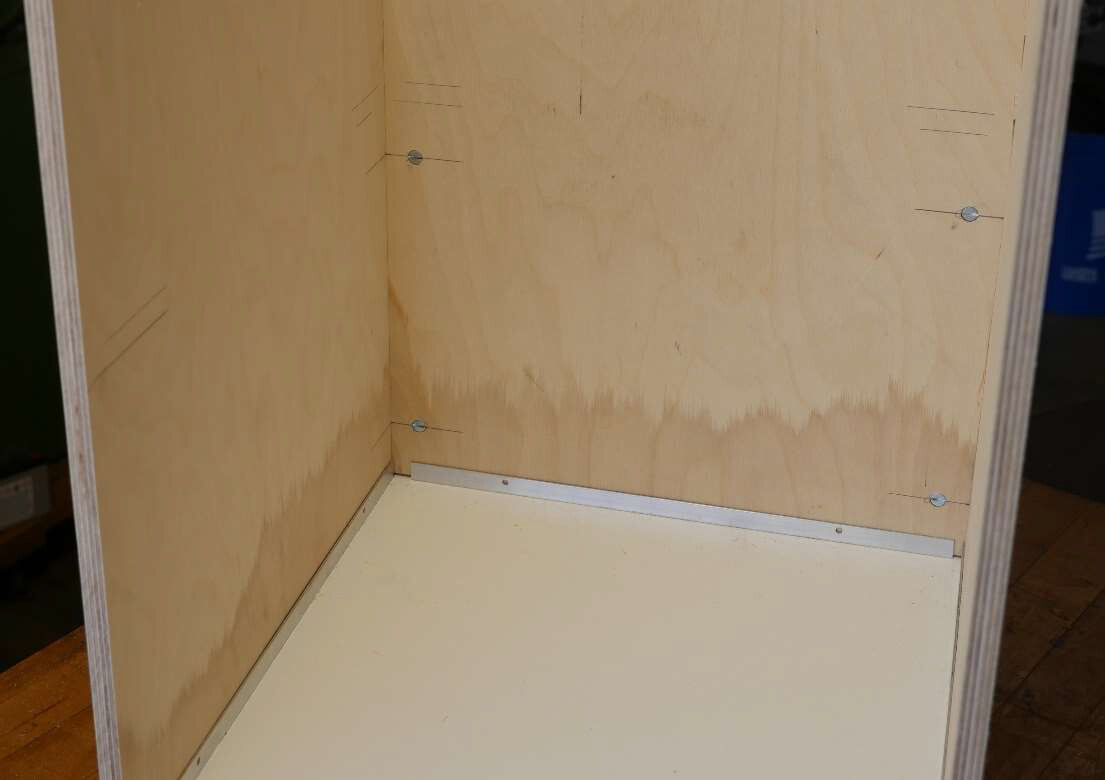
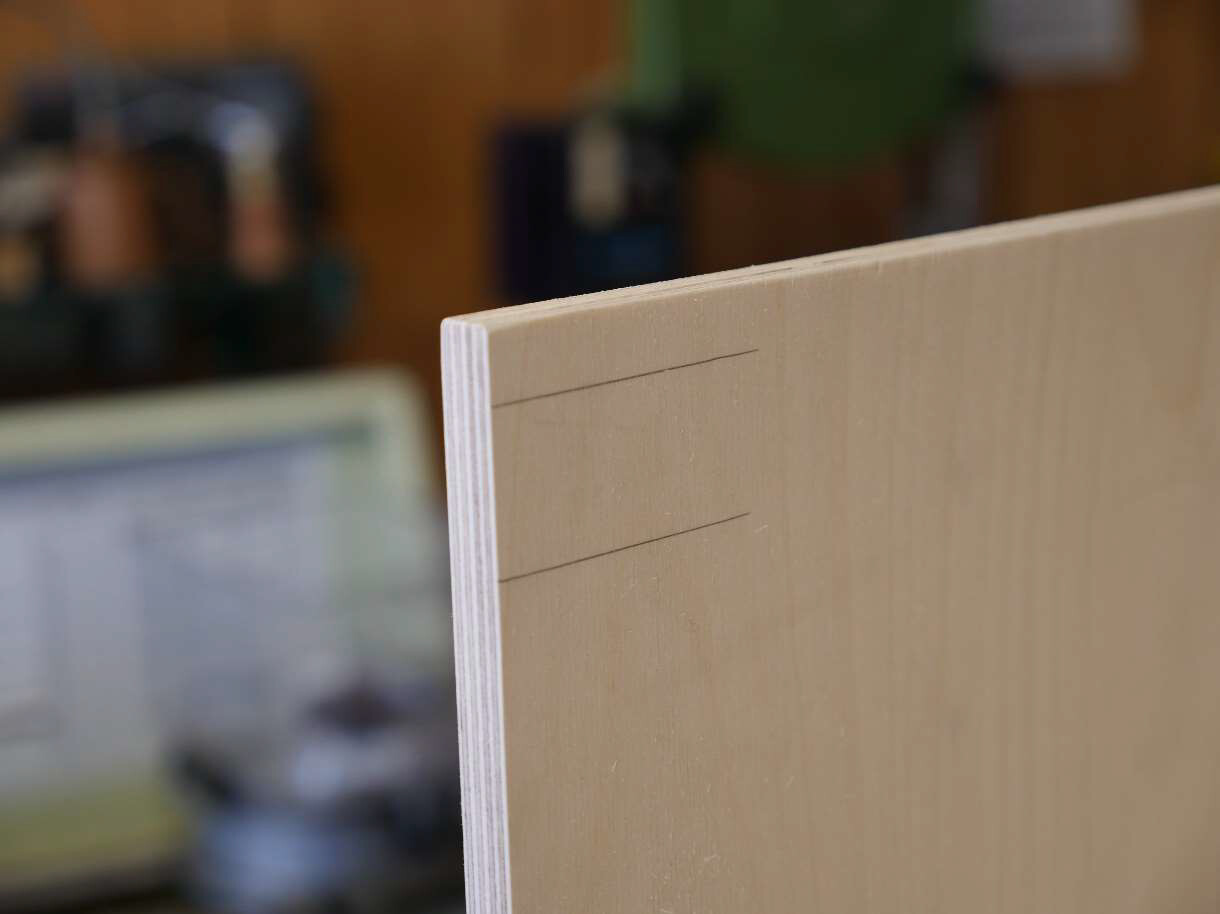
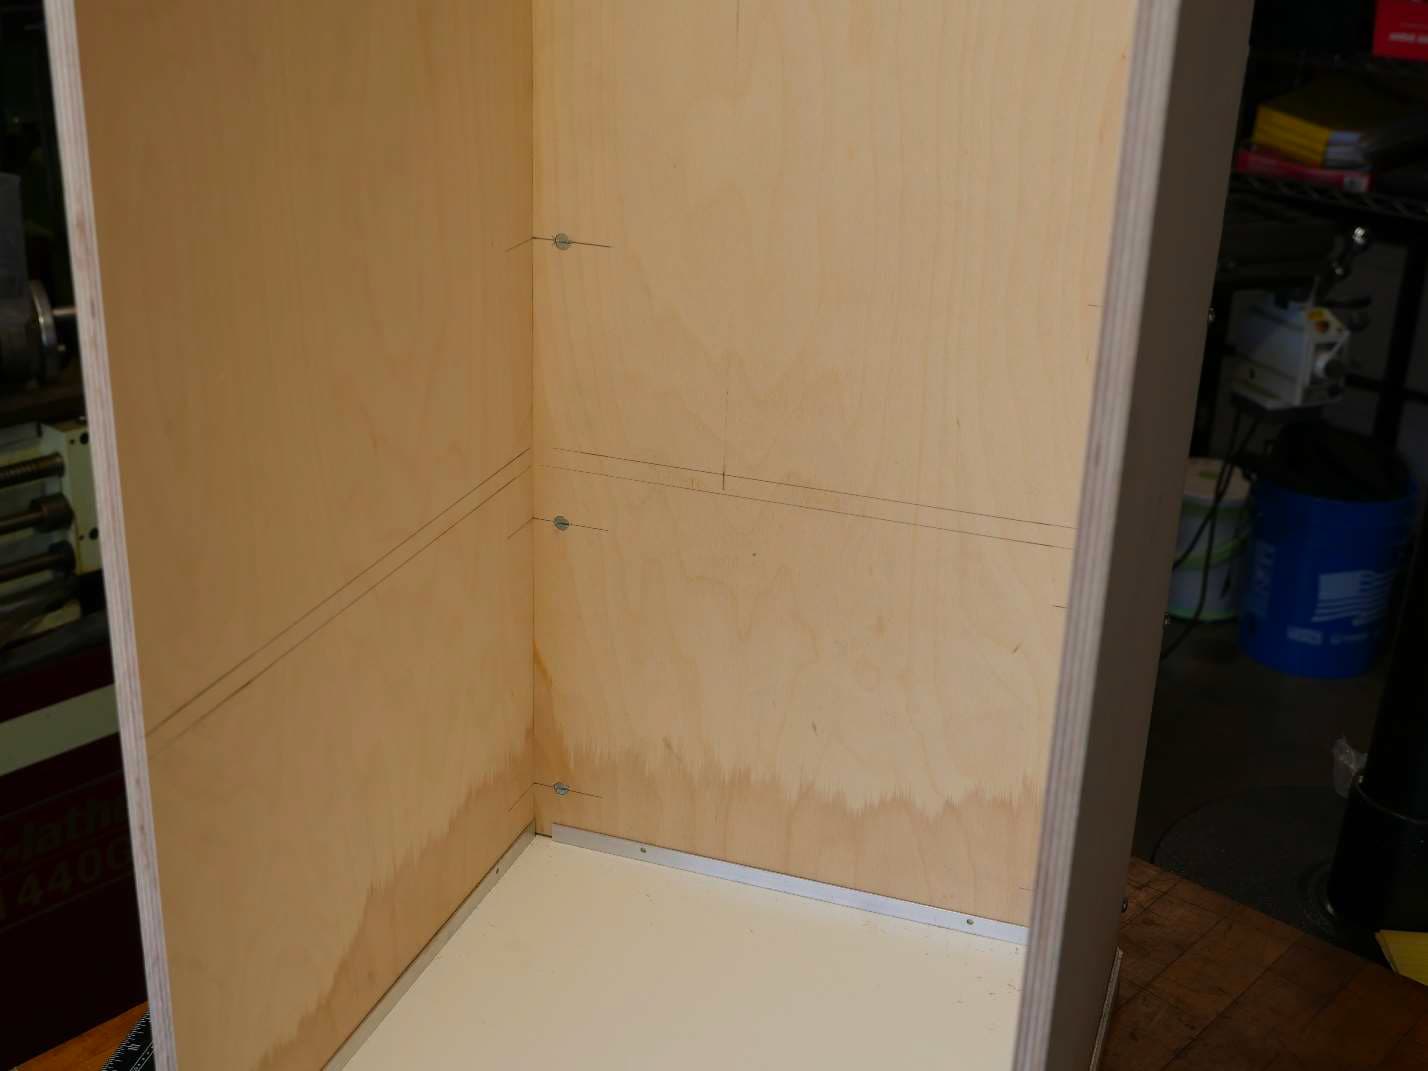
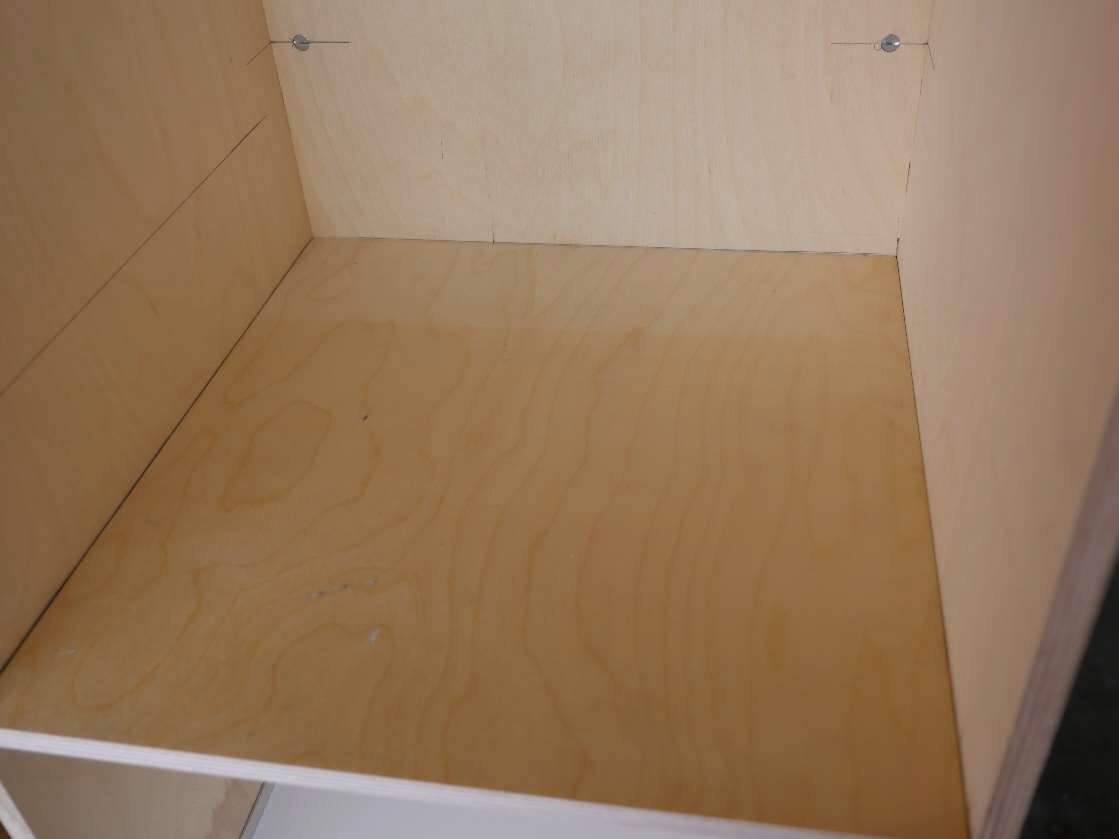
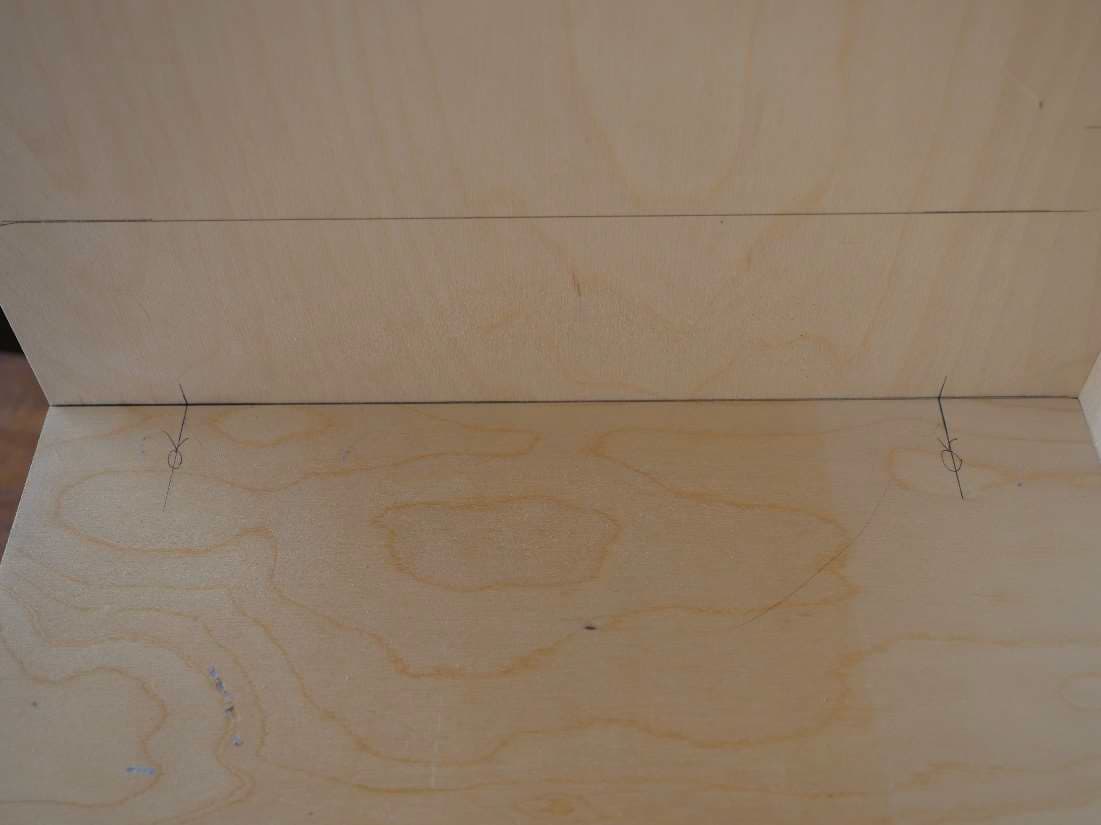
You should end up with two parallel lines that are ½ inch apart. The bottom line should be exactly 11
inches (or whatever dimension you chose) from the floor. Repeat this process until all three panels are
marked front to back/side to side. It should look something like this.
Take a straight edge and connect the lines all the way around the cabinet. (I’m setting this up for a shelf
later in this tutorial. If we were only going to install the frame piece, we’d just mark both inside surfaces
at the front of the cabinet. No need to extend around the whole cabinet.)
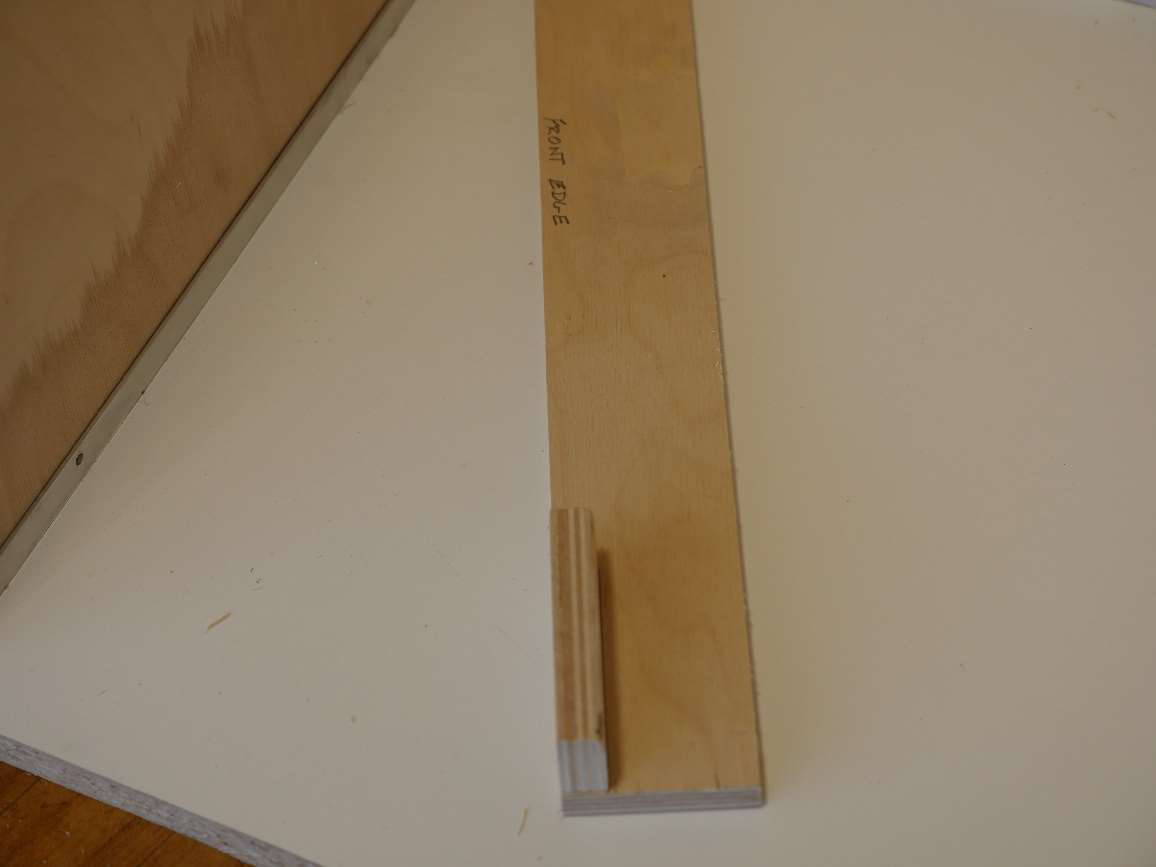
Layout of the face frame install
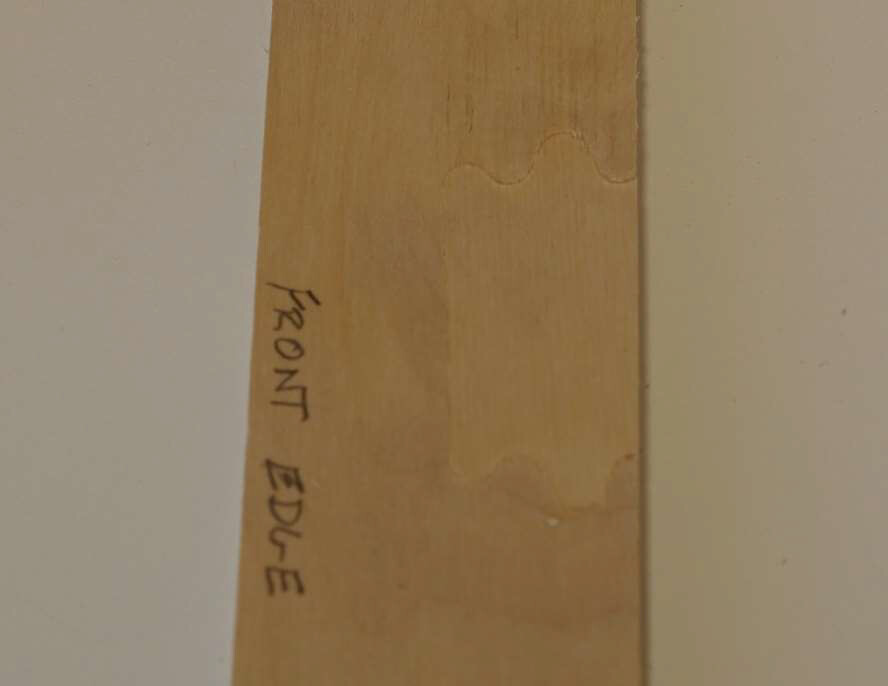
To start the cross dowel layout for the face frame, identify and mark the front edge on the face frame.
Since we’ll be using relative measurements instead of absolute measurements, we’ll need to keep track
of front, back, up, down, top, bottom etc as we go along. Marking the front edge tells us both the front
edge, and implies what side is up because we wrote it on the top side.
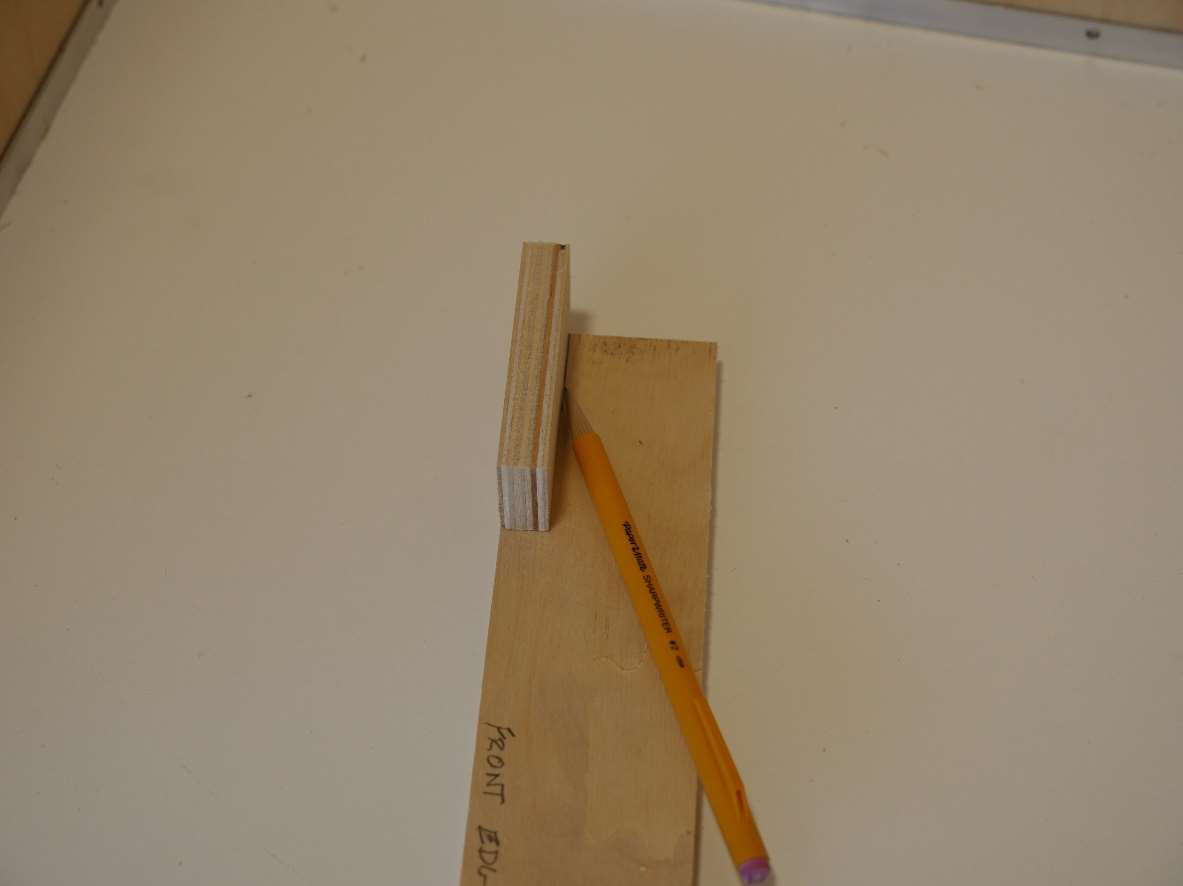
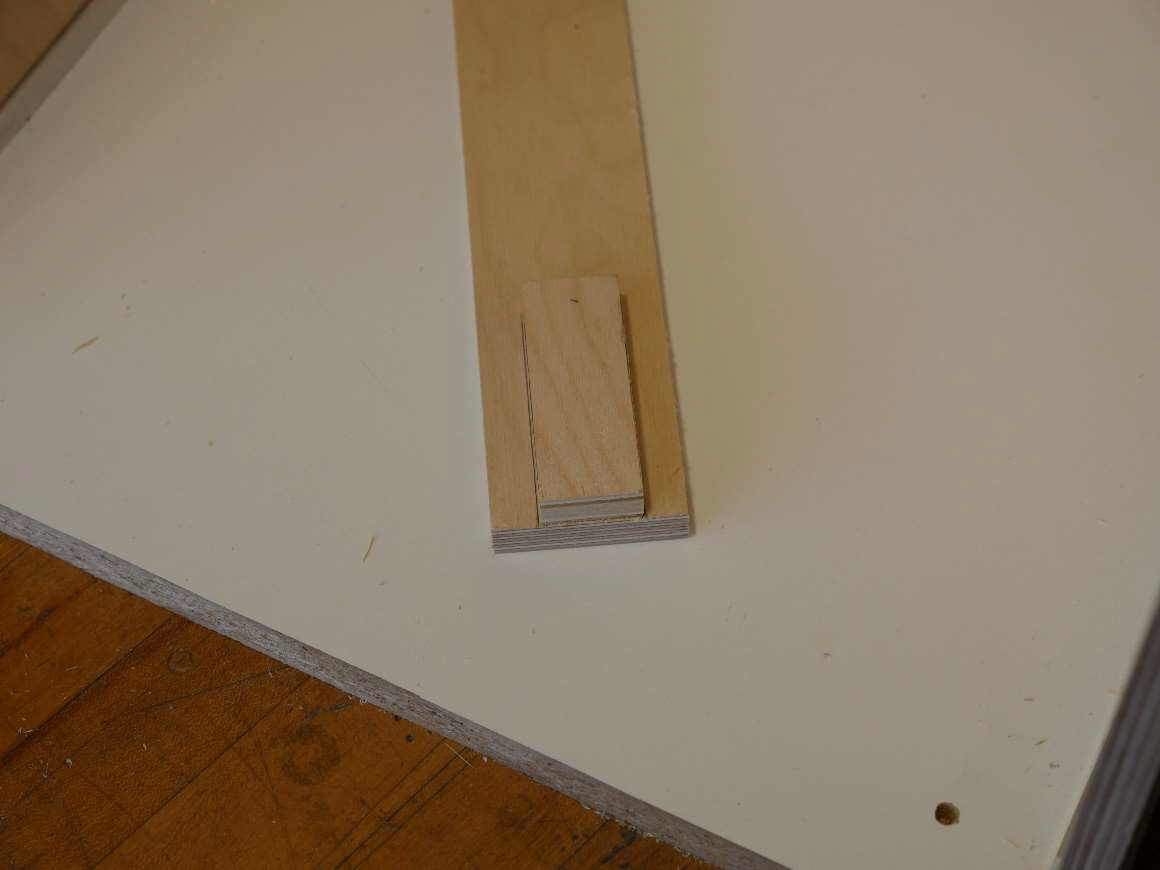
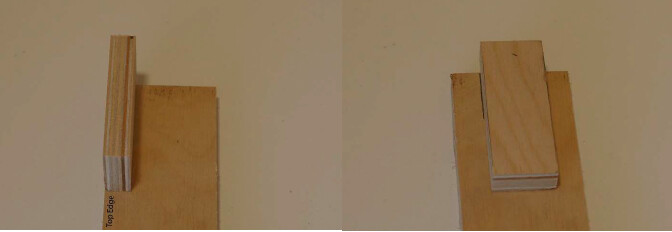
Next take the little ½ x 1 x 2 inch block of wood and place it on the left end of the face frame as shown
so that it is flush with the front edge of the face frame piece. Mark along the inside edge.
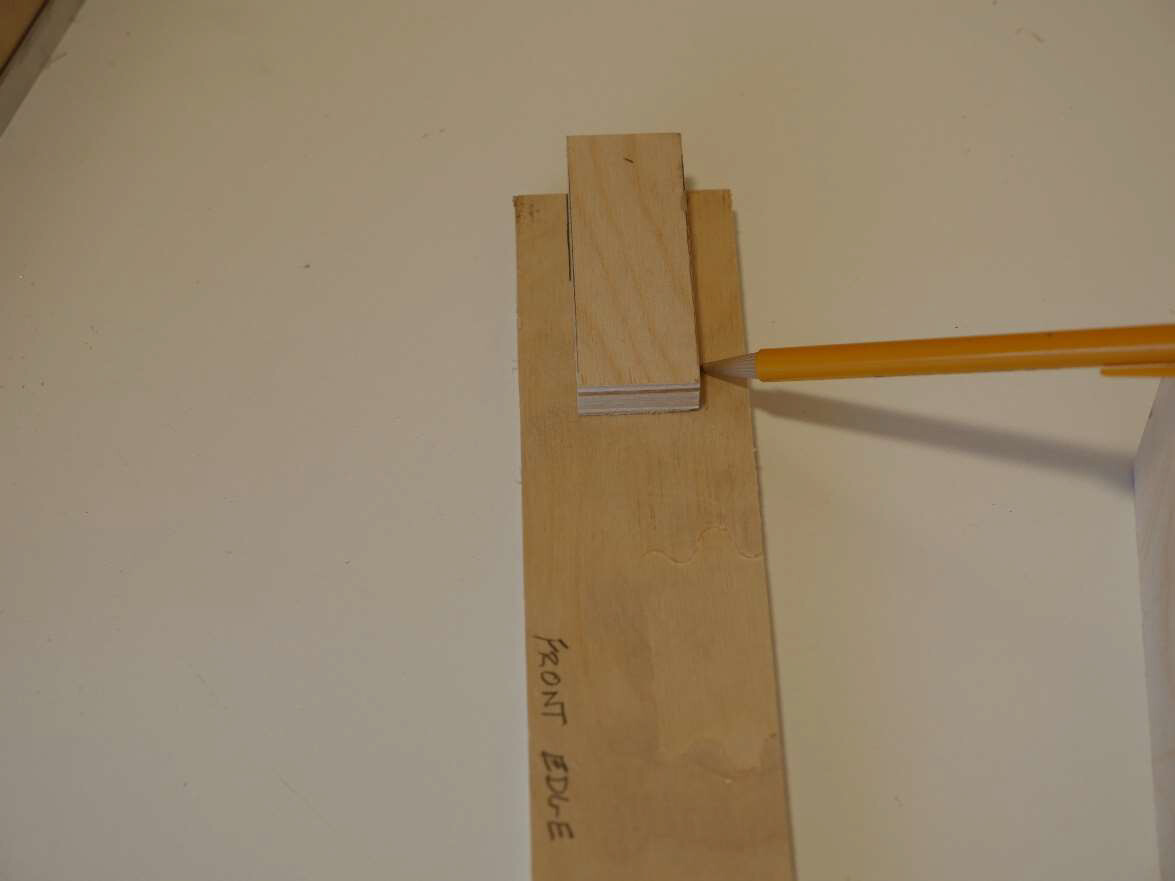
Now lay the block over so that it is flat and align the left edge with the line you just drew. Now draw
another line on the opposite side of the block. You’ll end up with two parallel lines 1 inch apart.
Rinse and repeat at the opposite end. Make sure you first align the block against the front edge of the
face frame since that is the reference for all of our measurements.
You now have two parallel lines 1 inch apart on the right end of the face frame.
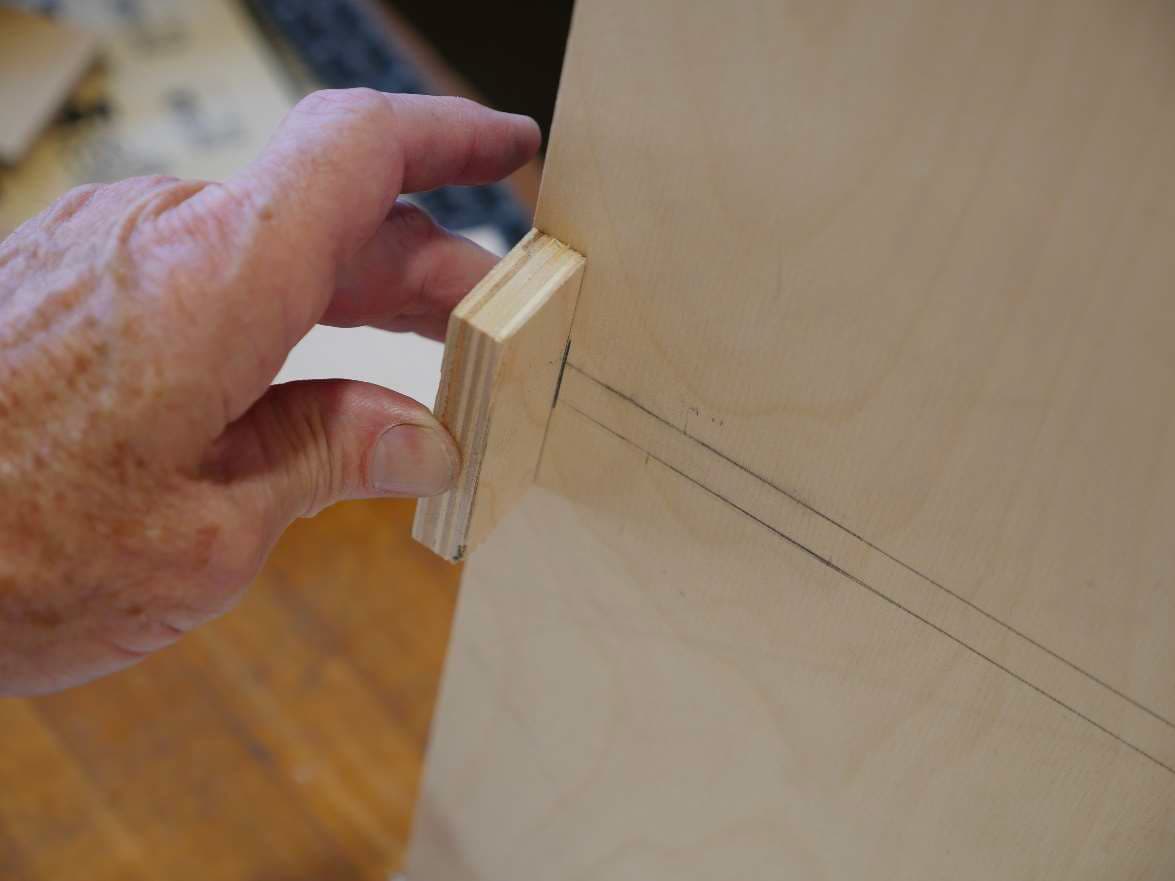
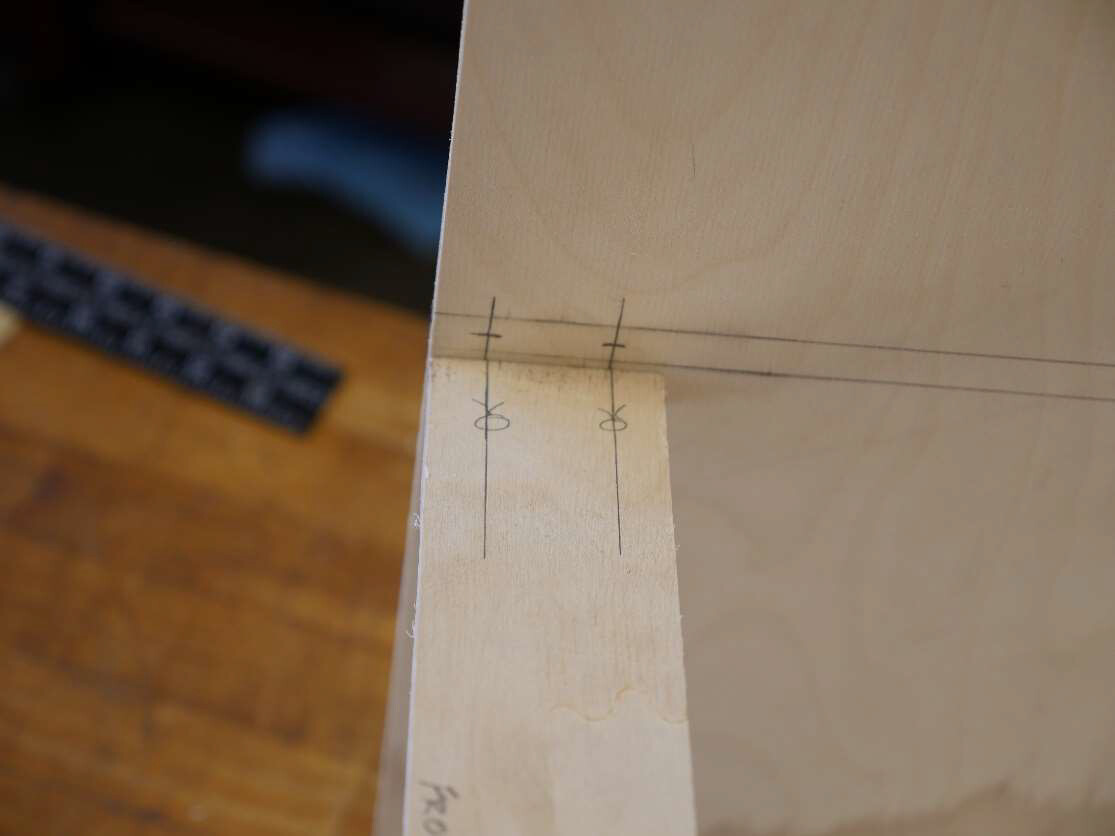
Next take your ½ x 1 x 2 inch block and set the ½ inch side against the side of the cabinet and align it
with the front edge so that it spans the parallel layout lines you drew on the inside of the cabinet. Mark
across the parallel layout lines.
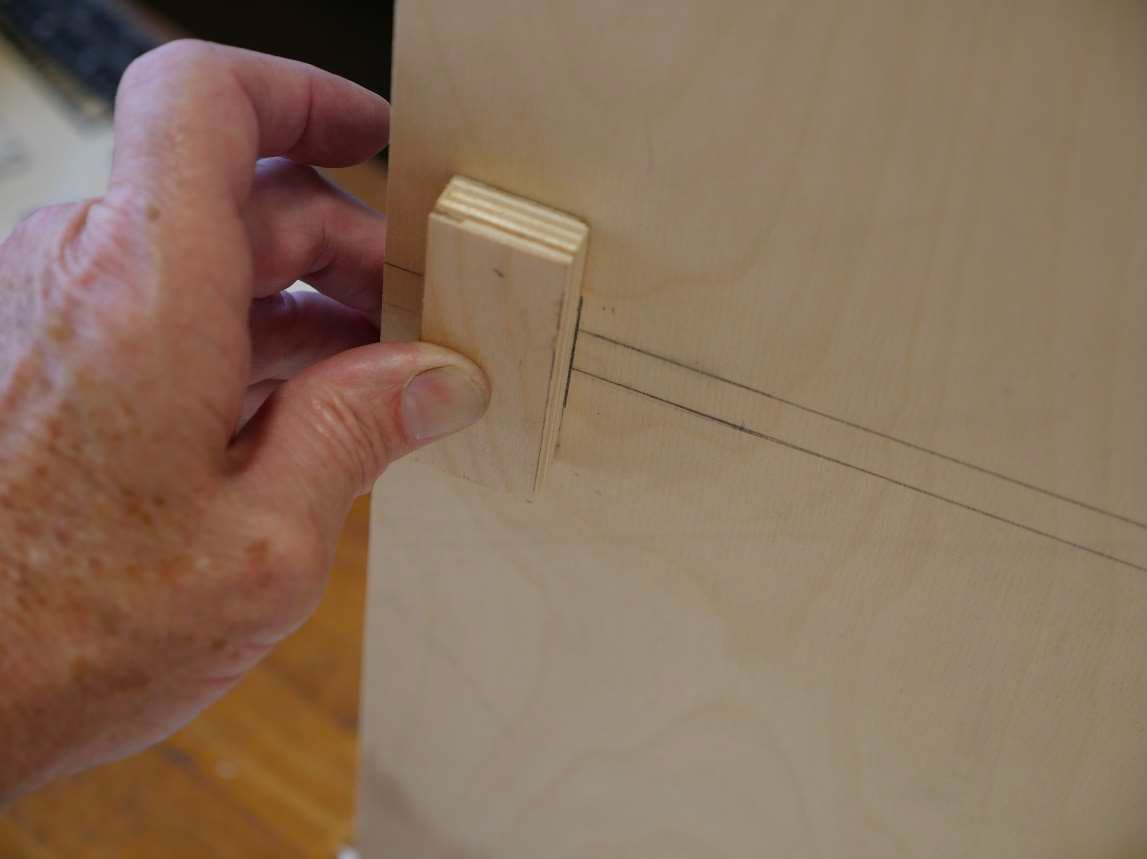
Lay the block over on its side, line up the left side with the line you just drew and make a mark on the
right side of the block. Repeat this process on the opposite side of the cabinet.
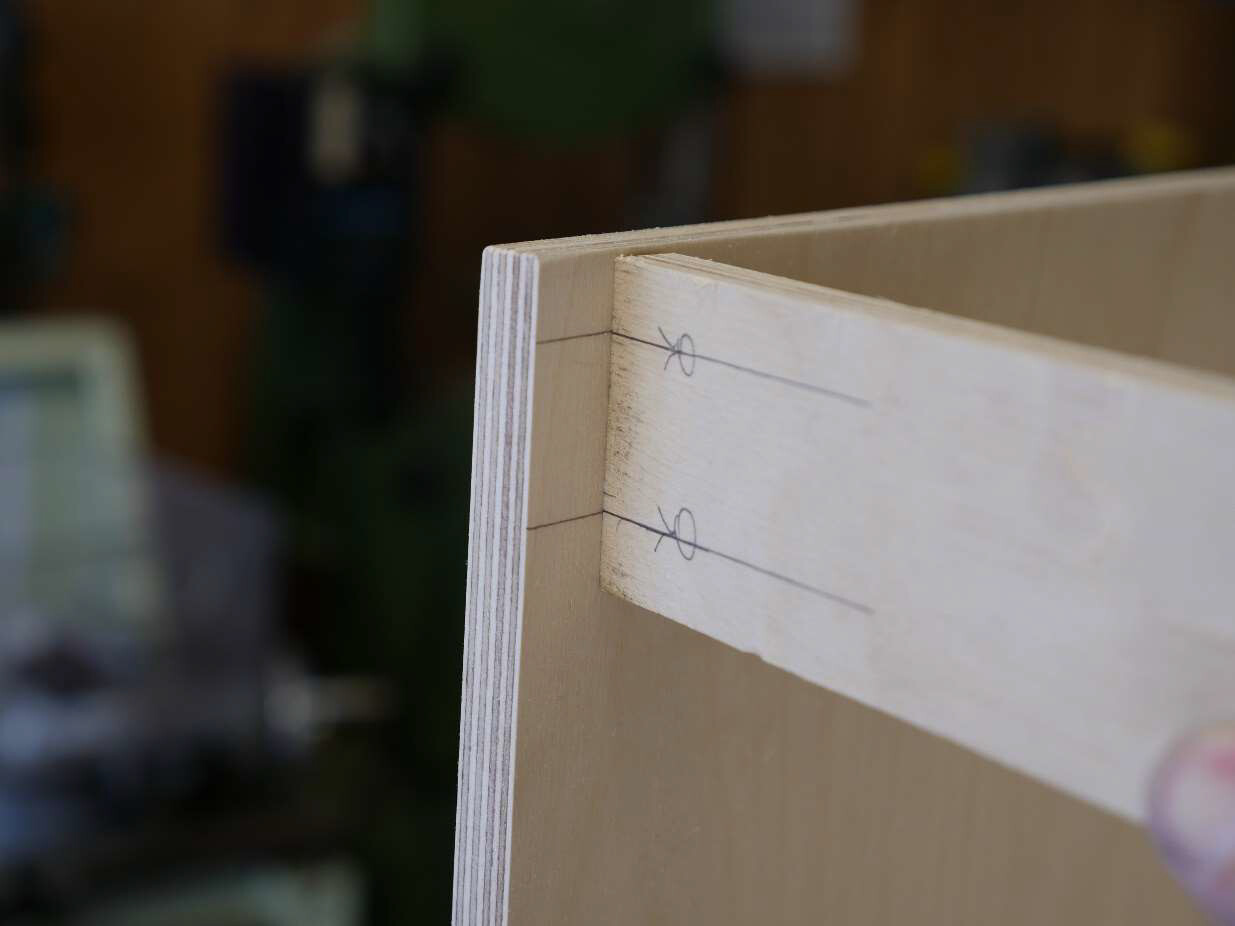
Make a small horizontal mark across each of the vertical lines half way between the two horizontal
parallel layout lines.
You have just completed all the layout needed for drilling and mounting the face frame piece and you
only used a ruler or tape measure when you initially cut the two wood blocks. This is the left side of the
cabinet. The right side should look exactly the same. Use the cross dowel jig to drill and install cross
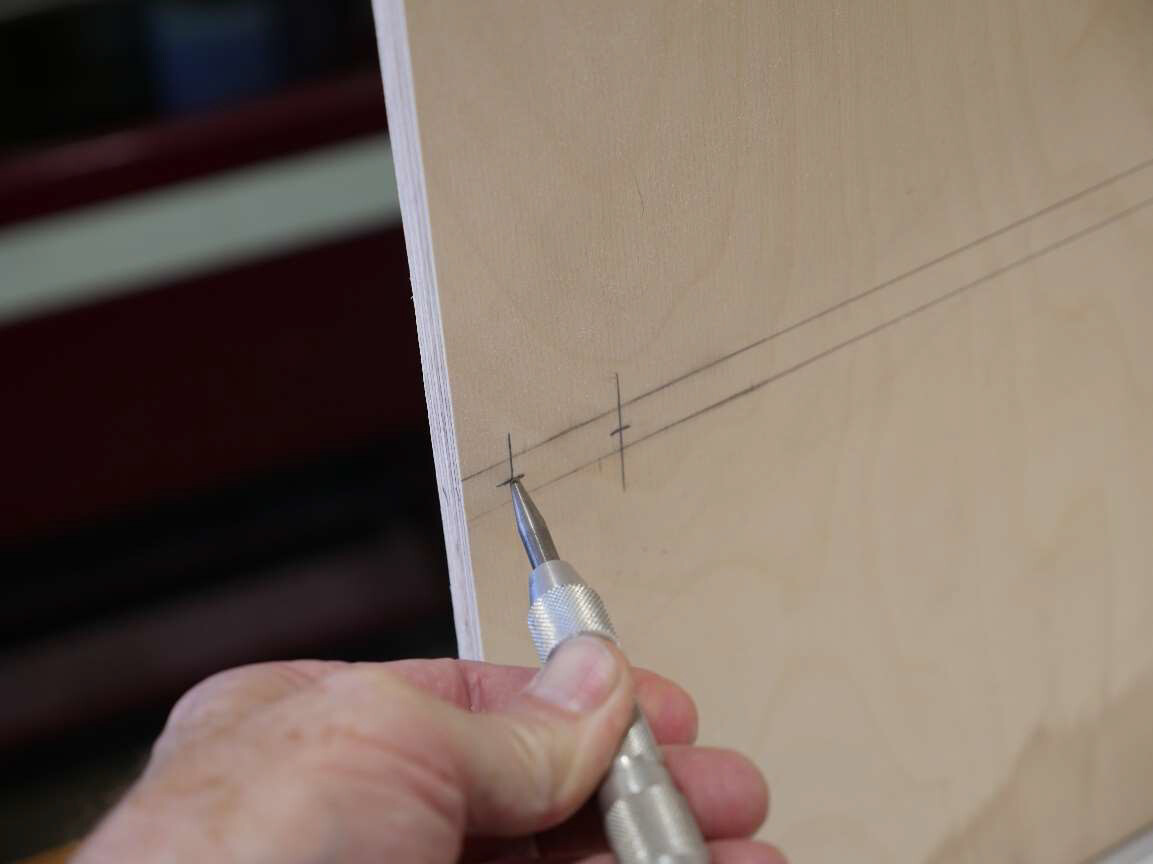
dowels in the face frame piece.
Use a center punch to mark and drill the through holes in the cabinet side panels.
Installing a Face Frame in its Normal Vertical Orientation
Now let’s install a 2 inch wide face frame at the top of the cabinet, only this time will install it in its
normal orientation. Rather than a flat counter top, I built my cabinet around a commercial divided tray
thingy. It’s perfect for what I need but it does drop down about 2 inches into the cabinet so I need to
stabilize the top front of the cabinet, and because of the tray I’ll want that 2 inch space, so I’ll install my
face frame vertically.
Cut a 2 x 14 ¾ x ½ inch piece of Baltic Birch plywood, and mark it up just as in the previous install above.
Instead of marking the “front edge”, identify and mark the “top edge”. This will make sure that you
orient the piece properly as you layout and install it. The side you write on will face out, and you’ve
designated the top edge. This edge will be our reference.

Mark this piece with the circles and arrows designating that cross dowels will be installed at all locations
in this piece.
Layout the Top of the Cabinet
Now take the ½ x 1 x 2 inch layout block and set it flush with the top and front edges of the cabinet as
shown. Since we referenced the top edge when we laid out the face frame piece, we can use the top
edge of the cabinet as the reference as well. Draw a line under the block.
Lay the bock on its side and align the top edge of the block with the line you just drew. Now draw
another line under the block.
Just as in the previous section, you now have two parallel lines that exactly match the lines on the face
frame.
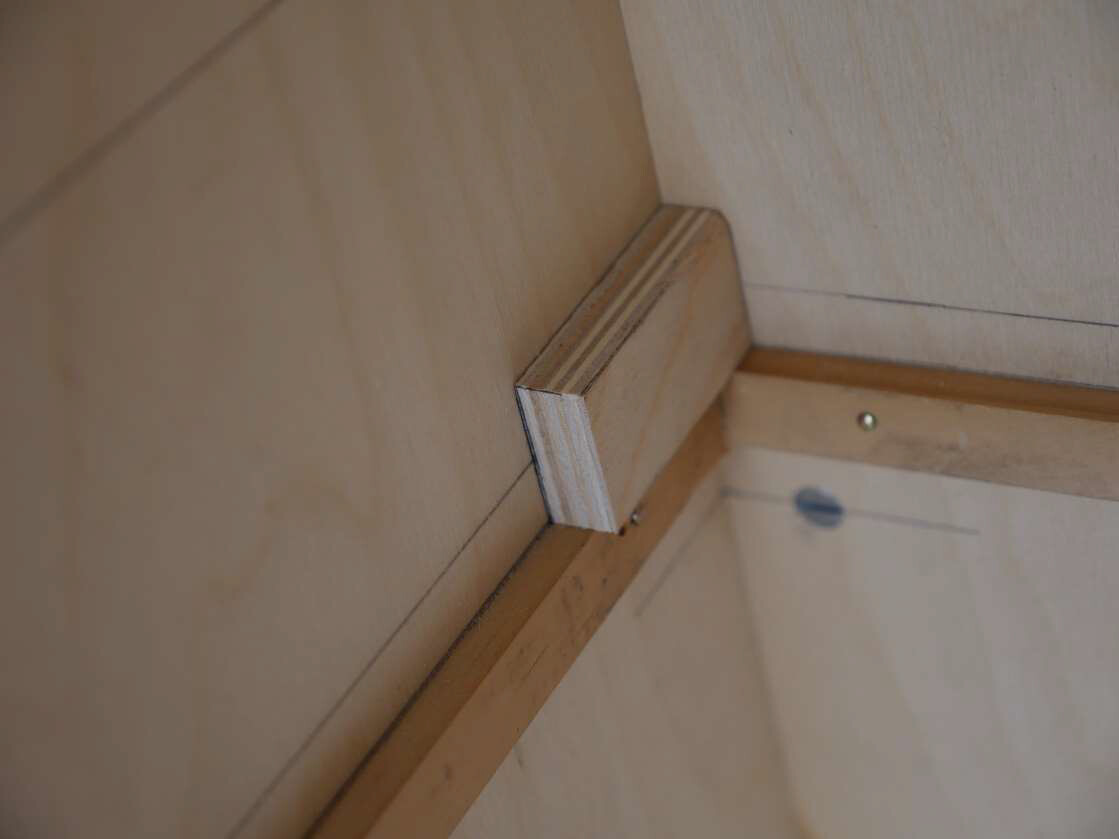
This is a normal corner joint. Drill and install the cross dowels on the face frame piece. Then use the jig
to drill the through holes on the edge of the cabinet.
When completed, your cabinet will look like this photo.
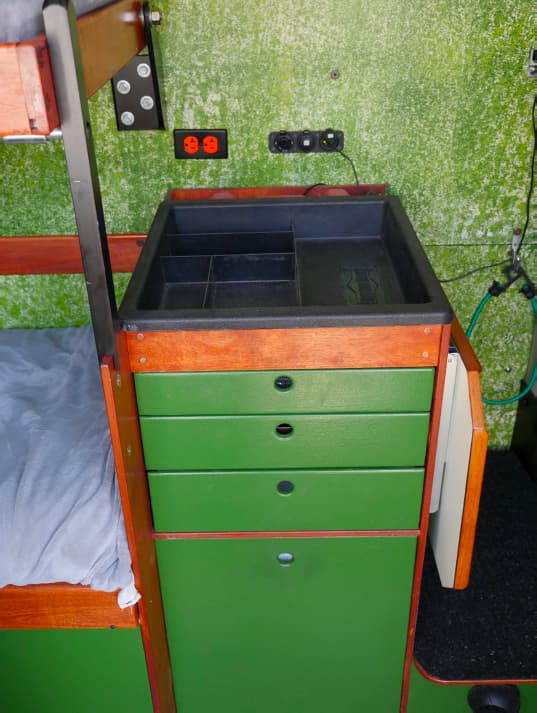
This is the actual cabinet in my van. The top divided tray was purchased at Lowes. It is designed to fit in
the metal cabinets that mount across the bed of a pickup truck. It just happened to be the right size so I
built my cabinet around it.
My lower “face frame” is actually a full sized divider. It is only held in by 4 cross dowels, one on each
side in front, and one on each side in the back. It is not a shelf and carries no weight. It is used to divide
and seal the space between the drawers and the porta potty in the bottom cabinet section, and to act as
a face frame to keep the front center of the cabinet from warping out of shape. The upper face frame
holds the top of the cabinet sides in place.
Oh! You wanted a shelf not a divider!
We went to all the work in the first part of our layout process to extend parallel lines ½ inch apart all
around the inside of our cabinet. I promised I’d discuss that later in the tutorial and it appears that later
has arrived.
To install a simple divider you only need to cut a piece of wood to fit the inside of the cabinet like a shelf
and install it with 4 cross dowels, 2 in front and two in the rear of the side panels. The layout process for
a divider would be the same as the shelf only you won’t install ledger boards.
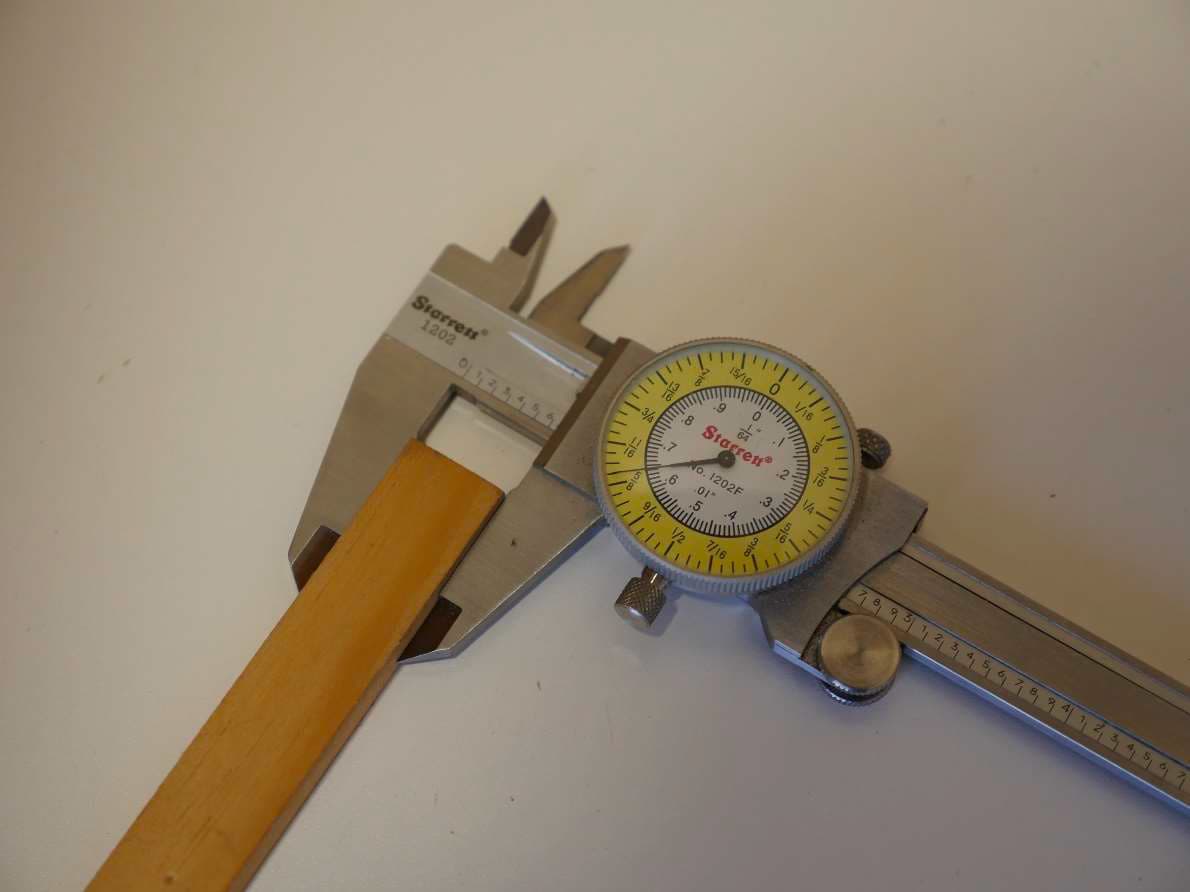
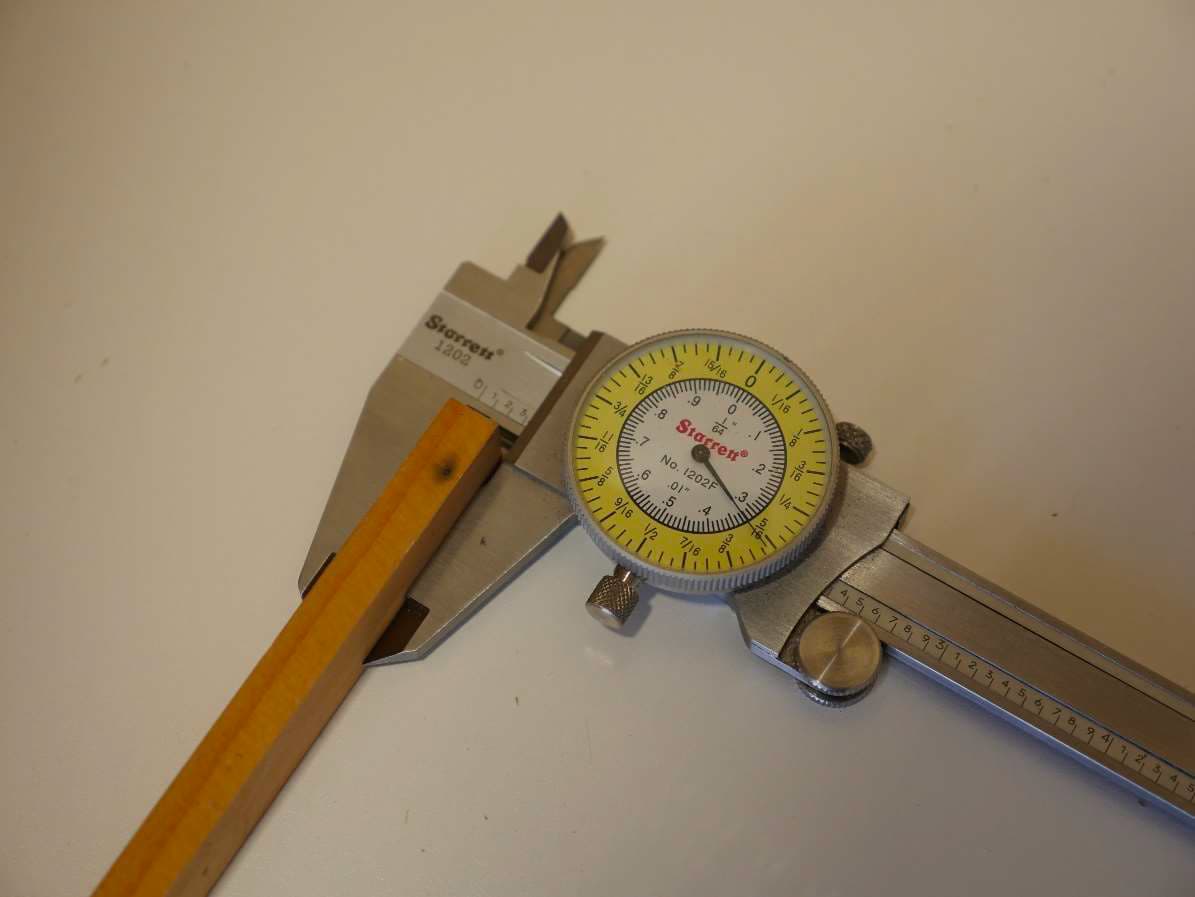
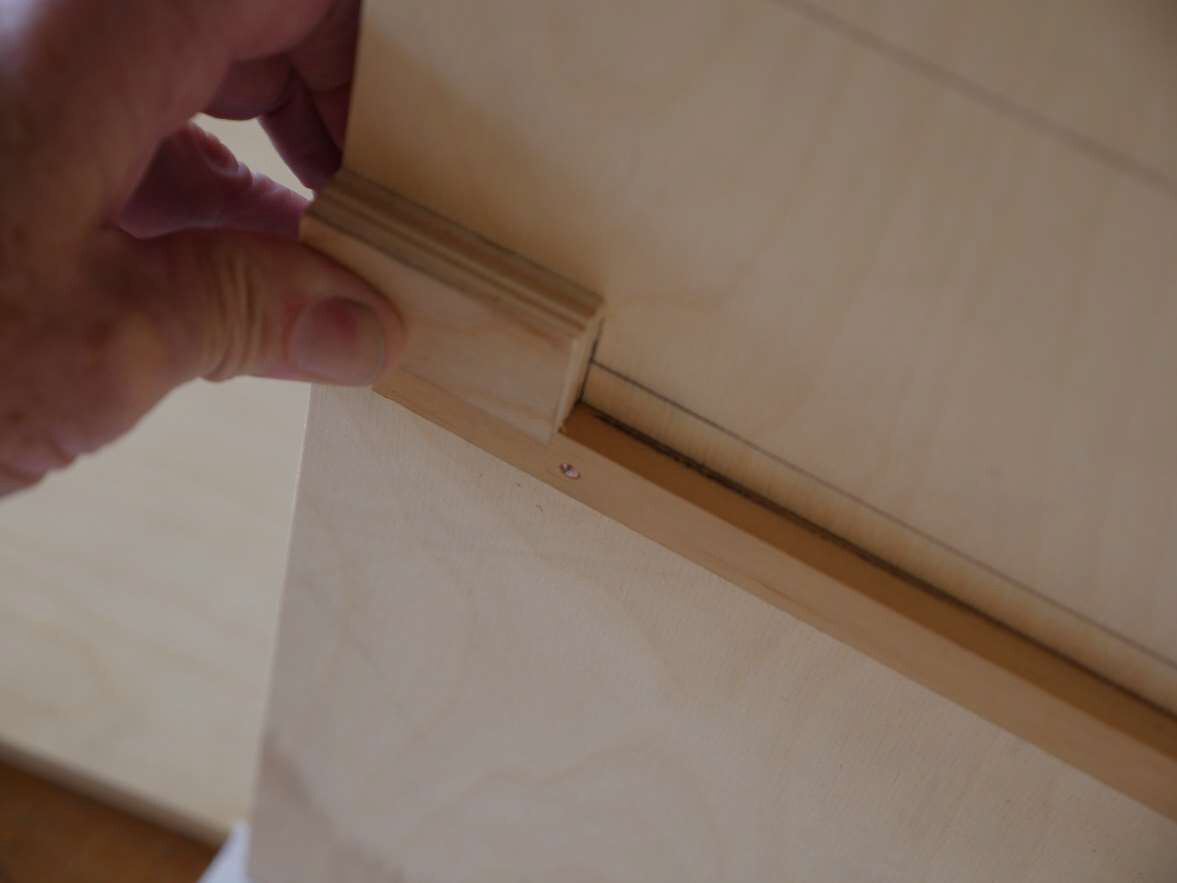
However, if you want a shelf that will carry a month’s worth of canned beans, you’ll want to beef it up a
bit by adding ledger boards for support. They don’t have to be very large. The ones I’ll be using are just
a skosh over 5/8th inch wide, and 5/16th inch thick. They are nothing special. Just a scrap piece of alder
or Poplar wood from Lowes or Home Depot. These and four cross dowels will provide plenty of support.
I cut the length of my ledger boards to cover the full width of the sides and rear of the of the cabinets,
but this is not necessary. A few small blocks of wood strategically placed would probably do as well. I
like the look of full length ledgers. Gives me that belt and suspenders feeling of confidence.
The ledger boards are mounted at the level of the lower of the two parallel lines with glue and screws
spaced about 4 inches apart. #6 screws are fine. Make the screws as long as possible without going all
the way through the sides of the cabinet. I used ¾ inch long #6 screws.
I also like to pre drill a 1/8th inch hole through the ledger where I’m going to put my screws. Small pieces
of wood like this tend to split if you don’t first drill a pilot hole first.

Notice that the ledger boards don’t come right to the front edge of the cabinet. Mine are set back at
least 5/8 of an inch so that ½ inch thick cupboard doors or drawer fronts will close flush with the front of
the cabinet and hide the ledger boards behind them.
Cutting the Shelf or Divider
Cut your shelf as accurately as possible. Test fit the shelf and make adjustments as needed. It should fit
squarely into place with no gaps around the edges.
Place your little ½ x 1 x 2 inch layout block on the shelf and against a back corner as shown. Mark the
position of the front edge of the layout block on both the shelf and the side wall of the cabinet.
Move the layout block and align it with the front edge of the cabinet. Mark the shelf and side panel at
the rear edge of the layout block.
Repeat this process until all four corners of the cabinet and shelf are marked. Remove the shelf and
place the layout block against the back of the cabinet and rest it on the ledger board (or if you’re just
installing a divider, it should lie across the parallel lines. Mark down the front of the block through the
space between the lines.
Move the block to the front of the cabinet and align it with the front edge. Draw a vertical line through
the parallel lines. Repeat this process to mark all four corners.
Here’s what it should look like so far.

Now draw a short line across all of the vertical lines directly in the center between the parallel lines. You
just completed the layout for the through holes. Center punch and drill all four holes in the cabinet.
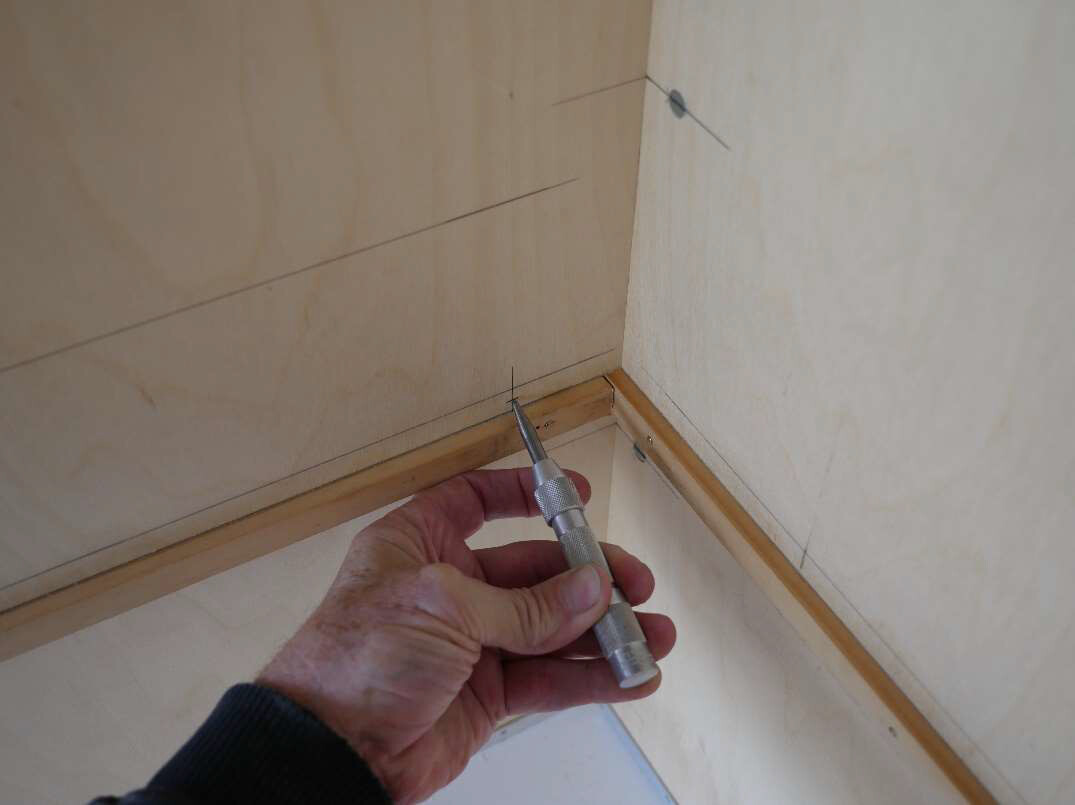
Extend the layout marks on the shelf using the combo square. Mark, drill, and install your cross dowels.
Your shelf is ready to install. As I previously stated I’m not drilling and installing the shelf because I’m
using this cabinet to show more than one process. However, here’s the shelf set in place and you can
see all the layout lines register perfectly.
Summary
Rather than trying to measure everything with a ruler or tape measure, cut pieces of wood to the
lengths you need and then use these to mark up your layout. As long as you use the same reference
point(s) (floor when measuring the height of a shelf or drawer, front, top, or rear of cabinet when laying
out cross dowel lines) you will ensure that all the lines are exactly the same position in relation to the
reference. This is far easier than trying to read at tape or ruler to 1/16 or 1/32 of an inch.
Try to standardize on the size of common elements like face frame width, and the distance you prefer to
install cross dowels from the edge of panels.
Cut small blocks of wood to the common dimension that you use in your layouts. I have several. In this
tutorial I used a ½ x 1 x 2 inch piece of wood to layout all the cross dowel locations. I also have blocks
that are ¾ x 1 ½ x 2 inches and several other sizes. By using these all my layouts are consistent.
As an example of consistency, let’s say I used layout blocks to position all the cross dowels in the divider
panels for the cabinet under the bed platform. I’d probably use the ¾ x 1 ½ x 2 inch block.
- I’d use the 1 ½ inch dimension of the layout block to locate the upper rear cross dowel position
on each divider panel where it attaches to the rear panel. - I’d use the 2 inch dimension of the layout block to locate the bottom rear cross dowel position
on each divider panel where it attaches to the rear panel. - I could use either the 1 ½ inch or the 2 inch dimension to locate the cross dowel position on the
top front edge of the divider panel where it attaches to the bed platform. - I’d cut a length of wood for locating the cross dowel position in the top center of the divider
panel where it attaches to the bed platform.
By doing the above, all the panels would be fully interchangeable. If I screwed up a panel and needed to
cut a new one, I wouldn’t have to fiddle with setting the combo square and hope I got it right. I’d just
use the same layout block as was used to layout the original panel and everything would match up.
As you can see, wherever possible, I use a ruler or tape measure to determine a specific dimension. I
then cut a piece of wood to that dimension. From then on, I use the wood stick as my layout tool rather
than the ruler or tape measure.
MORE TO COME
10. Extending the Cabinet & Anchoring Cabinets to the C-Channel
12. Installing Fixed Countertops Using C-channel