A countertop is just an upside-down floor. We used C-channel to hold our cabinets to the floor. We can
just as easily use C-channel to attach countertops to our cabinets. The process is straight forward, but
slightly different from the way we did the floor layout. For the floor we used centerlines. We’ll use a
different method for the countertop.
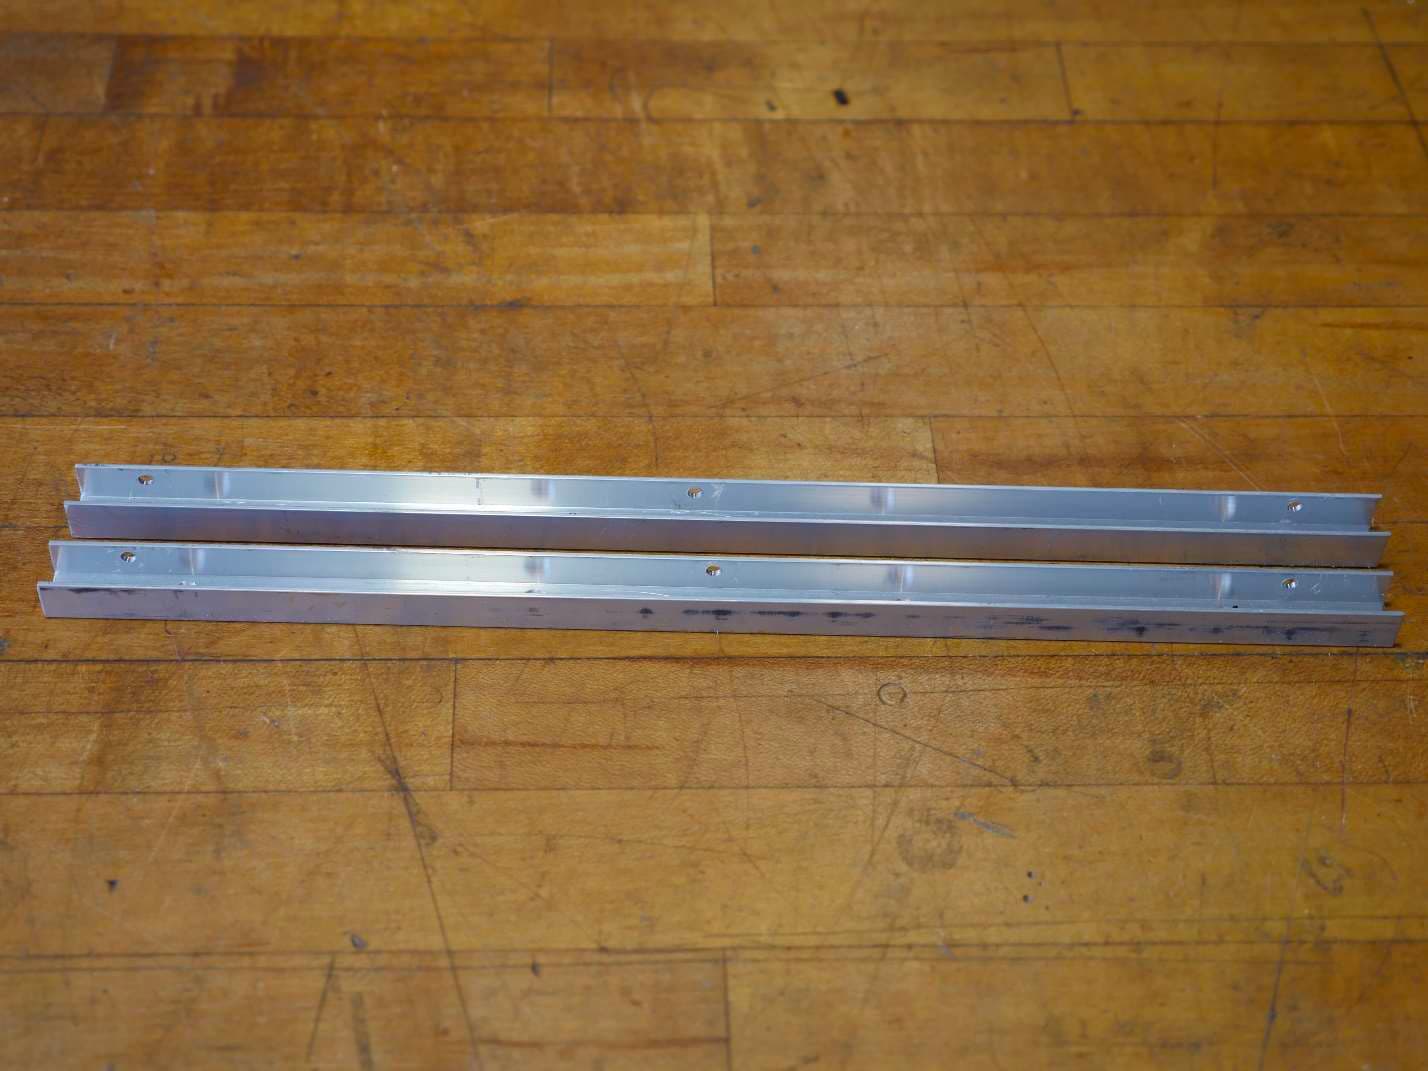
First, you need to cut your C-channels to proper length. They should be about 1 inch shorter than the
width (front to rear) of the sides of the cabinet. The inside dimension of my cabinet is 15 ½ inches.
We’ll cut two pieces of C-channel about 14 inches long.
We’ll drill and countersink holes in the bottom of the channel just as we did when we installed them on
the floor. If we’re going to make a hinged countertop we only drill the bottom countersunk holes. If we
are mounting a fixed countertop then we’ll drill the side holes on one side of the channel as well. You
can use your C-channel jig for the side holes, just make sure you only drill through one side and not
both.
Choose whatever material you want for your countertop. I’m going to make my countertop of ½ inch
Baltic birch. You can use ¾ inch MDF, Formica, Melamine, Butcher Block. About anything you want.
Cut your countertop material of choice to the size you want. I want my countertop to overhang the
cabinet by about 1 inch on the sides and front. It will be flush with the cabinet in back because the
cabinet will be mounted against the sidewall of the van.

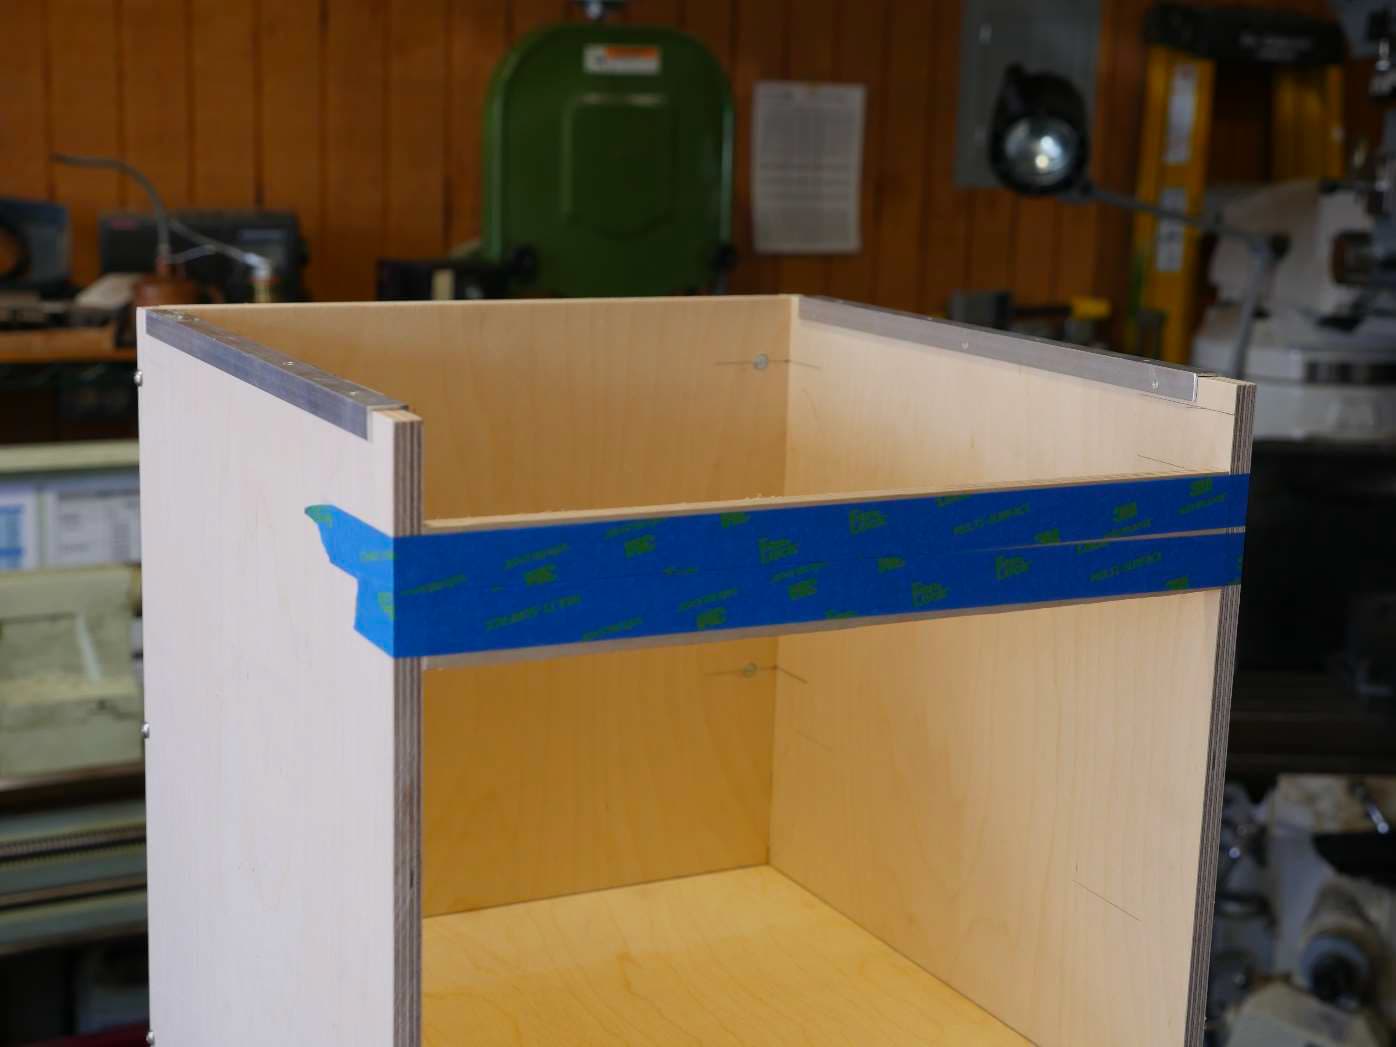
You don’t need to do the following step if you have a permanent face frame installed at the top of the
cabinet. If your cabinet is open and you want the countertop to hold everything in place then you’ll
need to do the next step.
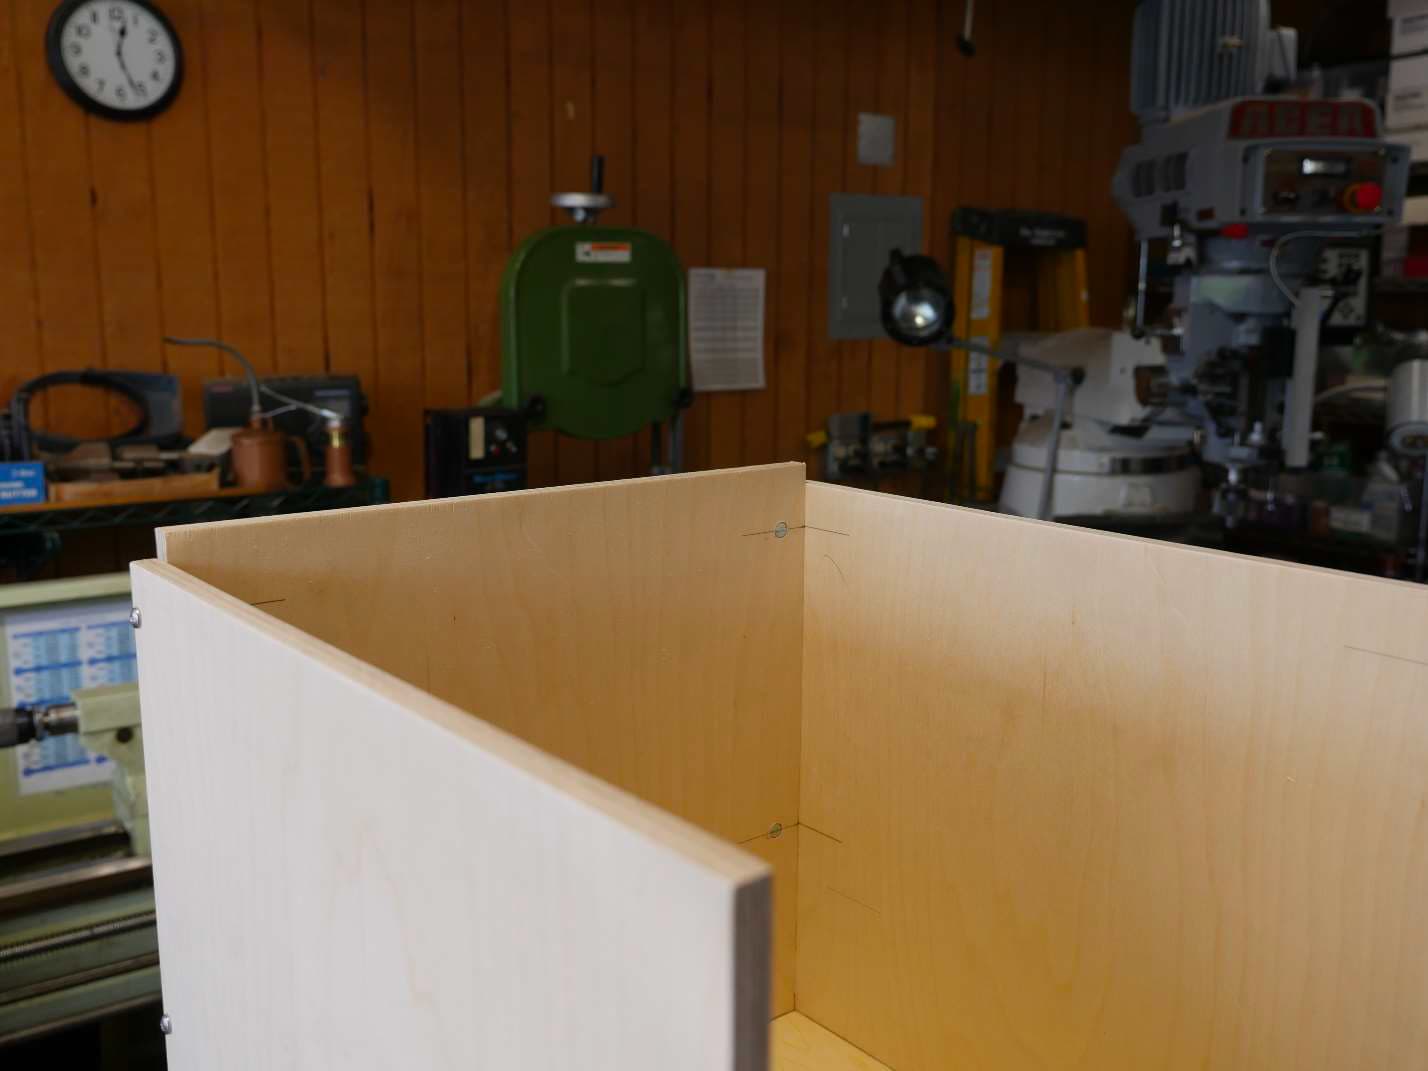
In this cabinet there is nothing to hold the top front of the plywood sides the proper distance apart. Our
countertop will take care of this problem, but while we’re doing the layout, we need to make sure that
the top edge is exactly the same width in the front of the cabinet as it is at the back. To do this we need
to temporarily clamp a face frame piece of the proper dimensions in place while we mark up the layout
for the top.
If you have a large cabinet clamp then by all means use it to hold the face frame piece in place. If you
don’t have a clamp then you can hold it in place with blue painter’s tape. Put the face frame piece in
place, then stretch the painter’s tape tightly across the cabinet to hold the frame piece in position. Make
sure that there are no gaps between the face frame piece and the sides of the cabinet. Now place your
C-channel on top of the cabinet sides.
Position your C-channel pieces where you want them. Place your countertop in position on top of the
cabinet and C-channel pieces. Make sure that it is centered or that the overhang on each side is what
you want. I want an equal overhang on both sides so I’ll double check that both sides are the same.
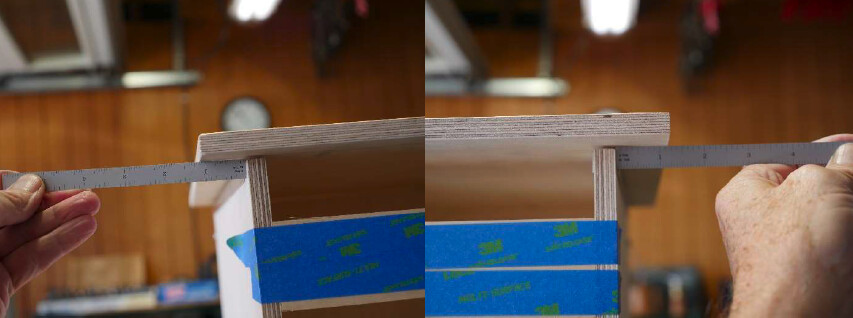
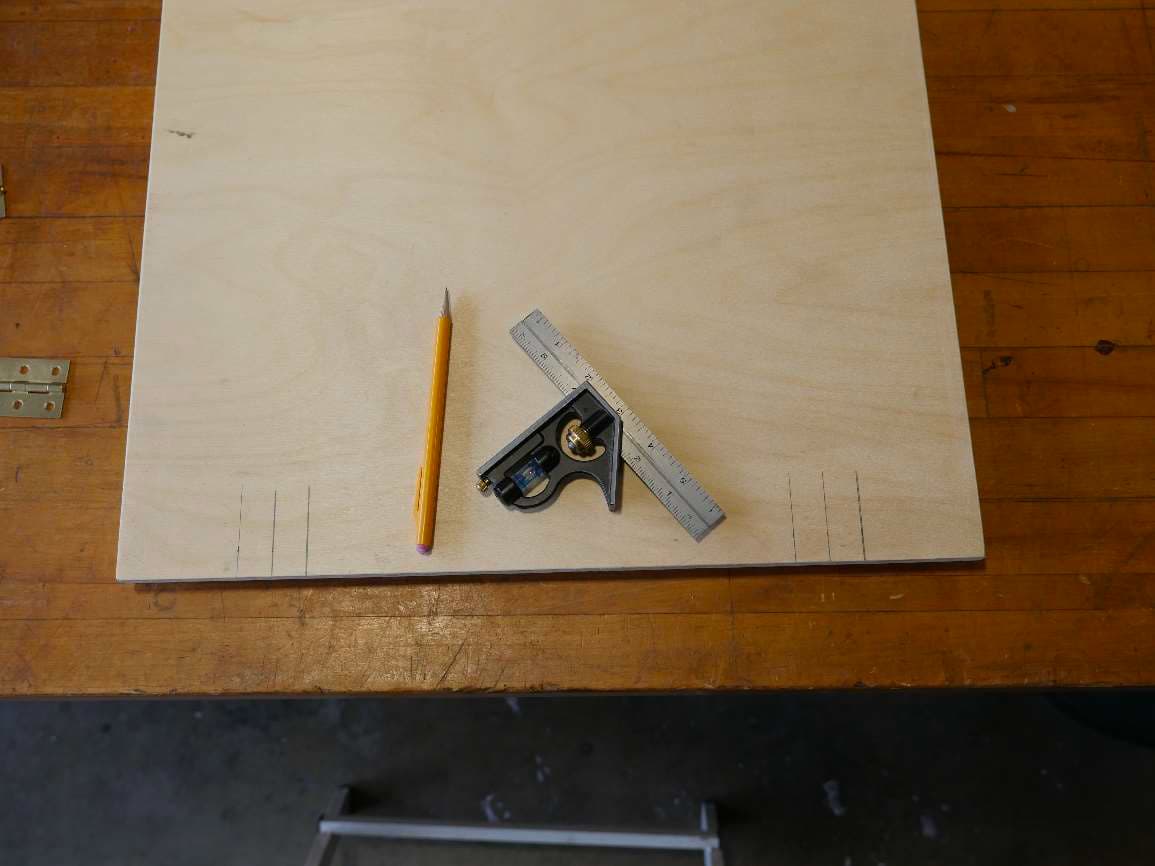
Once you are happy with the position of the countertop, run a pencil along the C-channel on both the
inside and outside edges of both sides of the cabinet. Be careful that the countertop doesn’t move
while you are making your marks. Run your pencil the full length of the C-channel.
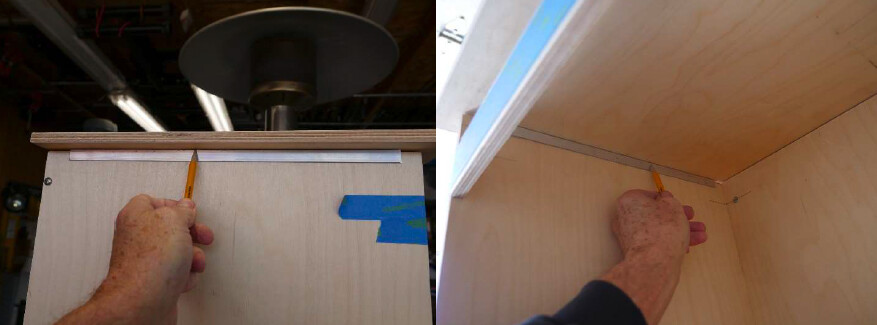
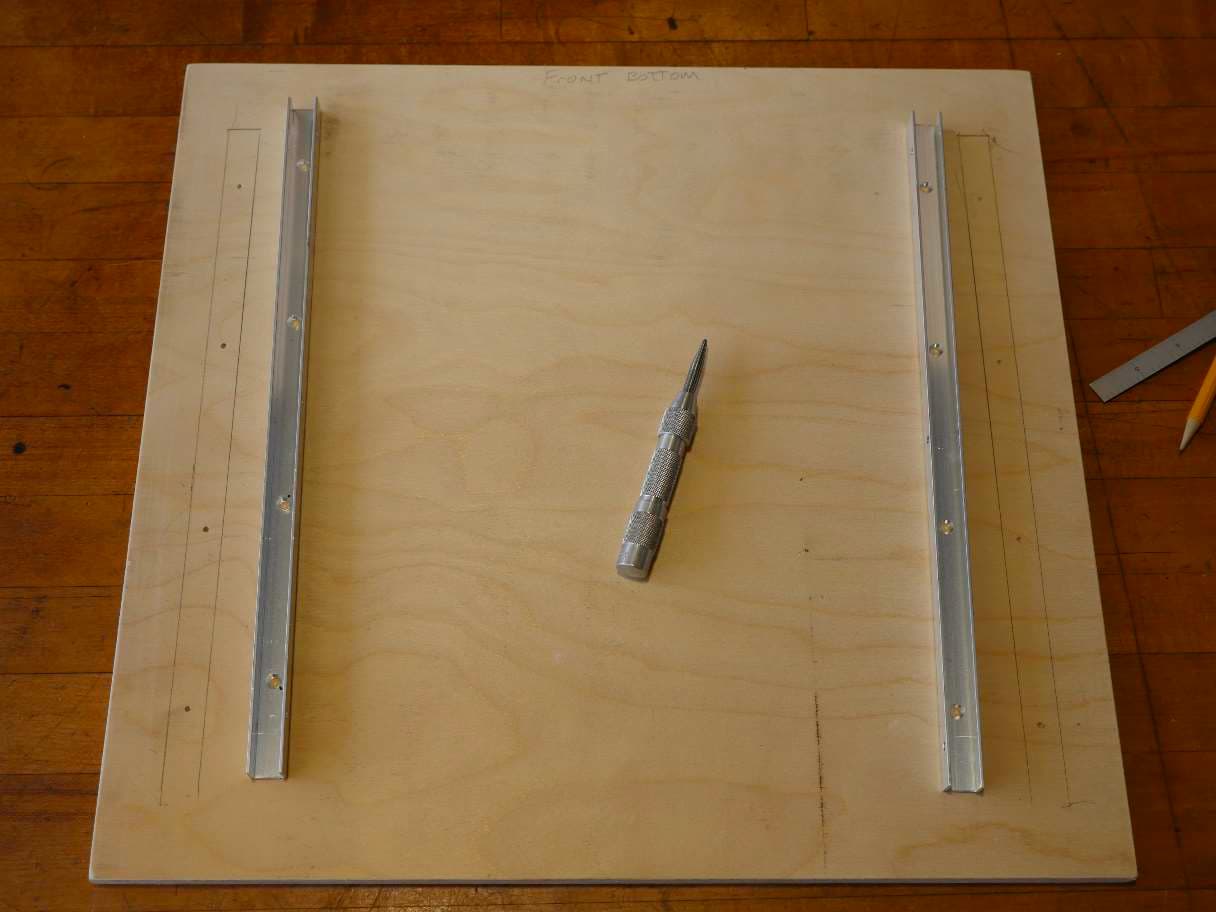
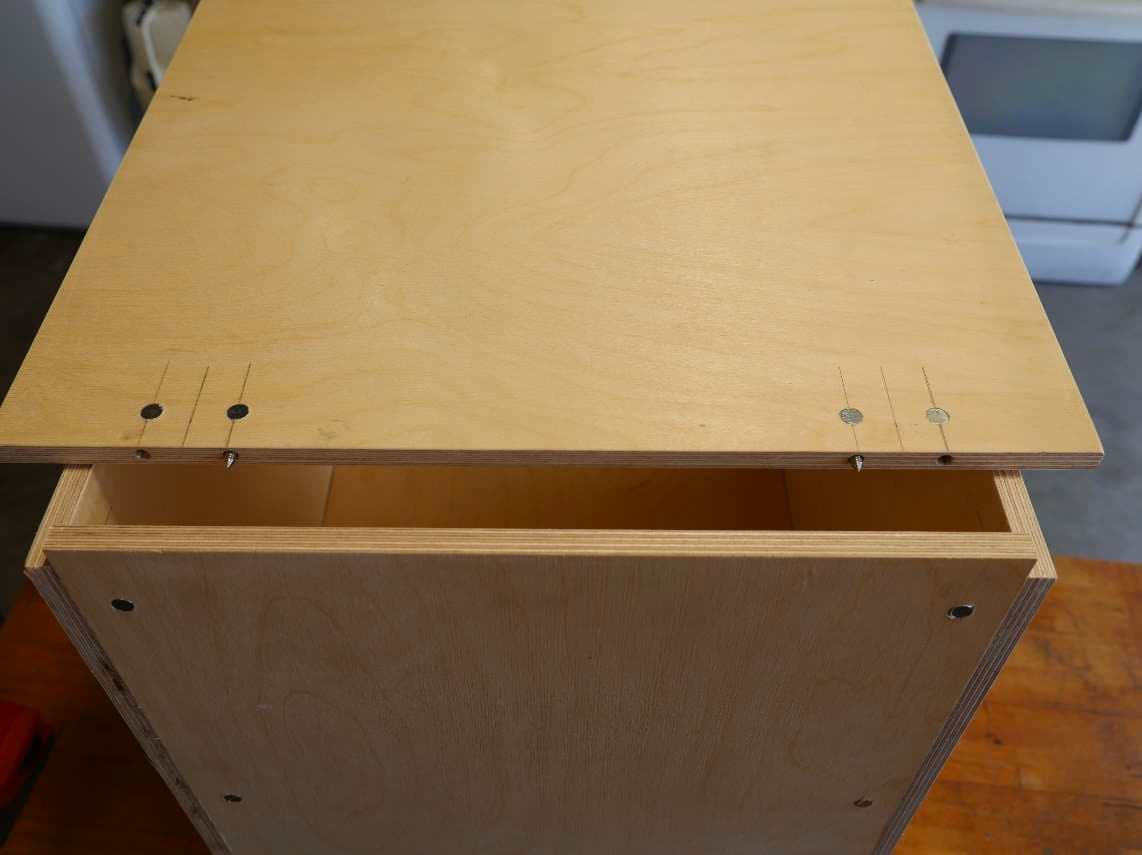
Remove the countertop and place it upside-down on your workbench. You should have two sets of
parallel lines showing the exact position to mount the C-channel.

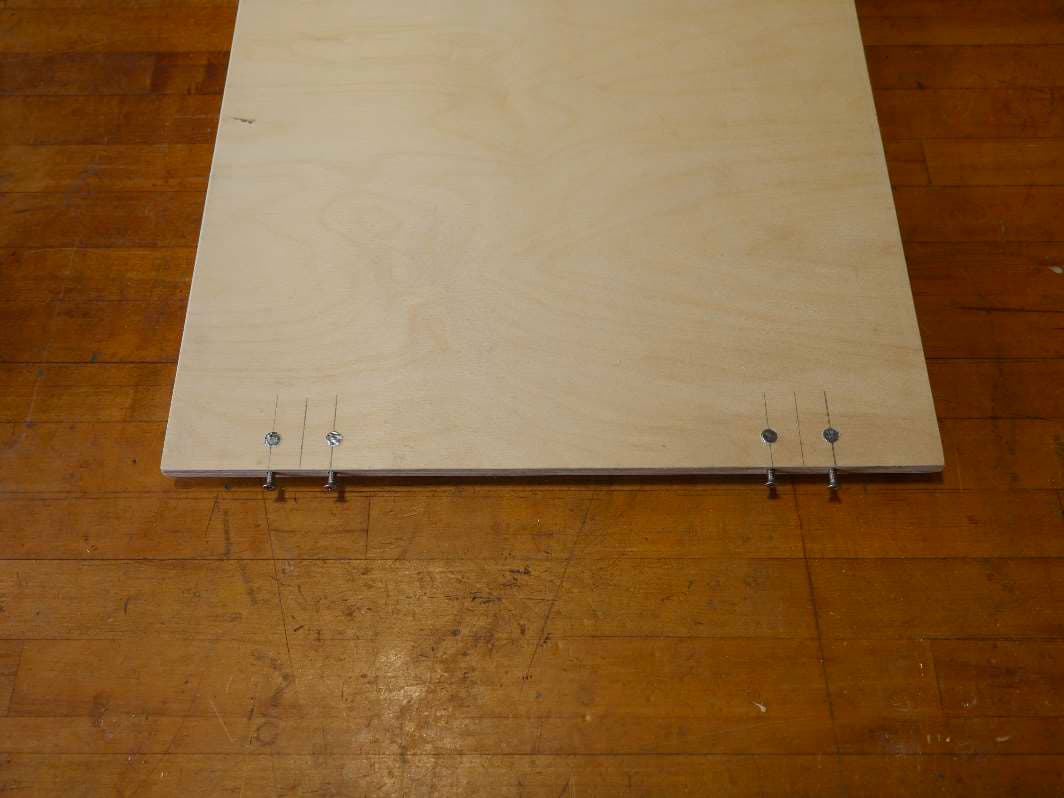
Set the C-channel in place between the parallel lines. Make sure the C-channel is oriented so that the
side holes in the C-channel are facing towards the inside of the cabinet.

Using your center punch, make a punch mark in the center of each mounting hole.
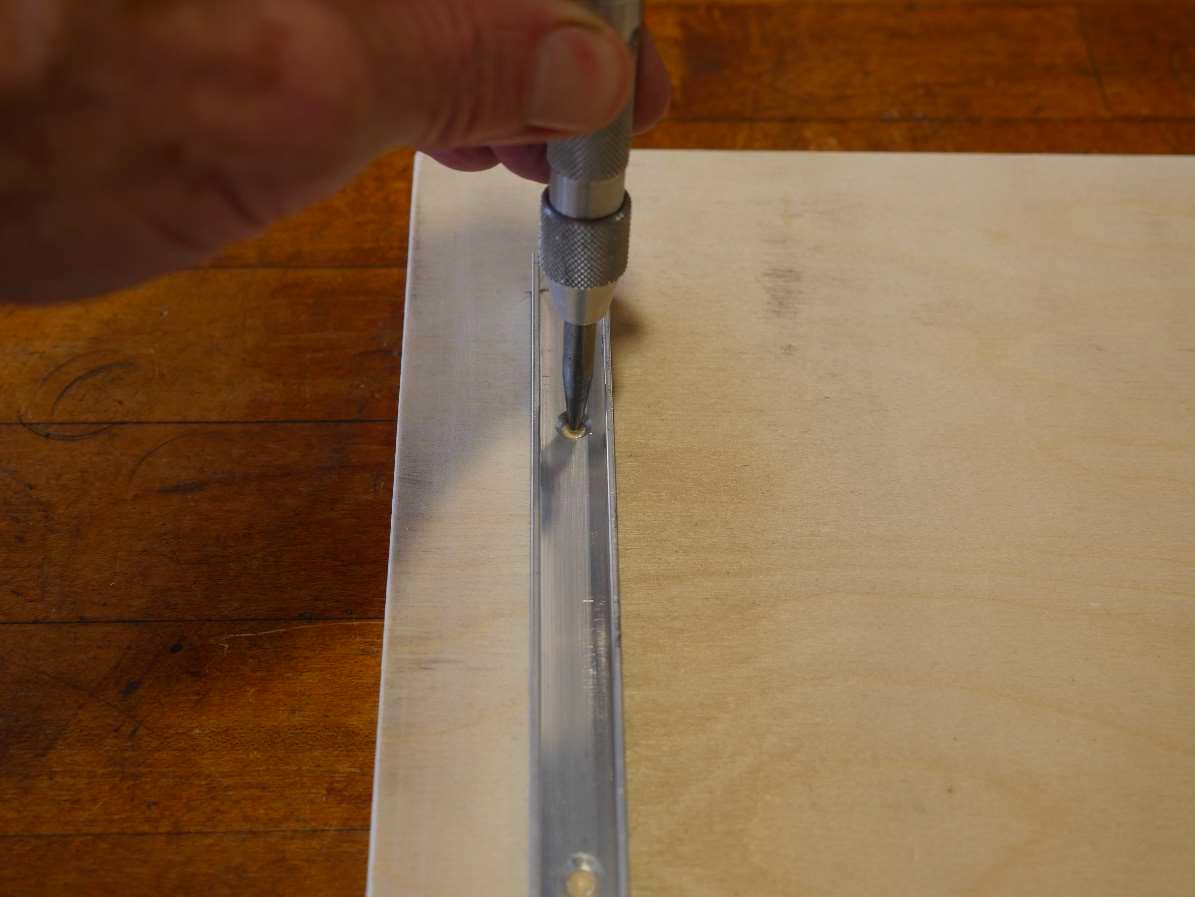
Now mount the C-channel to the countertop using appropriately sized screws. Since this is ½ inch
plywood, I’m using #6 screws ½ inch long.
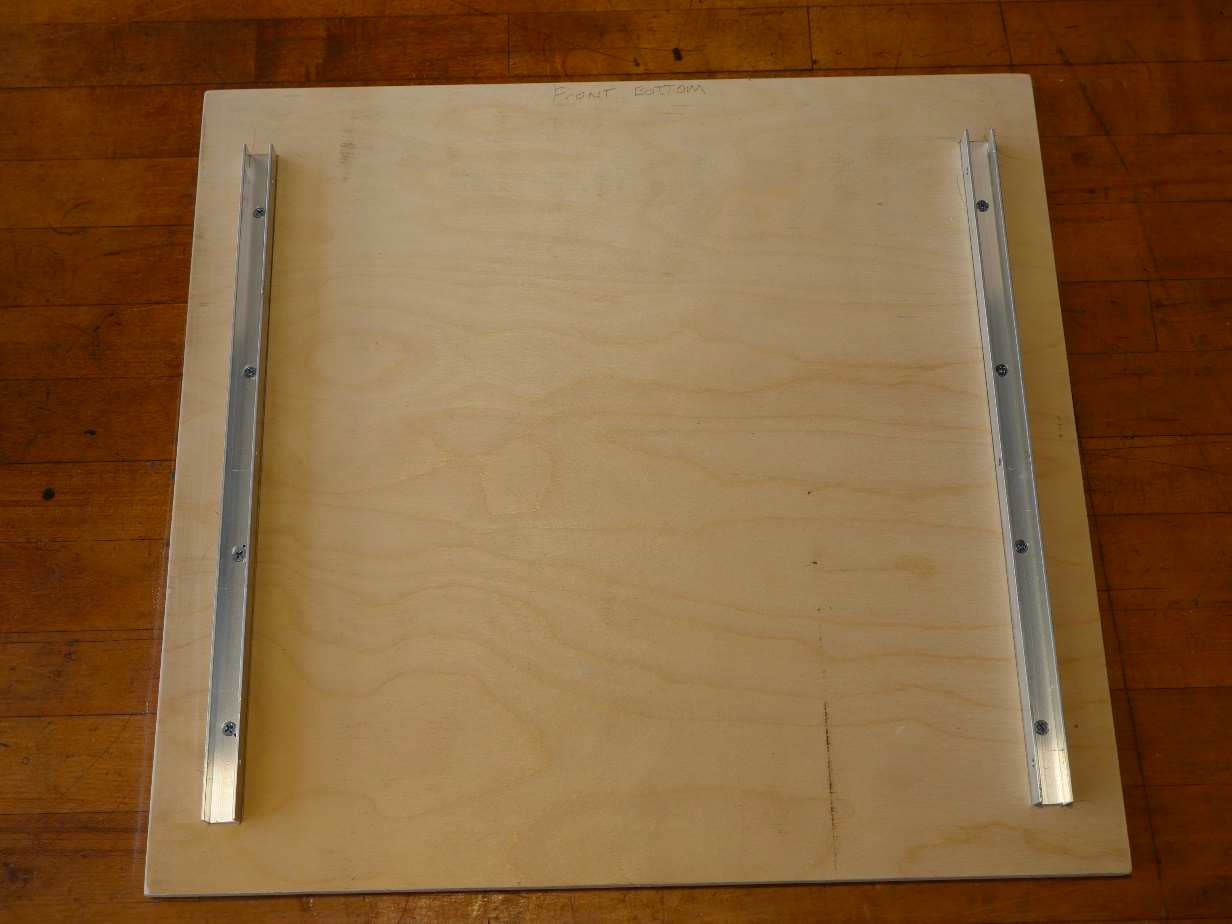
Now you can set the countertop in position and secure it with ½ inch #6 screws to the sides of the
cabinet just as we secured the cabinet to the floor mounted C-channel.
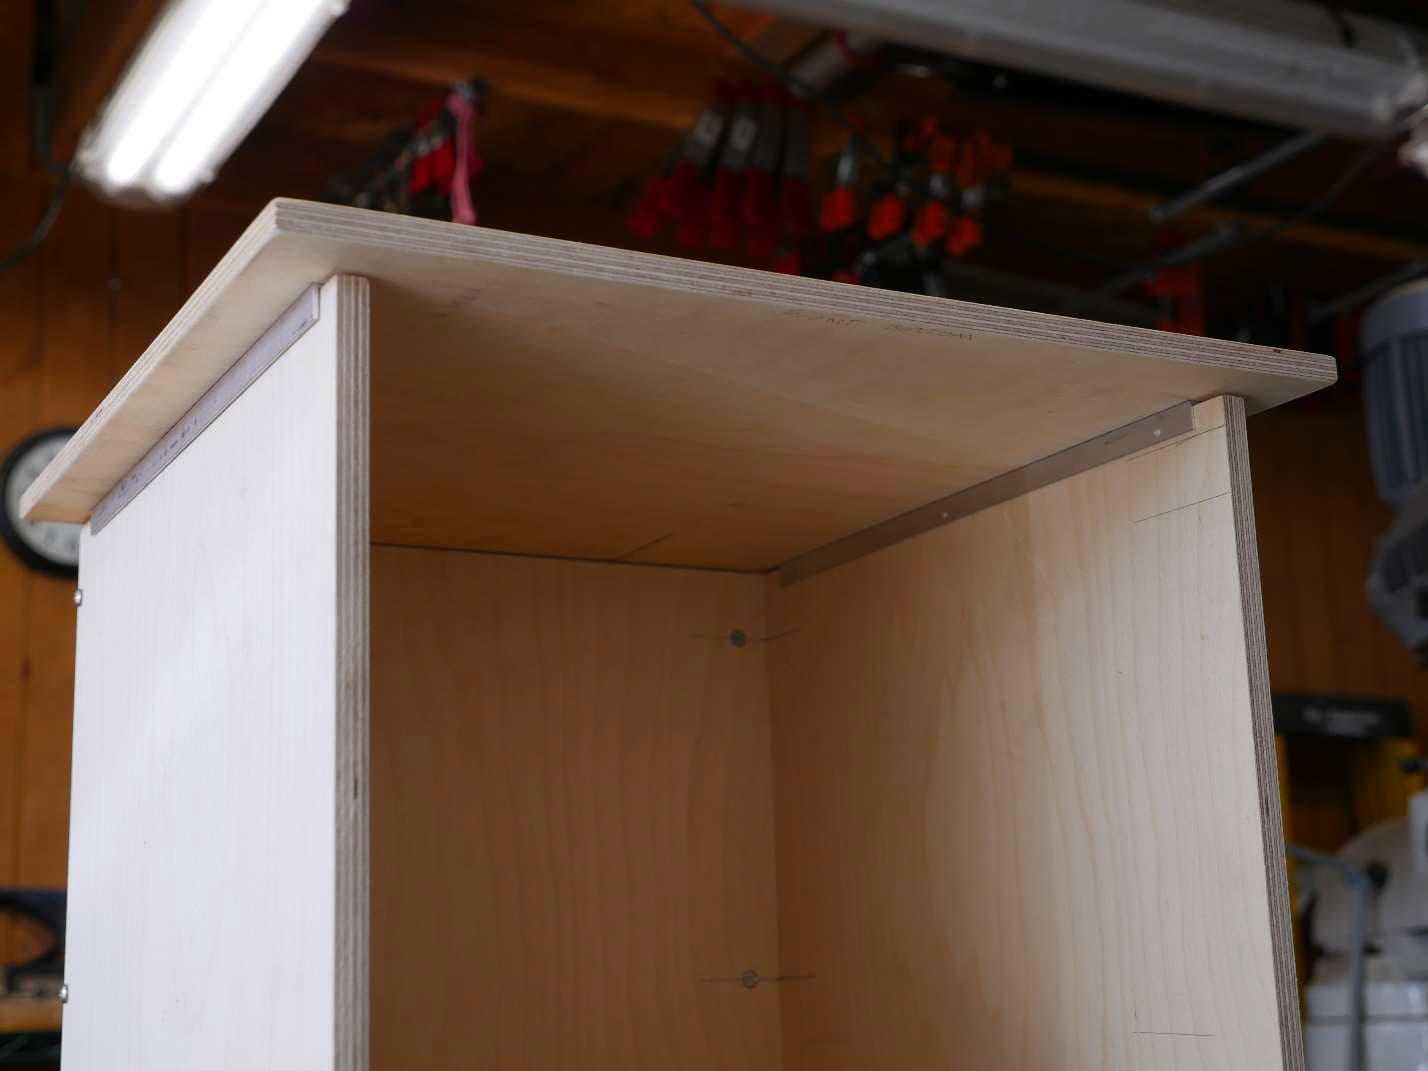
With the countertop securely holding the cabinet side panels in place, you can add a cupboard door or
install drawers to complete the cabinet without loosing space at the top for a face frame.
Often your countertop will span several cabinet sections. Follow the above instructions, only you’ll need
to prepare a C-channel section for every cabinet divider that the countertop spans. Lay the countertop
in place, mark both sides of every C-channel location, and then proceed as above.
Sometimes you may find it desirable to add a section of C-channel to the countertop to capture the rear
cabinet panel. I’ve seldom found this necessary. I think the only place I’ve done this is when my cabinet
spans the open side doorway of the van and the sink and/or cooktop are mounted here. Then I often
want access to water or propane tanks in this area so there is no lower back panel and therefore no C-
channel mounted to the floor where the back panel would be located. In that case I’ll secure the
countertop to the upper back panel/rear frame with a piece of C-channel. This will help keep the
cabinet square.
Installing Hinged Countertops Using C-channel
I often want a hinged countertop to give me a storage bin instead of a drawer, or, as I’ve done in my
van, provide access to a top loading refrigerator/freezer.
The basic construction is the same as for the fixed countertop with a few minor variations.
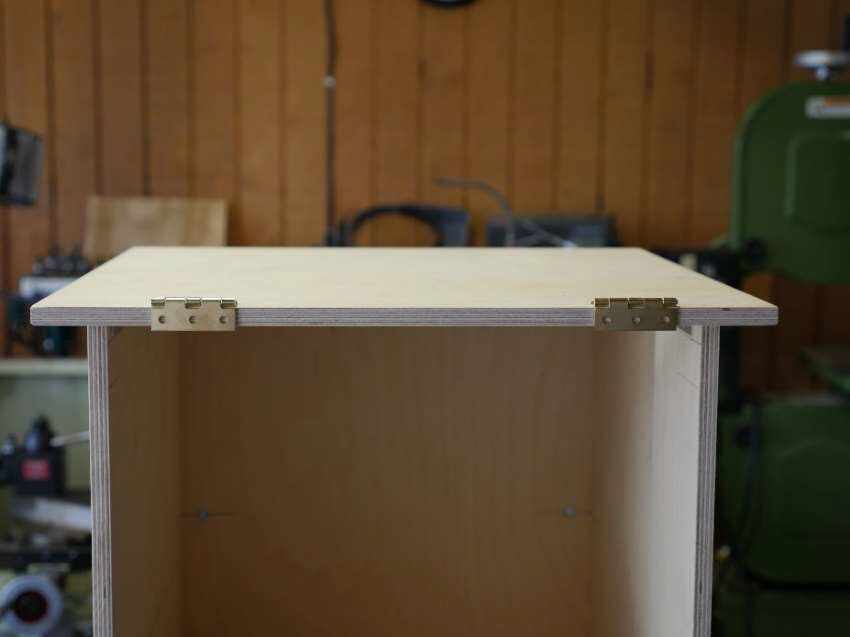
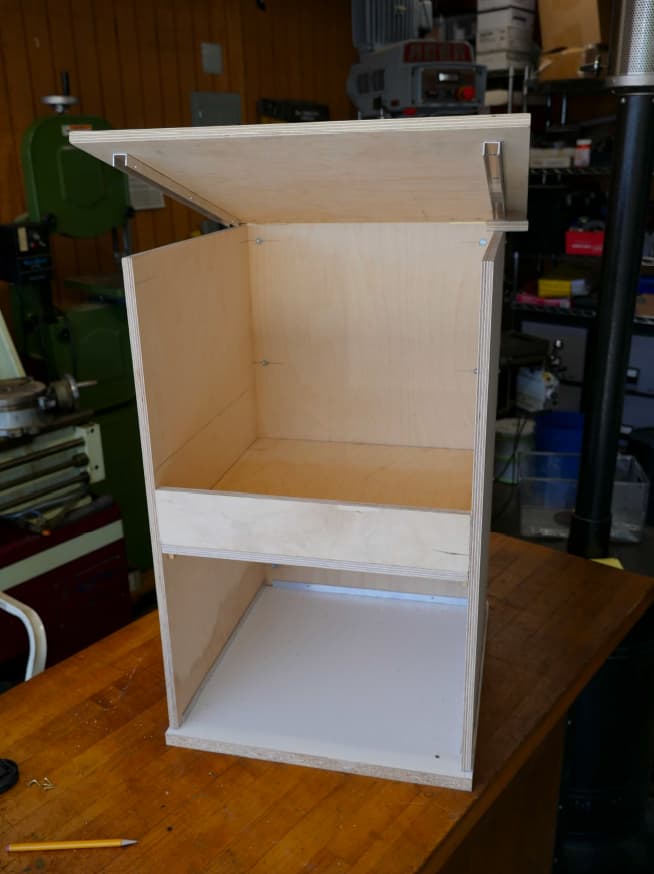
First, the cabinet must be built for a hinged top. In our fixed countertop install, all the cabinet panels
are the same height. For a hinged top, the rear panel must be taller than the side panels by the
thickness of the countertop. My countertop is ½ inch thick so my rear cabinet panel must be ½ inch
taller than the side panels.
Selecting Your Hinges
You want the wings of the hinge to come as close as possible to being the same width as the thickness of
the countertop. This is not much of a problem if you are using butcher block as it us usually solid wood
and is about 1 ½ inches thick. Plenty of room to mount a hinge. However, ¾ inch MDF, ¾ inch plywood,
and ½ inch plywood can pose some problems. For starters, the mounting space isn’t very wide. A 2 inch
hinge works well for ½ or ¾ inch material. You also want to make sure that all the mounting holes in
each wing are in a straight single row with none of the holes offset.

Here you can see these hinges are slightly large for ½ inch plywood but they will work fine. They’d be
perfect for ¾ inch plywood or MDF.
One side of the hinge has to mount to the back edge of your countertop. MDF is just pressed sawdust
held together with some glue. Plywood isn’t much better. It’s thin layers of wood held together with
glue. Neither of these materials hold screws well on their edges. In our rolling earthquake, the screws
will often fail and pull out of the wood. When that happens, reattaching the hinge is almost impossible.
What to do? Cross dowels to the rescue. We’ll use cross dowels to mount the hinge to the edge of the
countertop. If you’re using solid wood countertops like butcher block, you can use regular screws and
you won’t need to install cross dowels.
The other side of the hinge mounts to the back of the cabinet. Here we can either use plain wood
screws or we can use T-nuts. For this install I’ll be using the screws that came with the hinges.
Installing Cross Dowels in the Countertop
We can use our cross dowel jig to drill the holes but first we must layout the hole positions. We need to
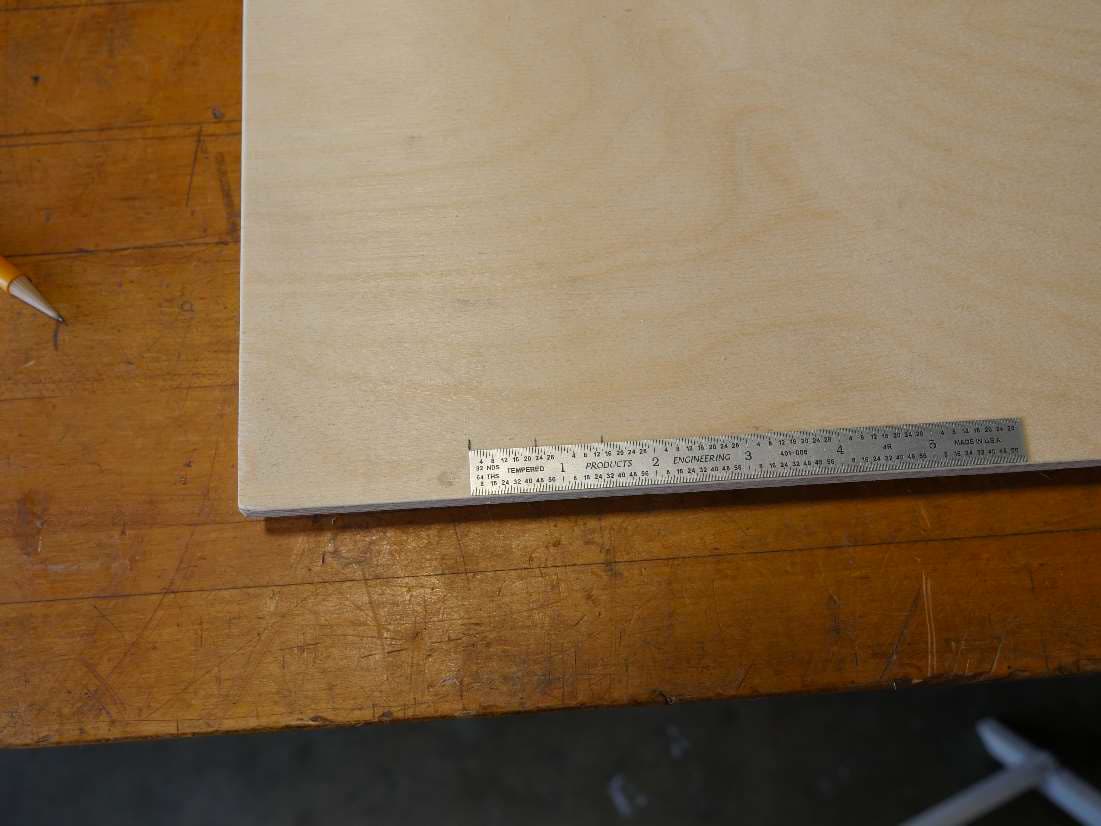
know how far apart the mounting holes in the hinge are. The easiest way is to use a 6 inch engineering
rule. These are very accurate and the markings are thin and easy to read. I use mine for every
measurement that is under 6 inches when the arm on the combo square would be in the way.
The big box hardware stores have 6 inch engineering rules at a reasonable price. At Home Depot they’re
called a 6 inch Pocket Ruler and cost about $2. Empire # 2730 or 27303 should both do the job.
It is difficult to accurately measure open holes from center to center. It is much easier to measure from
one edge of a hole to the same edge of the next hole. Edge to edge or center to center is the exact
same distance.
Lay the hinge on a flat surface. Line up the edge of the engineer’s rule against the center of the left side
of the left most hole in one wing of the hinge.
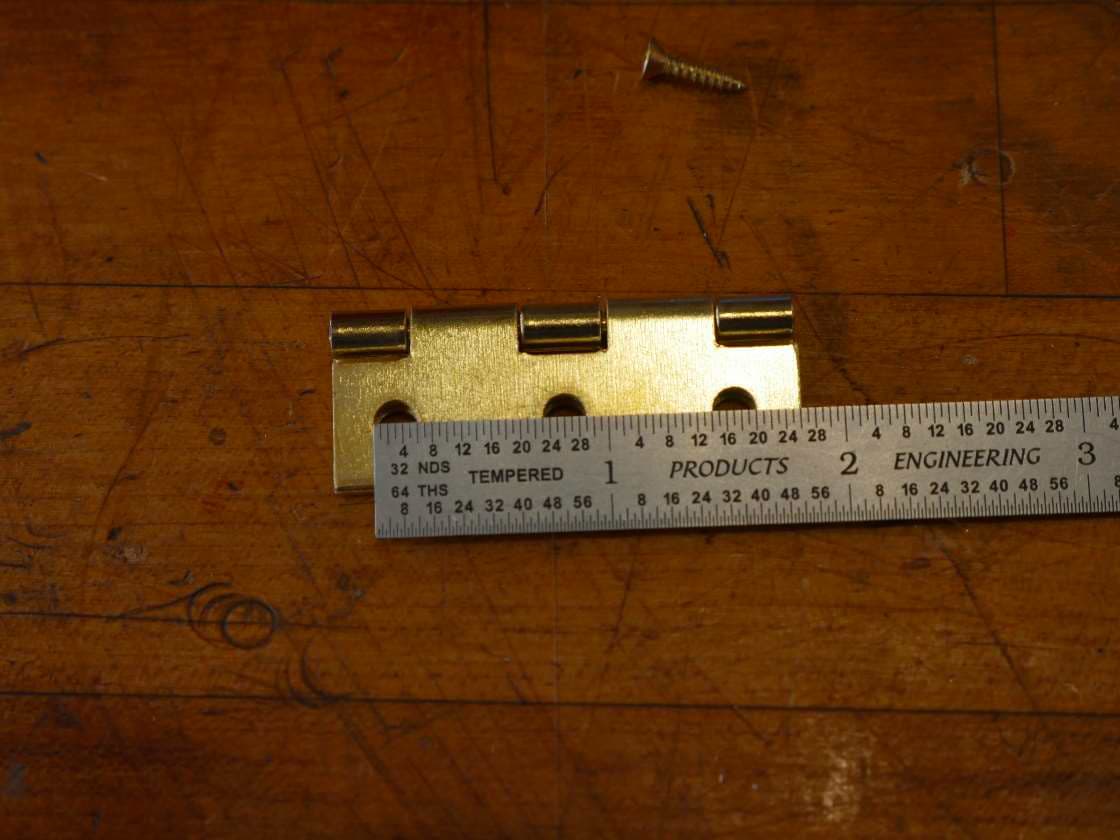
In the above photo I’m using the side of the rule marked in 32nds of an inch. Look closely at the rule.
You’ll see that the left most edge of the center hole is 23/32nds from the left most edge of the left hole.
You can also see that the left edge of the far right hole is 1 14/32nds from the left most hole. Now that
we know the distance between our mounting holes we can get on with laying out our cross dowels.
Decide about where you want to mount your hinges. I usually come in about the same distance from
each side. For this install I’ll come in 2 ½ inches and make a small mark.
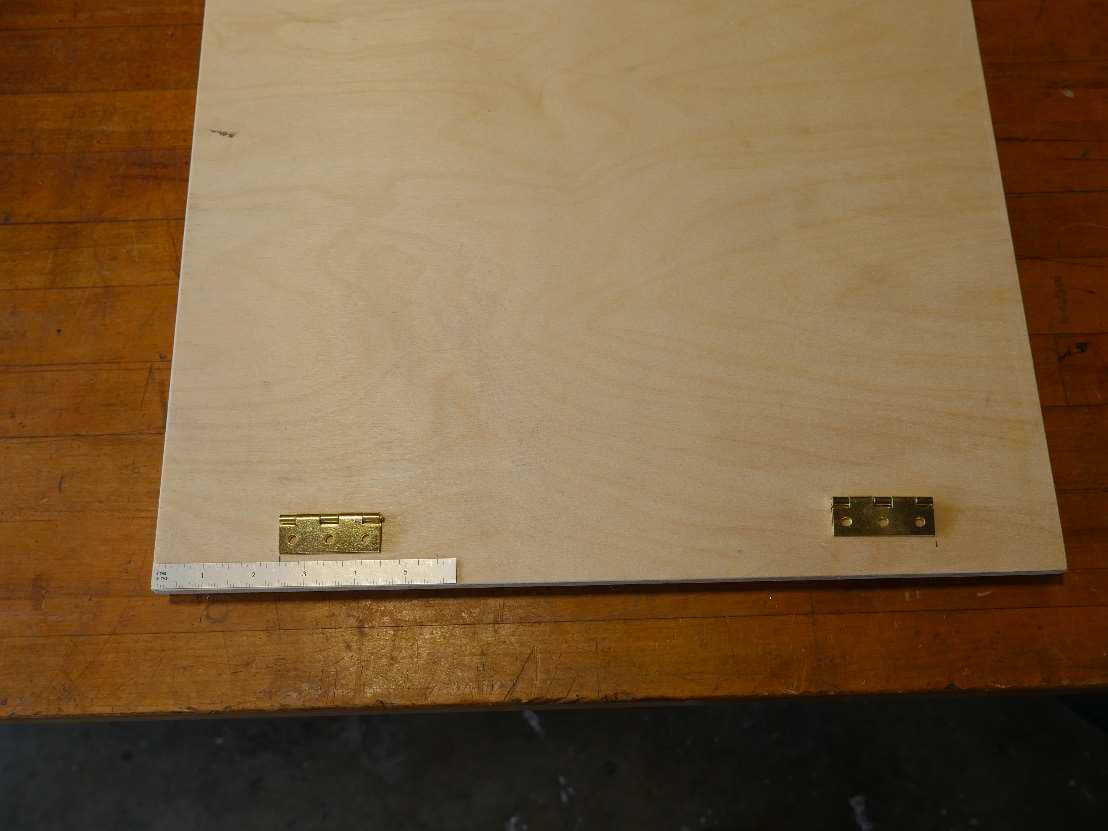
This mark is not going to be the edge of the hinge, but represents where we’re going to put the left most
screw in one hinge and the right most screw in the other.
Now lay the engineering rule so that the 0” end of the rule is right on the left most mark on the
countertop. Now, make a mark at 23/32nds, and another mark at 1 14/32nds. Rinse and repeat at the
other hinge position.
If all has gone well, the holes in the hinge should line up perfectly with your marks.

Using your combo square, extend the lines as you would for any cross dowel installation.
As you can see the lines are pretty close together. Cross dowels are very strong. Three cross dowels
would be overkill so we’ll install 2 cross dowels for each hinge rather than three. We can always go back
and add another one if needed.
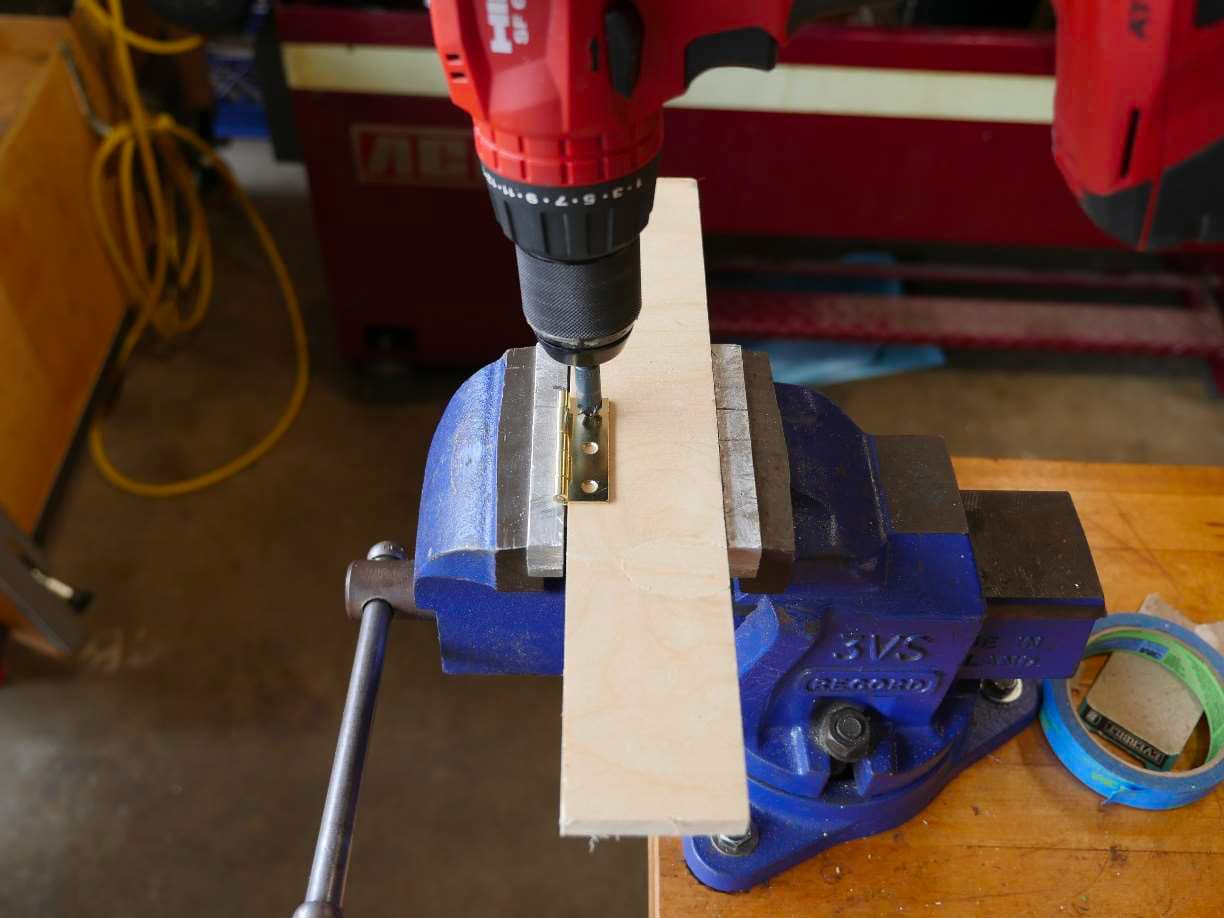
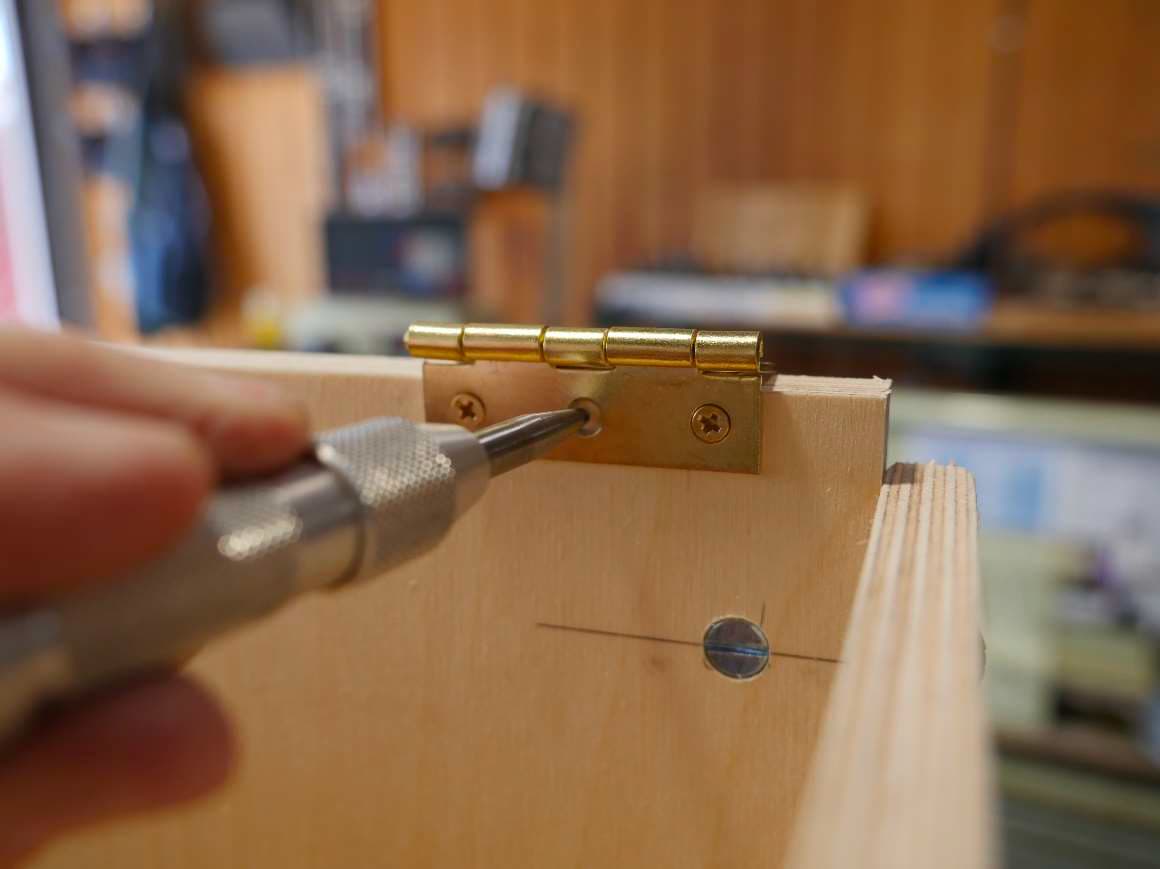
Our cross dowels are 10-24. The hinges want much smaller #4 screws. We’ll have to modify the hinge
to accept 10-24 flat head screws on the side that attaches to the countertop.
Secure a hinge in a vise using a small piece of wood as shown in the photo.
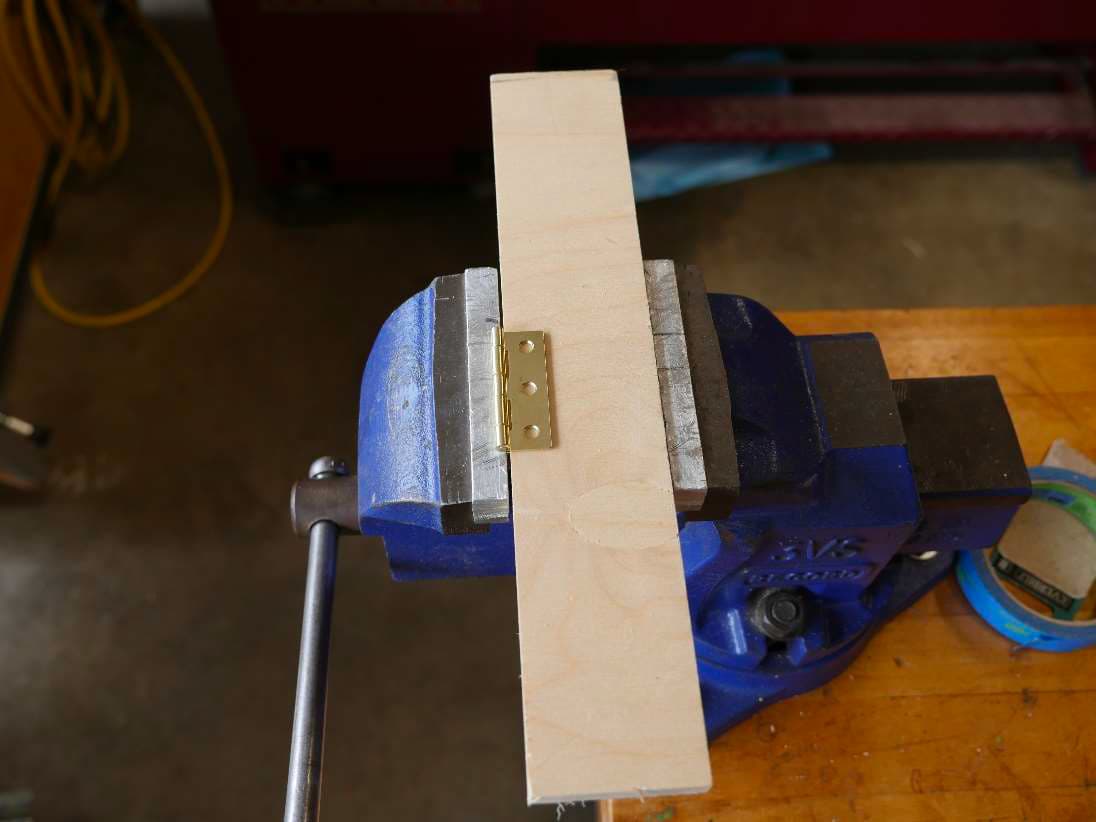
Using your 3/8ths countersink, widen the outer two holes on one side of each hinge until a 10-24 flat
head screw will sit flush with the hinge.
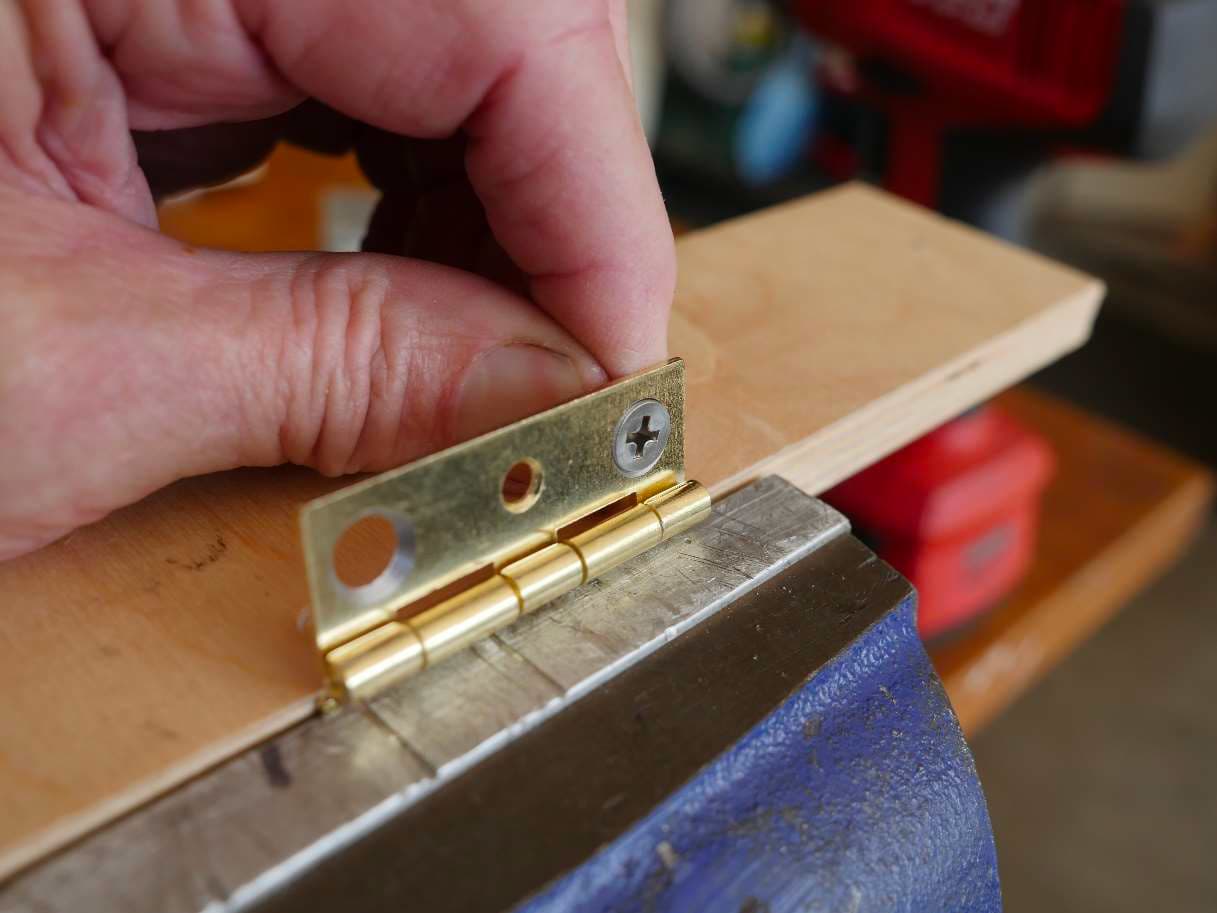
Check to make sure your modified hinges fit the cross dowel locations in countertop.
Un-install the hinges and place a 10-24 locating point in the two outer cross dowel positions. Set the
countertop in position on top of the cabinet. Push the top back against the rear of the cabinet.
Move the locating points to the inner cross dowel positions and again, push the countertop back against
the rear cabinet panel.
You should end up with four dots, showing the locations for the screws that will attach the hinge to the
rear panel.
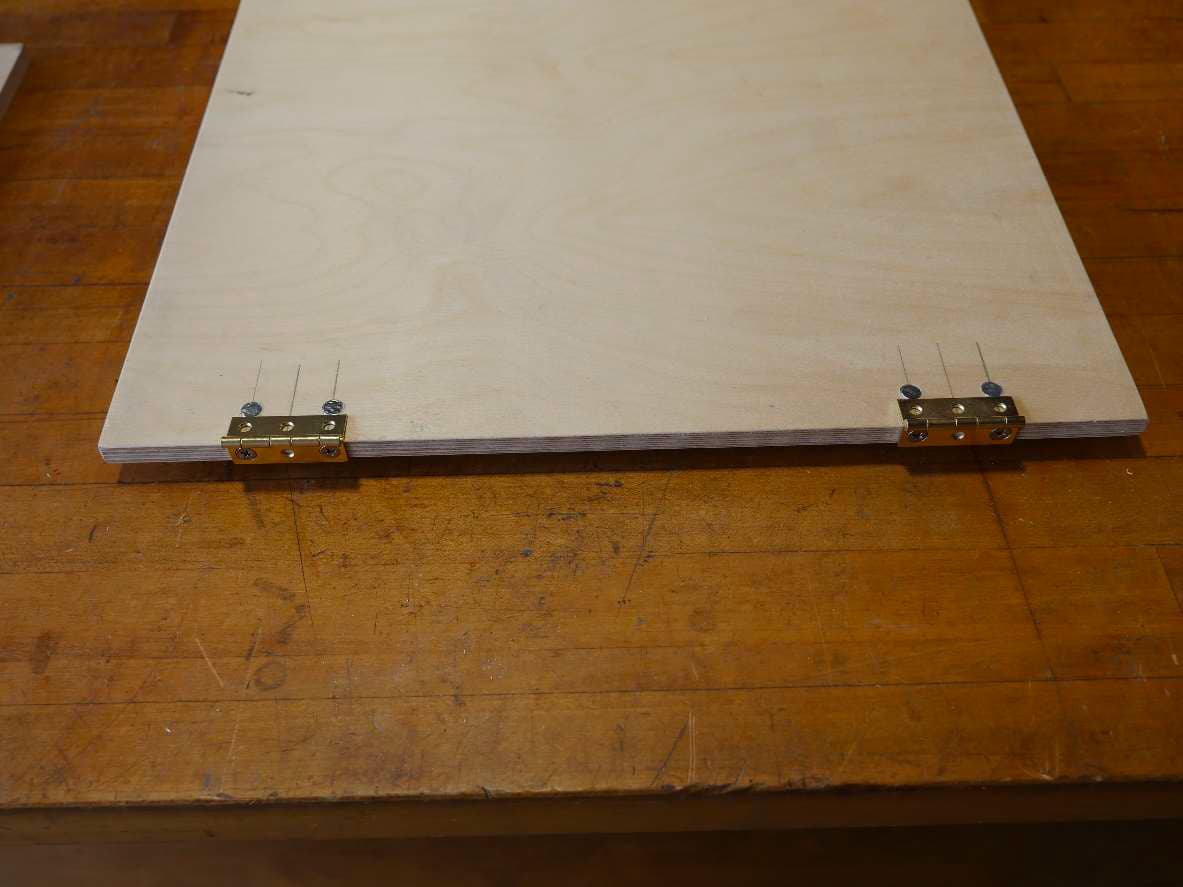
Using your center punch, punch the four hole locations. Install the hinges to the rear panel using the
screws provided with the hinges. Now punch the center hole for each hinge and install the center
screws.
Using 10-24 flat head screws attach the countertop to the hinges.
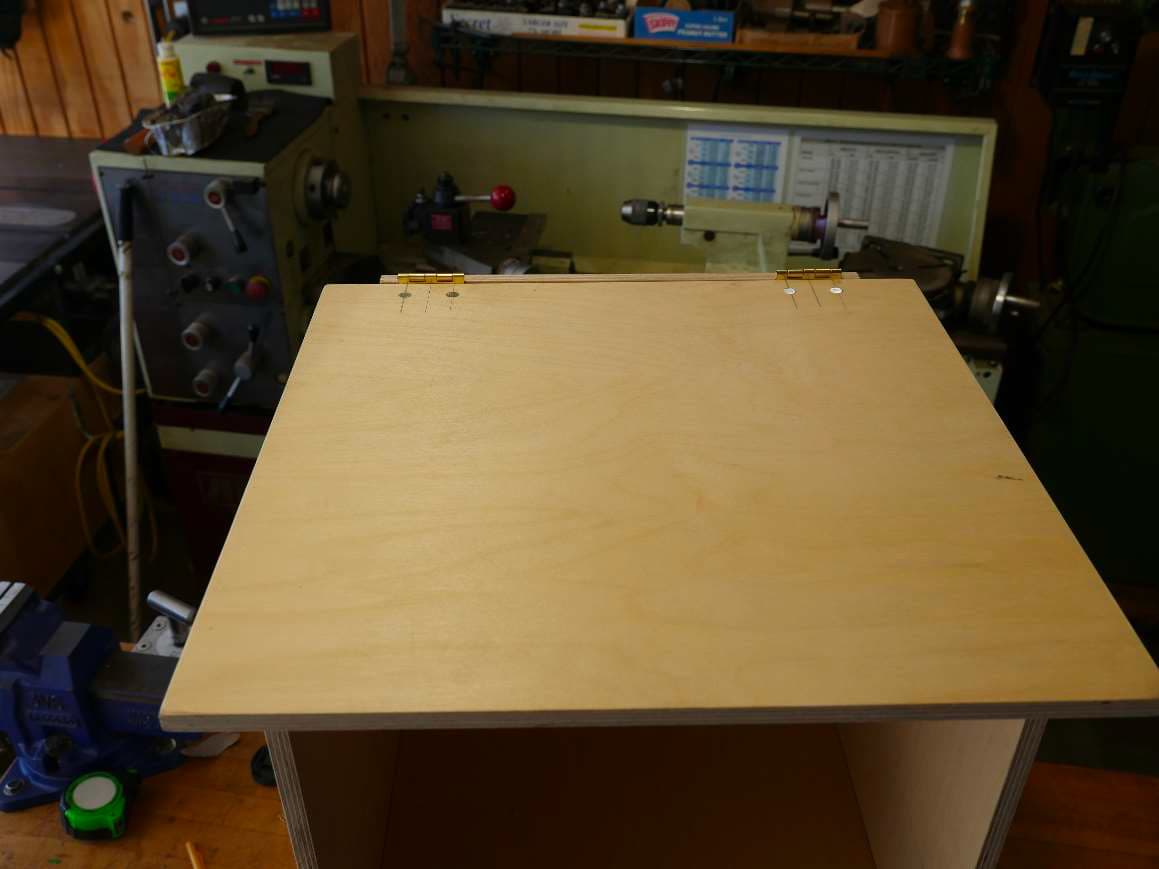
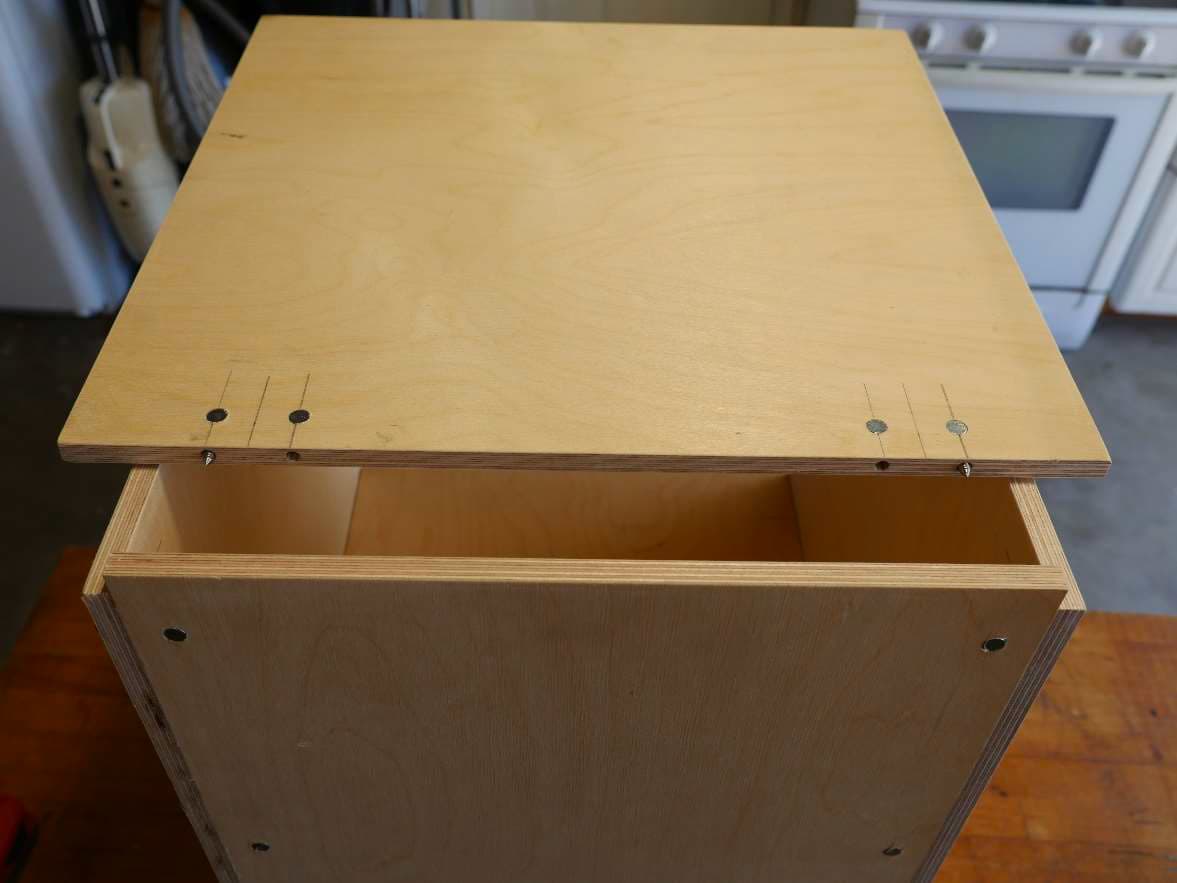
You now have a hinged top on your cabinet. You can close in the front to make a deep bin. You can
make a shallow tray on top accessible under the hinged top with drawers or a cabinet beneath. Or, you
can install a top loading fridge/freezer and hold it in place with a section of face frame across the front.
This completes the tutorial for using C-channel and Cross Dowel construction for camper van
conversion.
11. Dividing Cabinet Space
13. Ceiling and Wall/Ceiling Transition