Bed Platform: Introduction
The bed platform serves as the top of the lower cabinet section.
In securing the bed platform to the rear panel and middle divider panels we’ll use the extended layout
lines we drew on the floor to locate the centerline of the divider and rear panels. Doing this will assure
that all the panels will be perfectly vertical at 90 degs to the floor. We’ll also decide where to put our
cross dowels and use their position to determine where on these centerlines to drill the through holes
to properly mate with the cross dowels. Nothing new here, we’re using the same process as we did in
our two previous tutorials.
However, there is an additional challenge that we’ve not yet addressed. The top platform will sit on top
of the rear panel and middle cabinet dividers, but the two ends of the platform will fall somewhere in
the middle of the head and foot boards where there are no existing layout lines for us to use.
You’ll have a similar problem whenever you want to install a shelf on the inside of a cabinet. There will
most likely be no previously drawn layout lines.
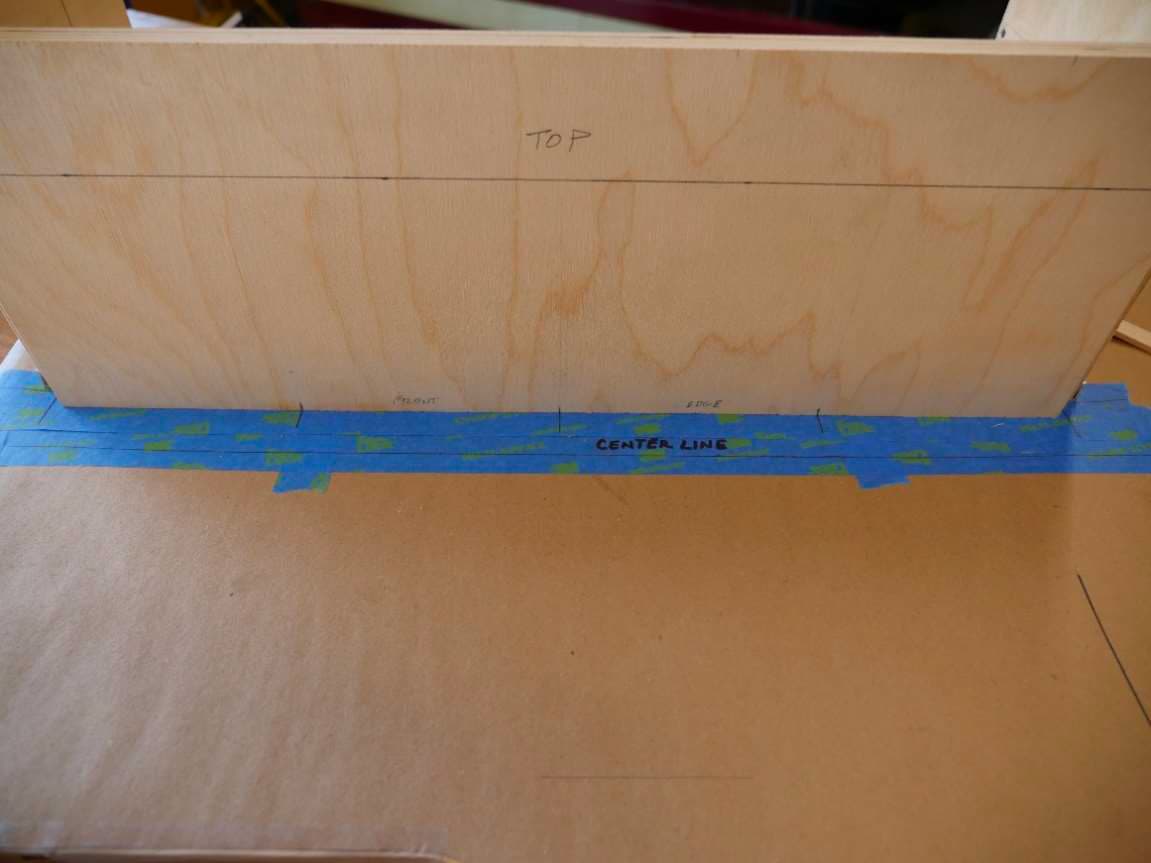
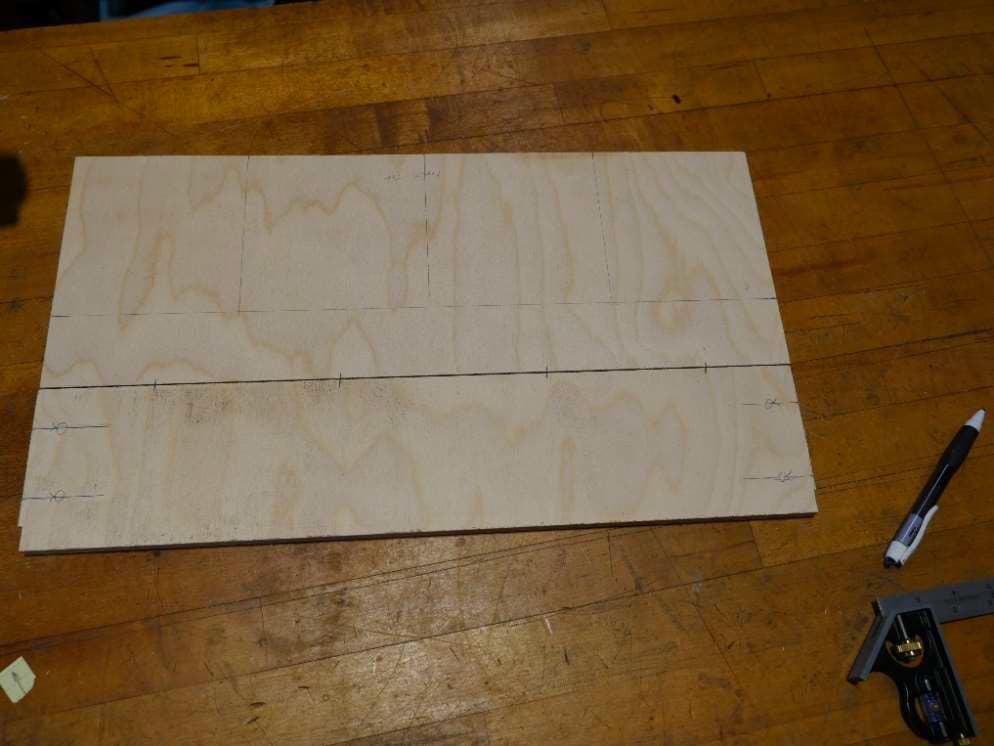
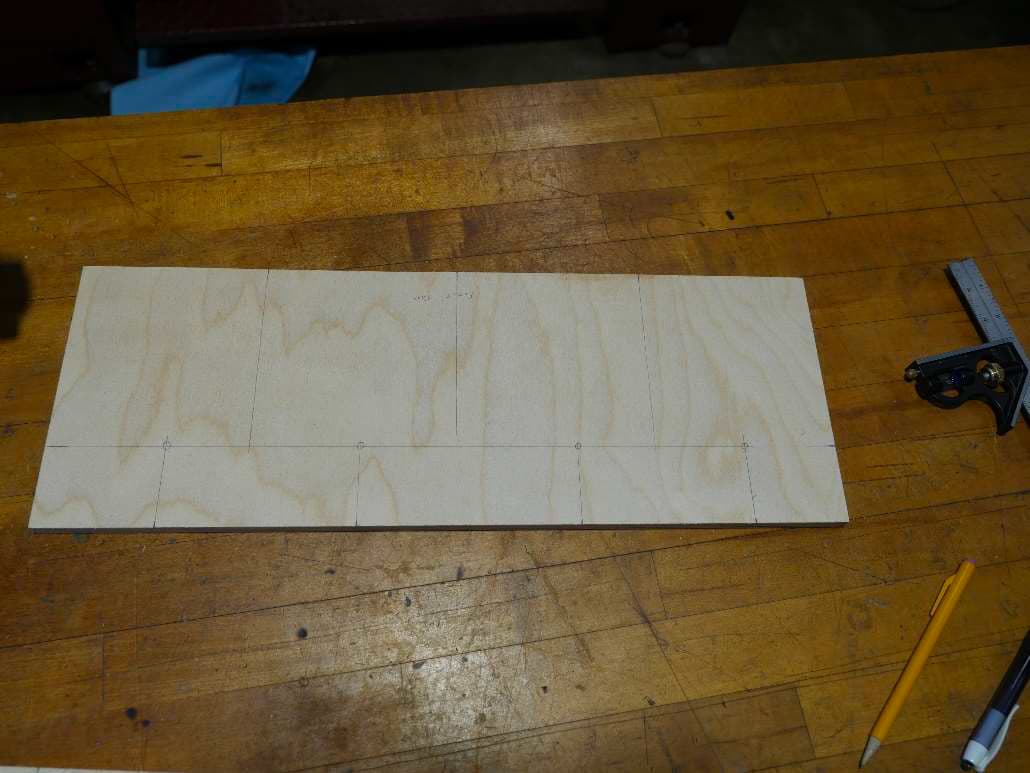
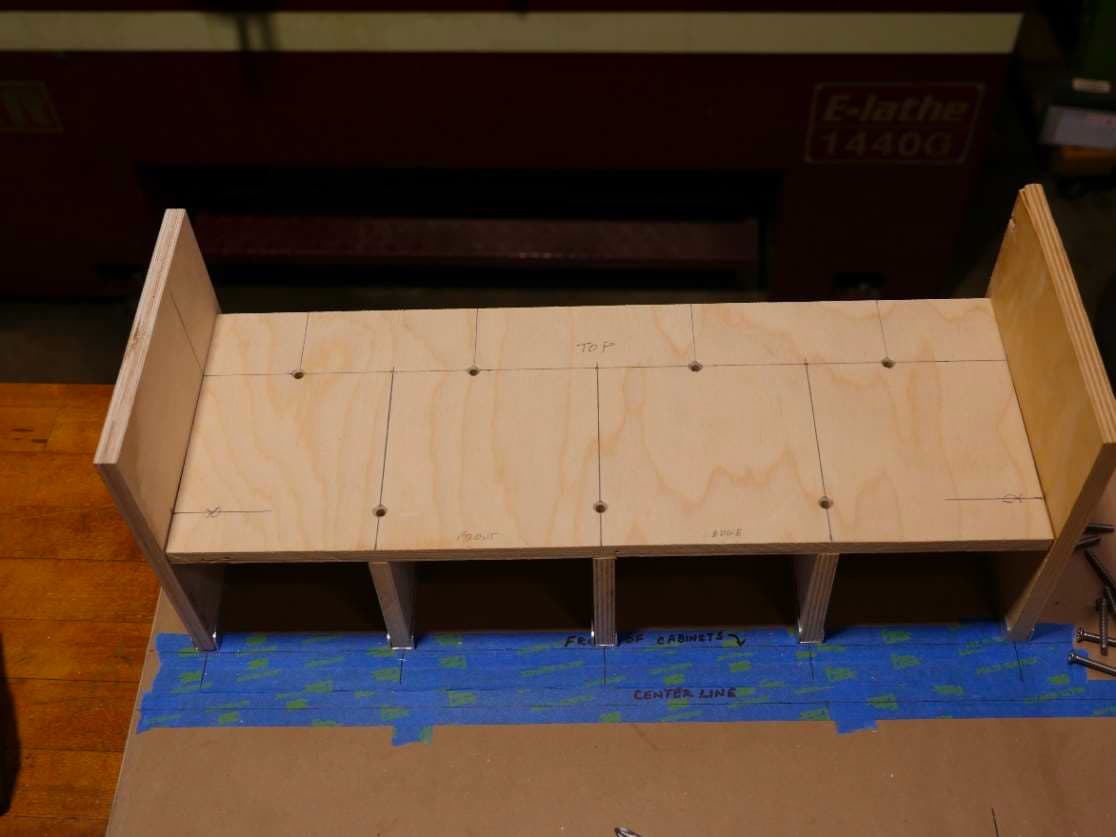
This is a photo of what our completed layout will look like.

Bed Platform: Marking the Position of the Rear Panel
We’ll start by locating the centerline of the rear cabinet panel. You might be able to set the head end of
the bed platform in front of the headboard, line up the front edges of the headboard and the bed
platform and mark the location directly from the extended centerline of the rear panel just as you did
with the headboard. My guess is that you’re taller than a Munchkin in the Wizard of Oz and therefore
your bed platform will be too long to do it this way.
Plan B
Measure from the front edge of the headboard to the extended centerline of the rear cabinet panel. In
this model it is 5 inches. In a full sized build this would be closer to 16 or 18 inches.

Lay your bed platform on a flat surface and make as many marks along the panel as necessary for you to
use a straight edge to connect all the marks from one end of the panel to the other end.
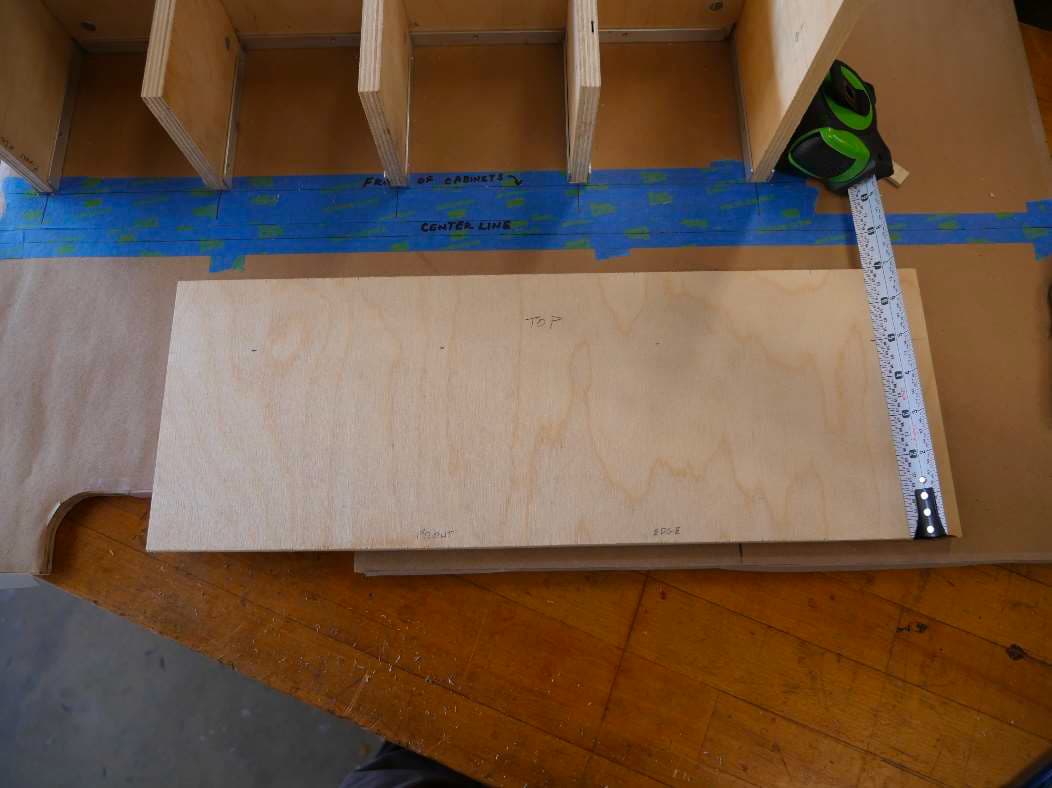
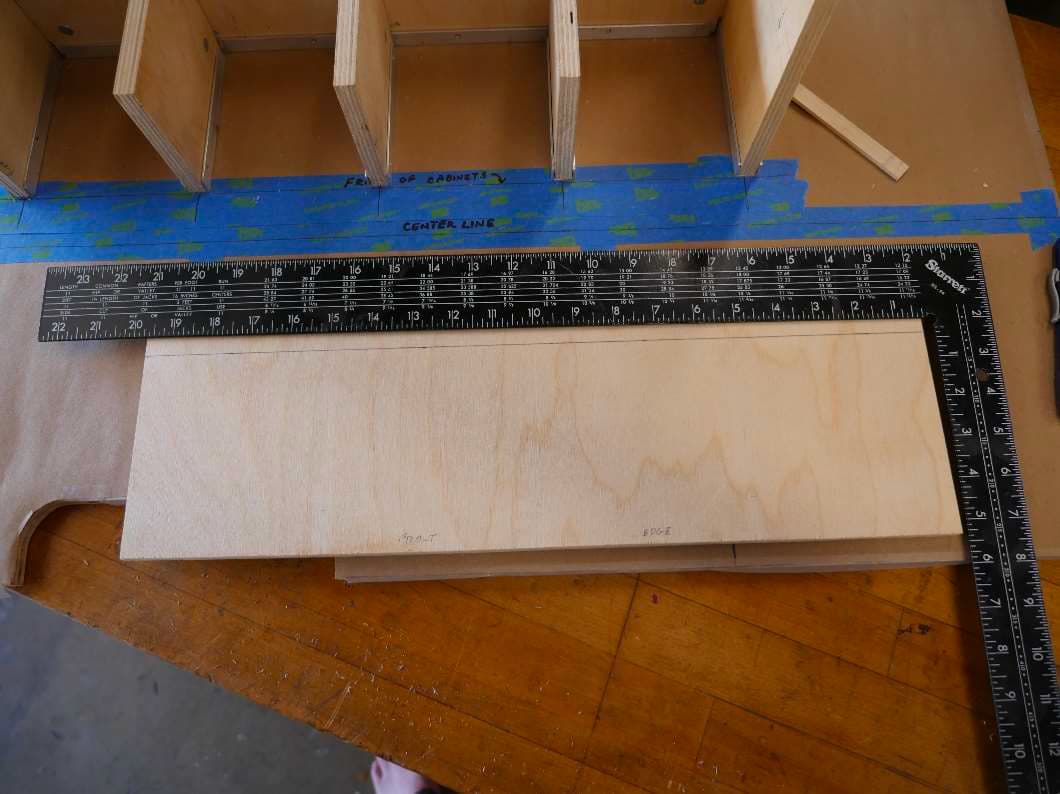
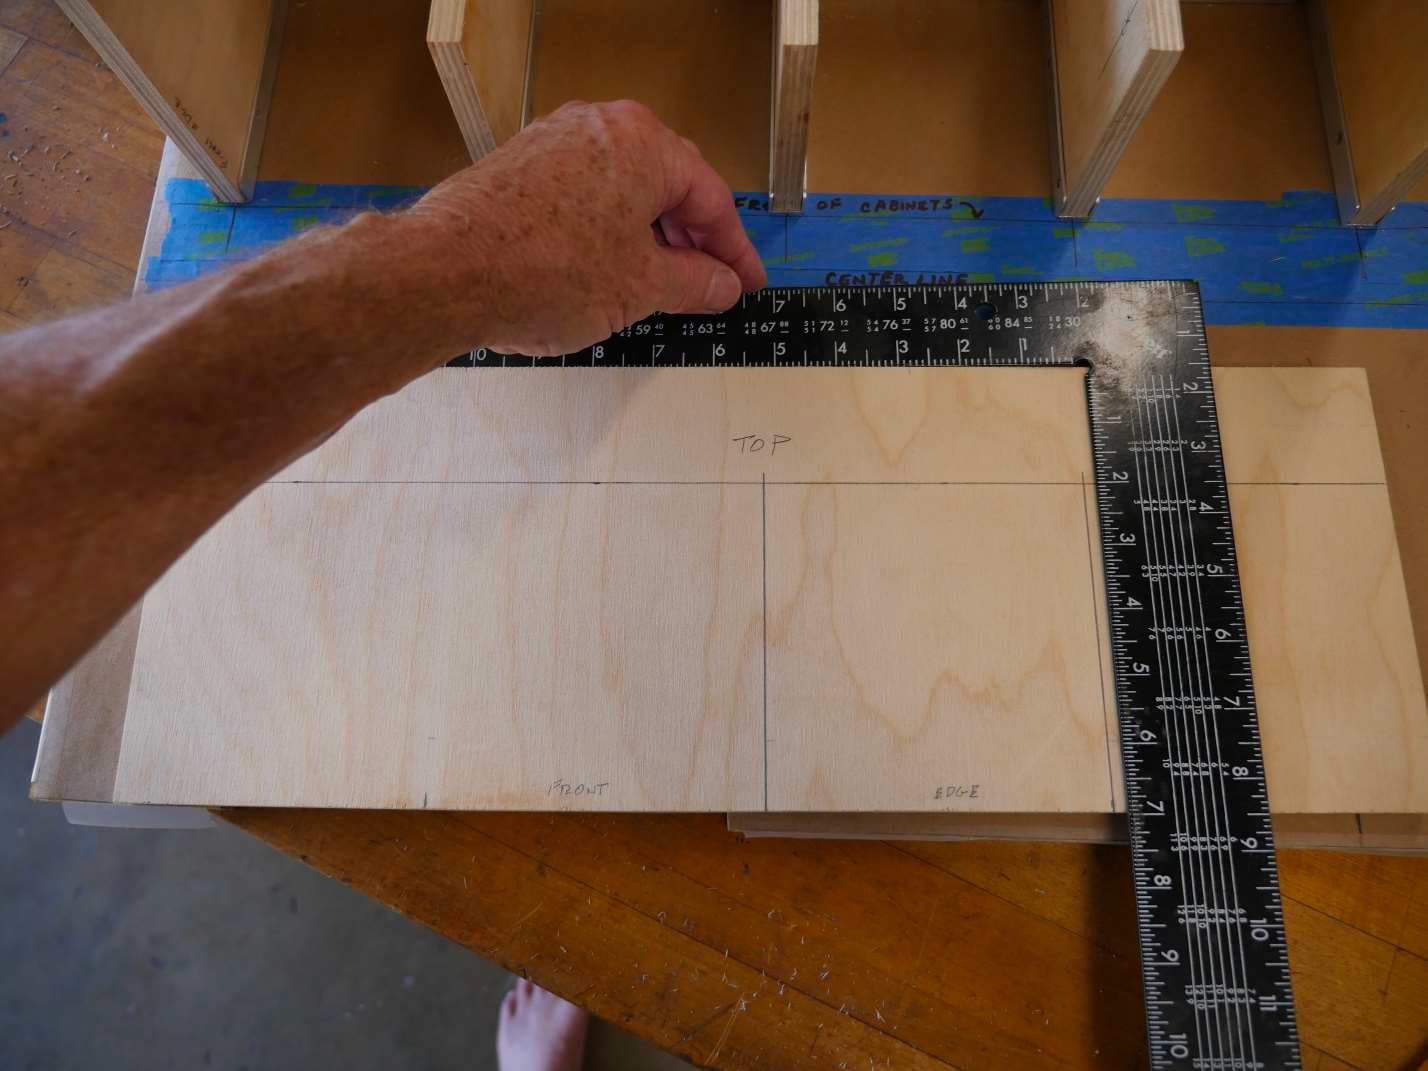
On this model I can use my Framing Square to cover the entire length. On a full sized panel you’ll need a
mark every couple of feet depending on the length of your straight edge. I have a 4 foot level that I
often use as a straight edge and this would require 3 marks, (one at each end and one in the middle) to
cover the entire length of a 6 or 7 foot bed platform.
Bed Platform: Marking the Position of the Divider Panels
Place the bed platform in front of the cabinet exactly centered between the two end panels with its top
surface (the side the mattress will be placed on) facing out and its front edge on the floor.
Using the extended layout lines on the floor, mark the centerlines of the divider panels on the bed
platform panel just as you did with the rear panel in tutorial #5.
Extend the marks from the front edge towards the rear edge until they intersect with the rear panel
centerline. You can do this either of two ways. You can measure the positions of the marks along the
front edge with a tape measure, duplicate the marks along the rear panel centerline and then draw a
line connecting the marks. This is how we extended our marks on the back panel in tutorial 5.
You can also use your Framing Square. To use the Framing Square, hold one leg of the square firmly
against either the front or back edge of the bed platform. Align the other leg of the square with each of
the marks in turn, and draw a line from the mark to the rear panel center line.
I’m using the back edge of the panel as my reference to make it clear in the photo, however you can use
the front edge just as well. The distance from the front edge where your marks are located, to the rear
panel centerline, will be in the neighborhood of 18 inches or so which is well within the capabilities of
the Framing Square.
Hmmmmm, some barefooted hillbilly managed to intrude on this high class photo. Must be one of the
neighbors…
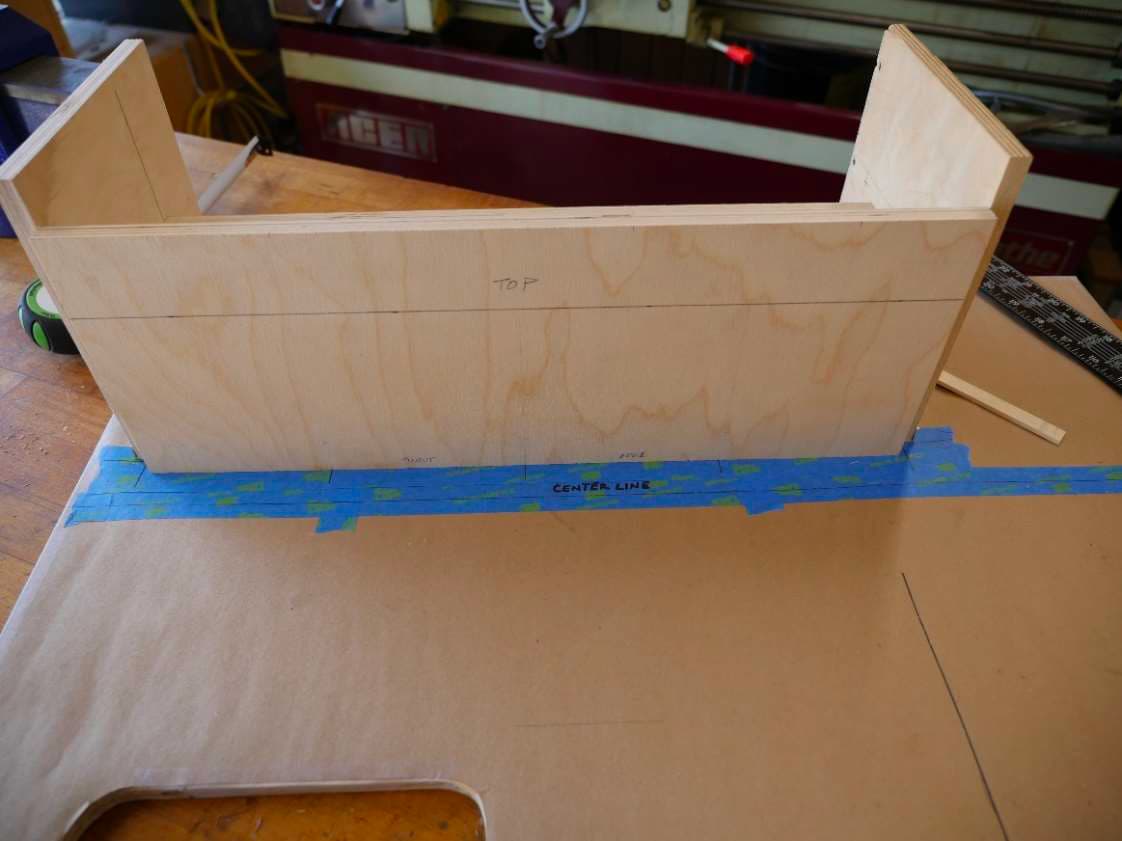
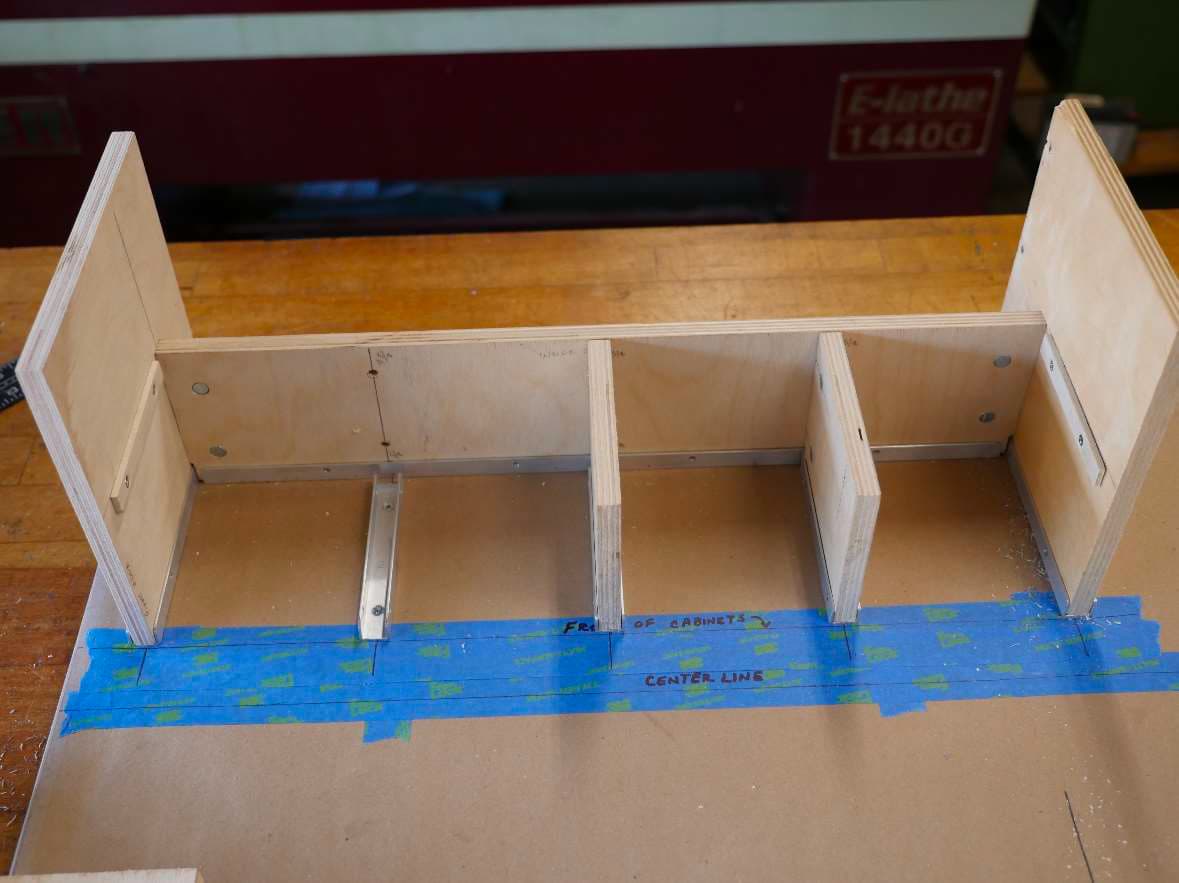
Let’s check to see how well things line up. This is a photo of the bed platform aligned with the front of
the divider and footboard panels. Looks like the layout line lines up perfectly with the center of the top
edge of the rear cabinet panel.
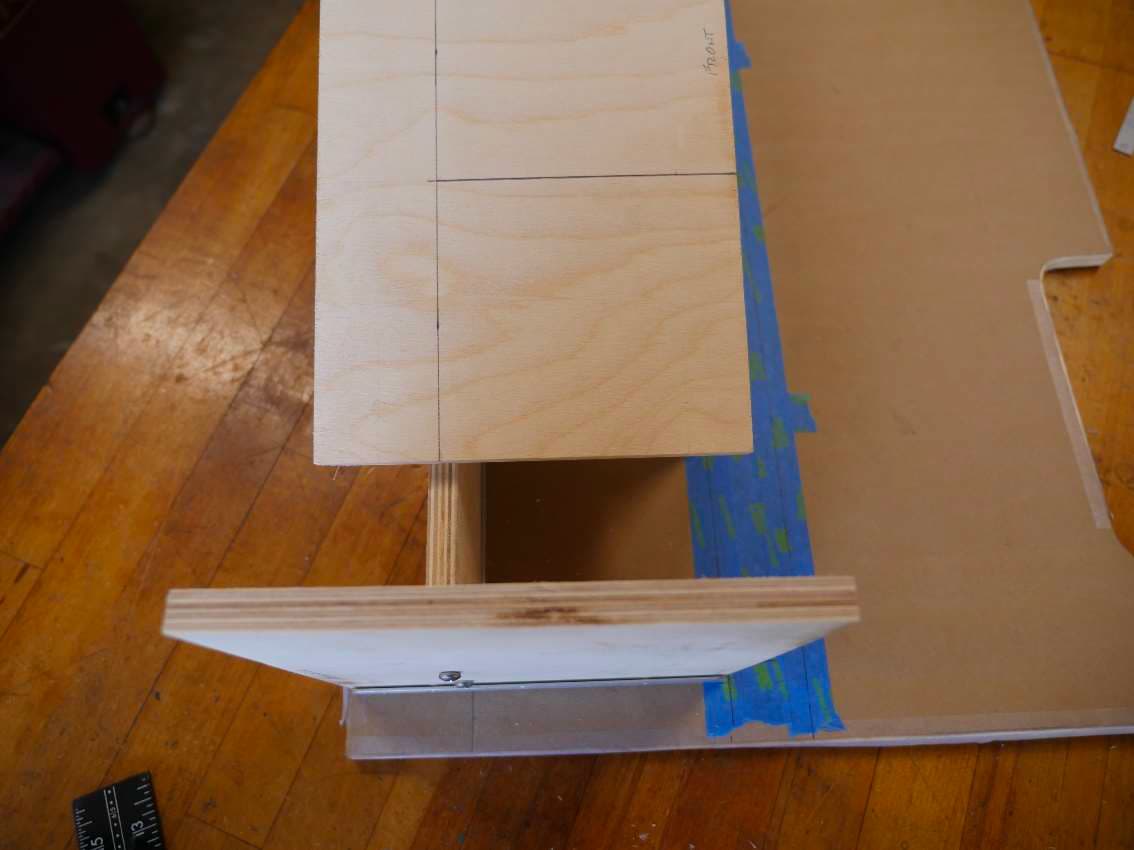
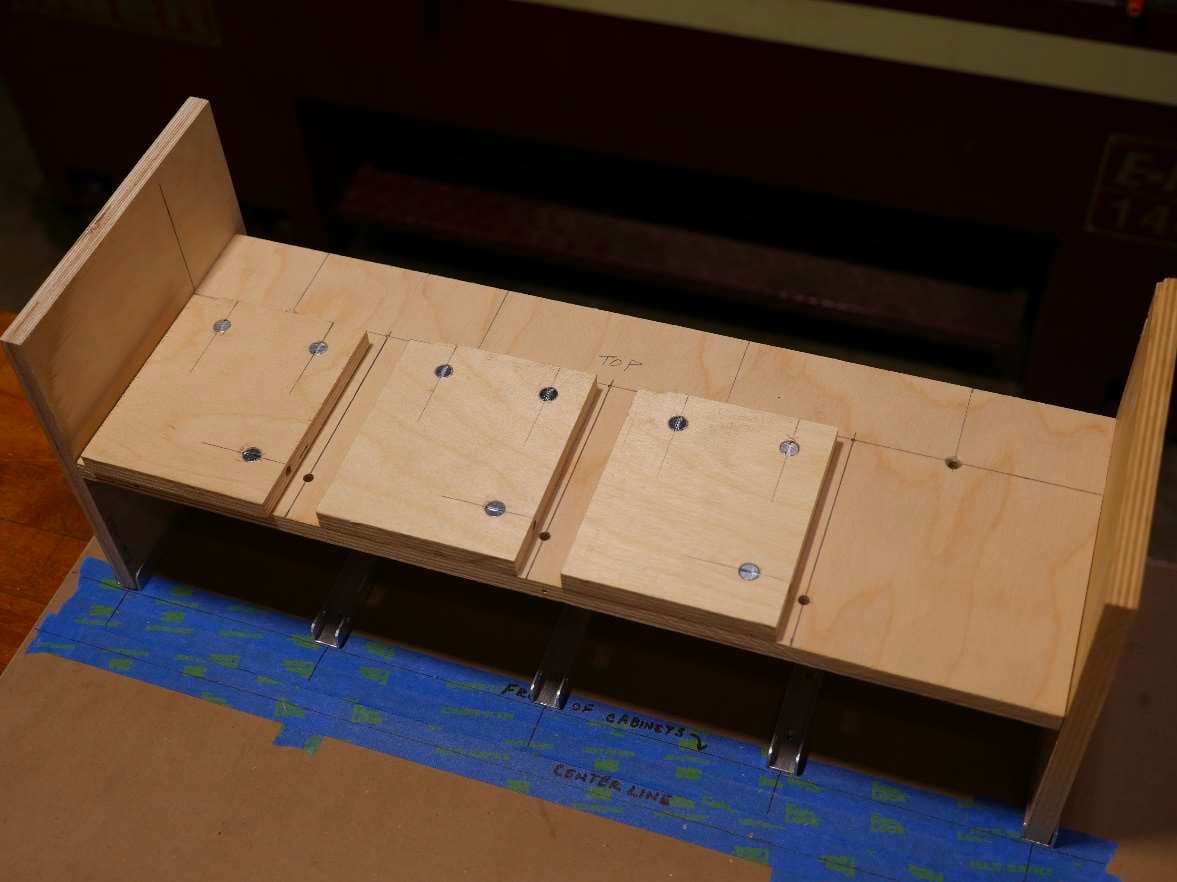
Here the bed platform is positioned between the head and foot boards. The middle divider panels line
up perfectly with their associated layout lines on the bed platform.

Bed Platform: Ledger Boards
It’s time to address attaching the bed platform to the head and foot boards. I use this same general
method for my shelves.
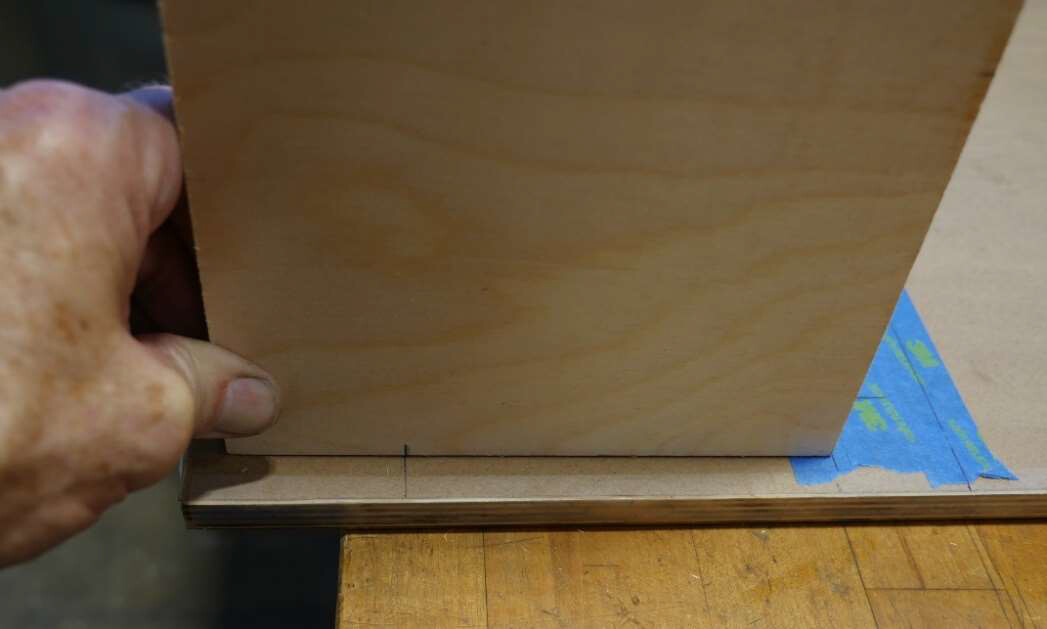
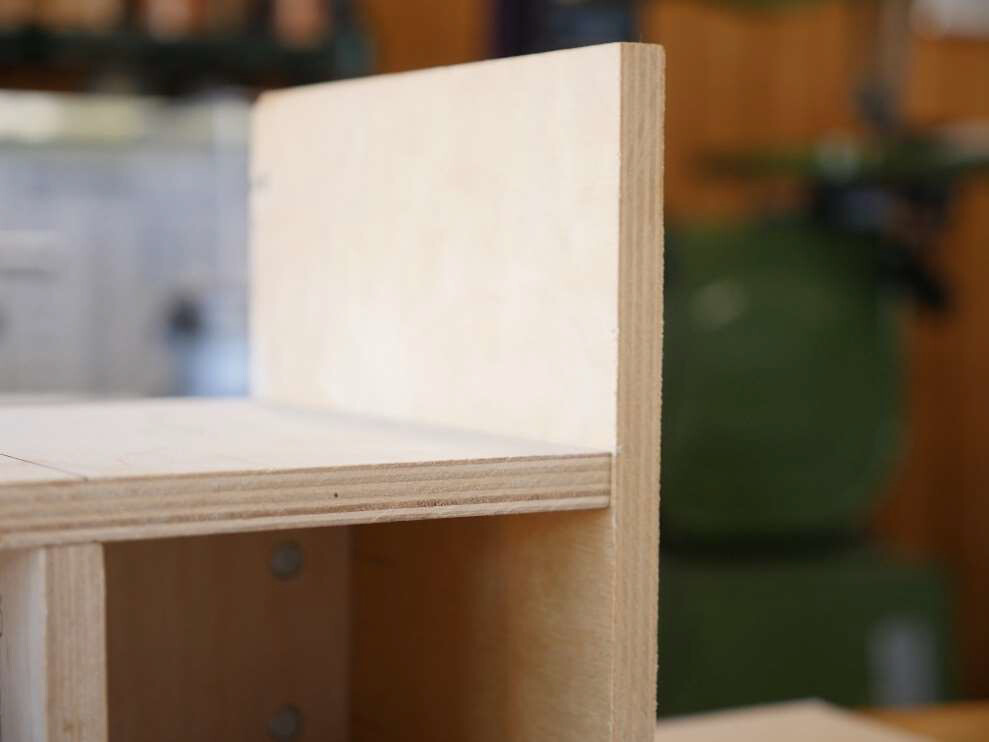
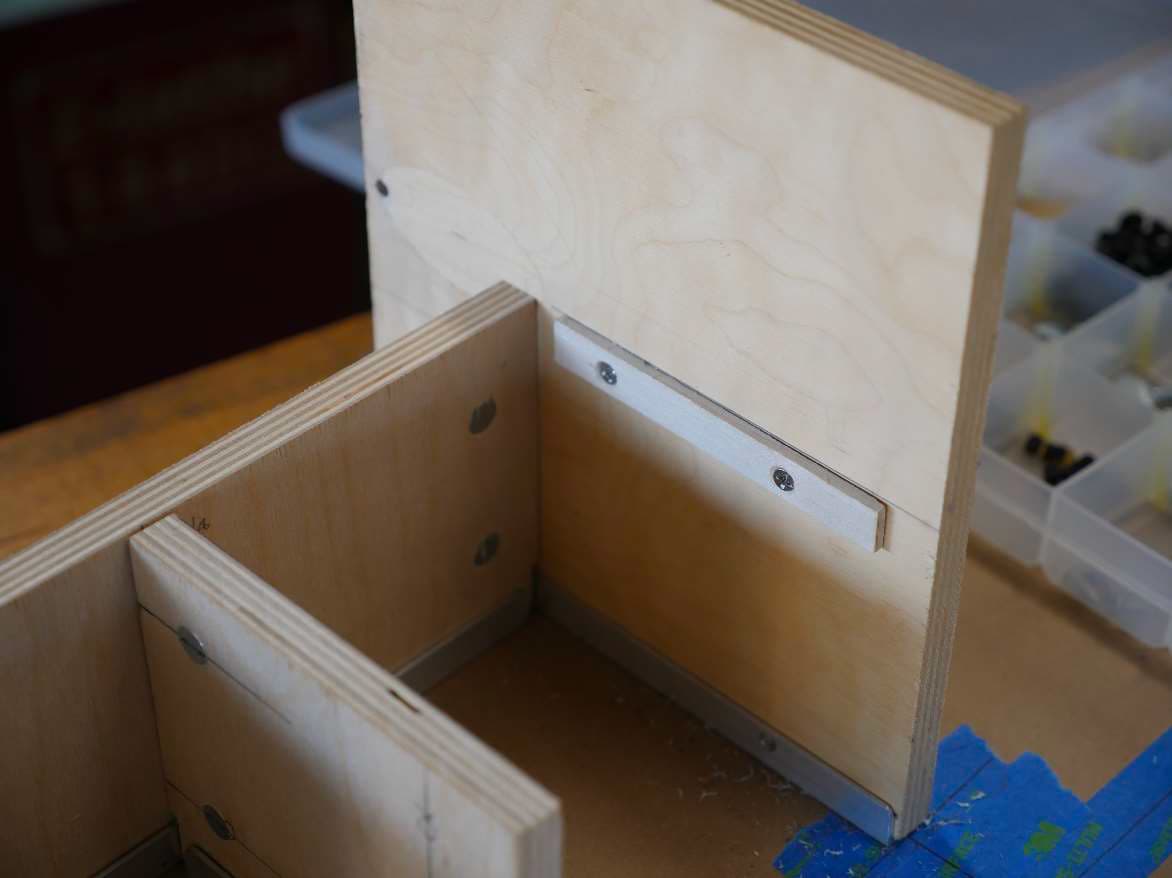
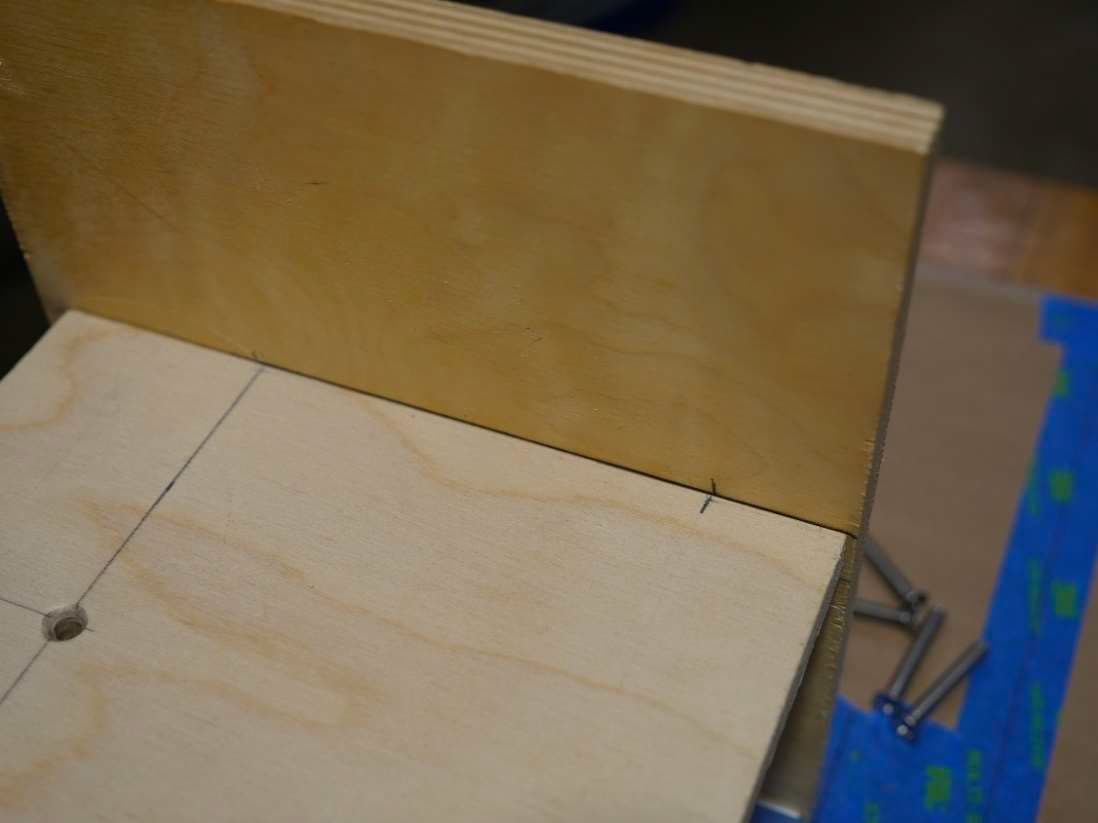
The problem we have is that we often have a span of a foot and a half or more of ½ inch plywood with
little or no support at one end. Here’s a photo of the front edge of the bed platform where it meets the
footboard.
Now imagine a 250 lb object siting on that front edge. I can hear the plywood creaking as it strains to
hold the weight. We will put a couple of cross dowels along that floating edge, but it will need more
than that to safely support the weight of a person.
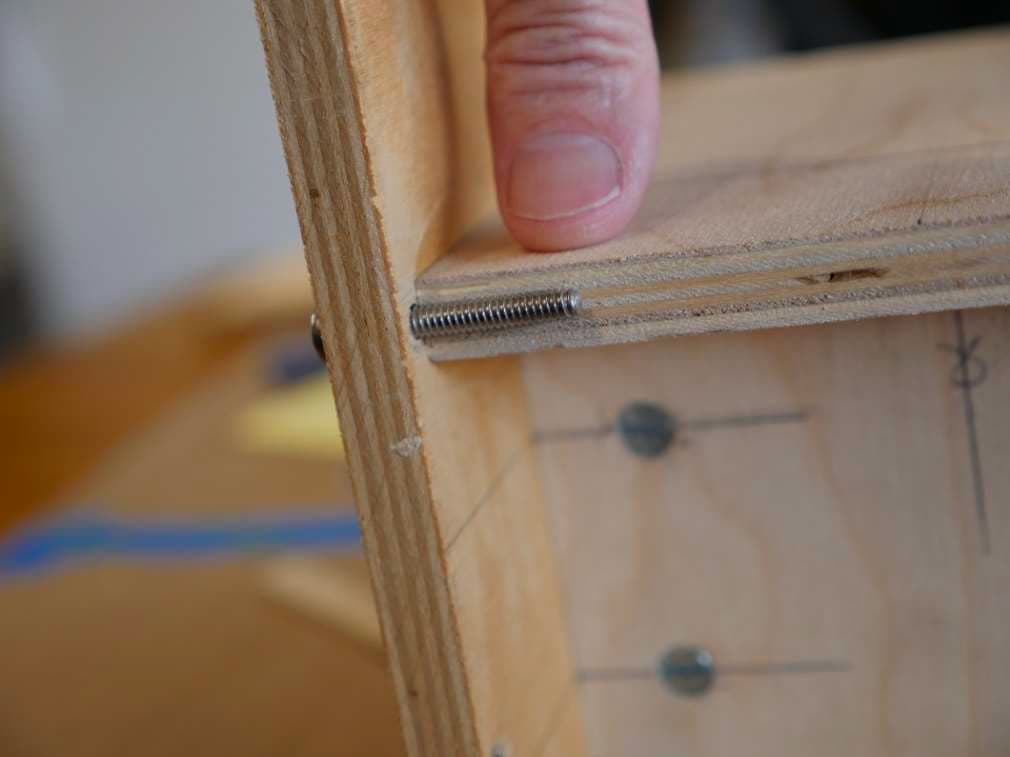
The above photo shows a cross dowel screw as it would be positioned in the center of the plywood.
There is not much wood above the thread of the screw and if my thumb were a heavy weight, the
plywood layers could separate and the joint would fail. We need to support the full thickness of the
plywood under the edge of the panel. For this we’ll use ledger boards.
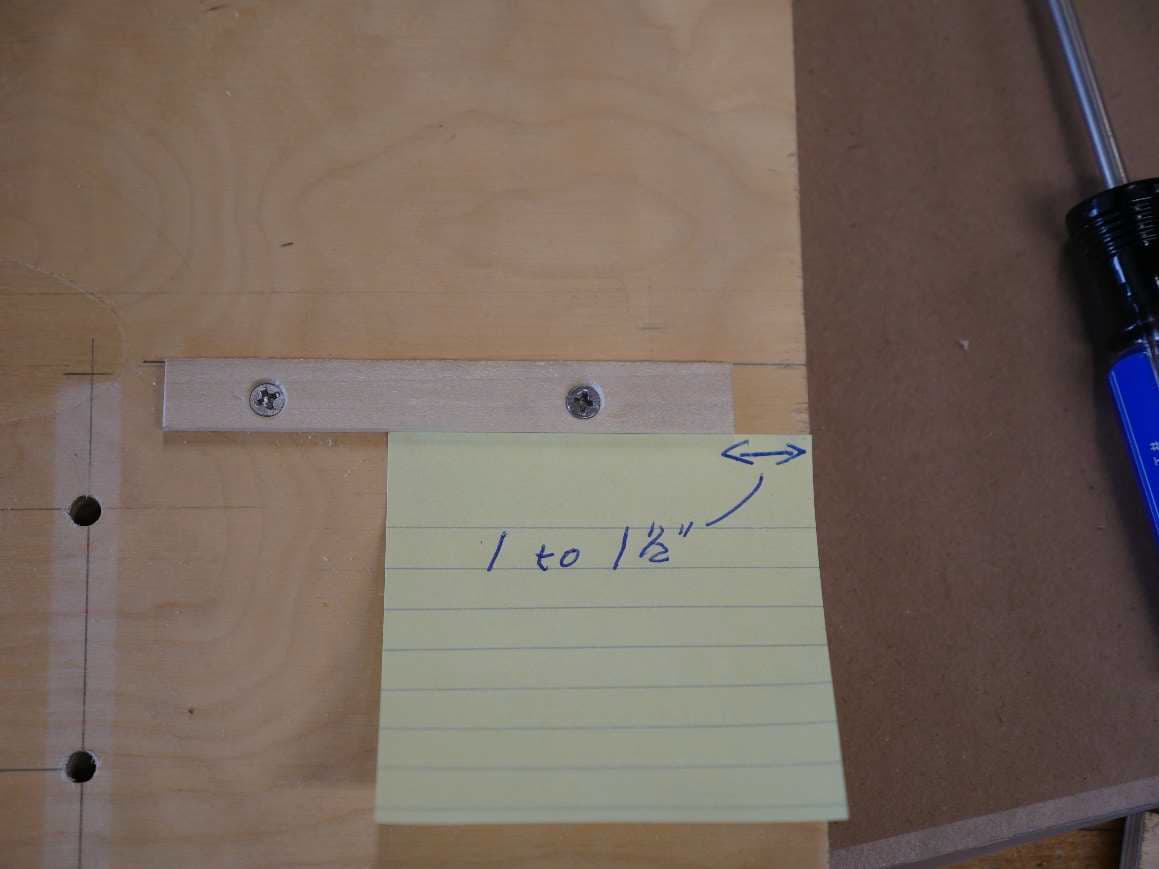
A ledger board is a thin board mounted underneath the edge of a shelf so as to support it. The ledger
boards in my van are ¾ inch wide and 3/8 inch thick. They are glued and screwed into place. In the
model the ledger board is about 4 inches long leaving about ½ inch clear space between the front end of
the ledger board and front of the cabinet, and rear end of the ledger board and the rear cabinet panel.
In my van the ledger board is about 16 inches long leaving an inch and a half clearance front and rear.
First we need to locate the position to mount our ledger board. Remove the footboard from its
mounted position and lay it on a flat surface with the side facing the bed up. Now remove one of the
middle cabinet dividers and lay it on top of the footboard, aligning the front and bottom edges of both
panels.
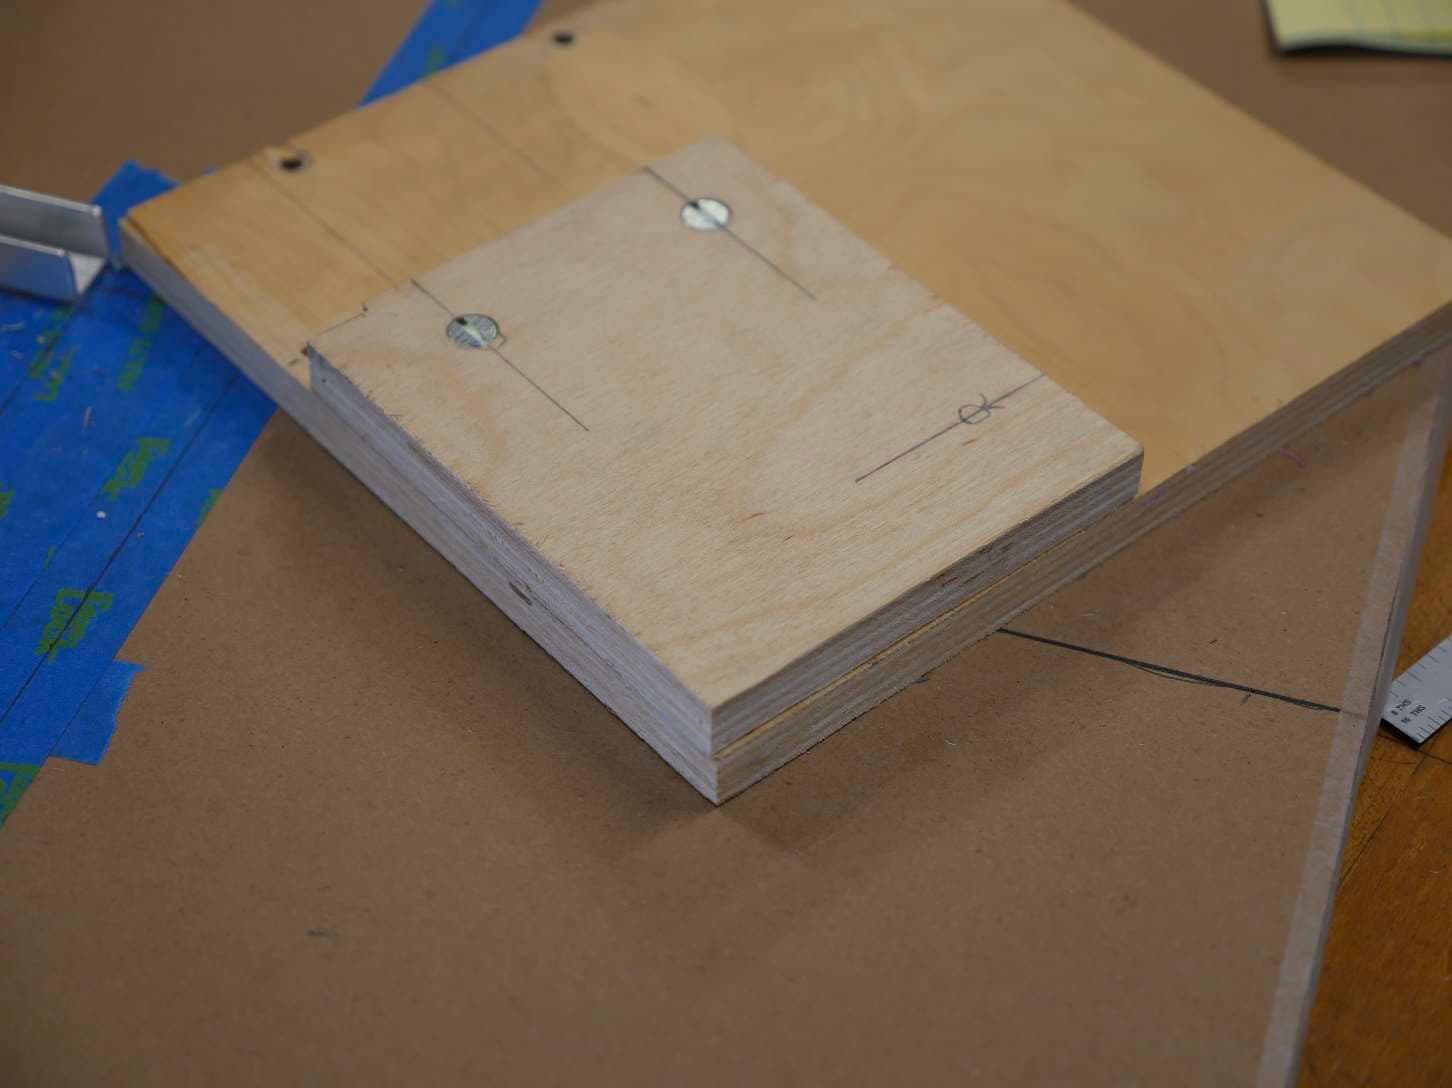
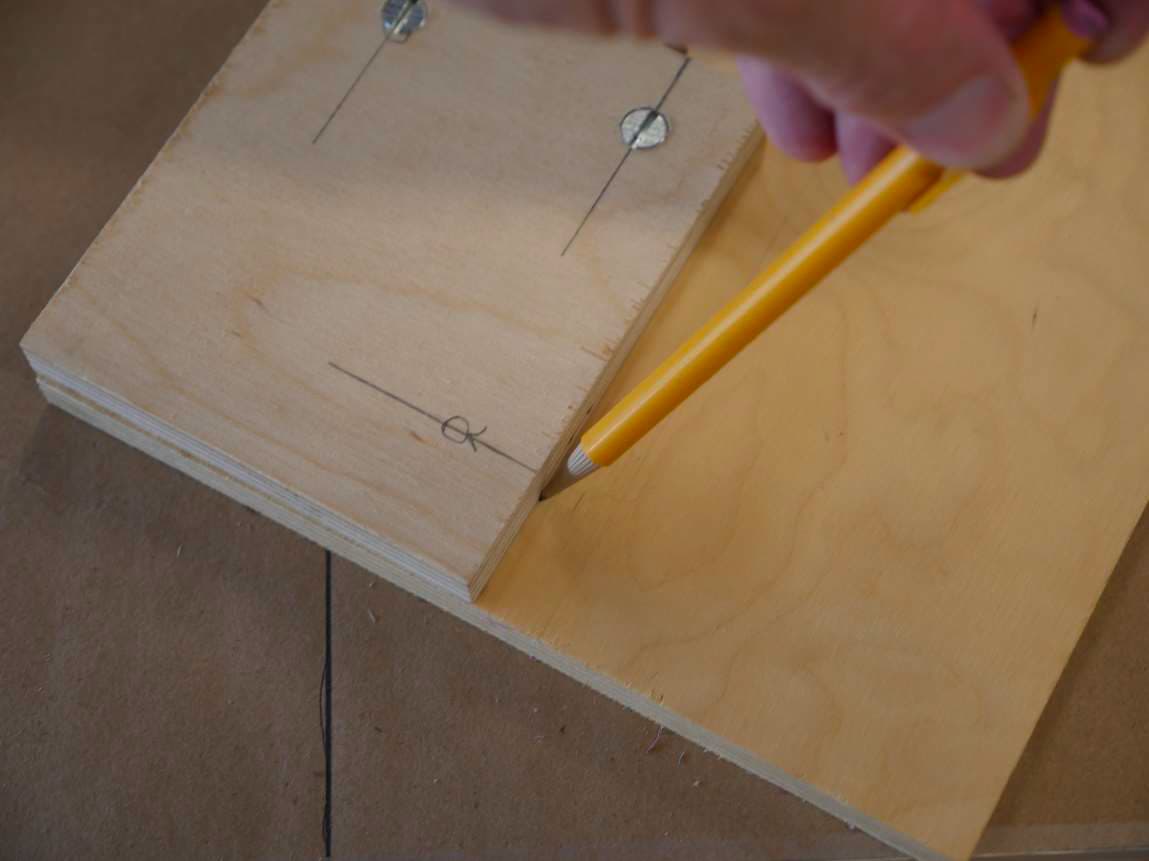
Now draw a line across the top of the cabinet divider panel from front to back.
Mount your ¾ inch wide by 3/8 inch thick ledger board so the top of the ledger board is just under the
line you drew. Leave about an inch of clearance at the front and back of the ledger board. You don’t
want it interfering with the rear cabinet panel or drawer fronts at the front edge.
Rinse and repeat for the headboard.
Reassemble the cabinet to make sure everything fits properly.
It’s time to locate and layout our cross dowels. I’m going to move through this with fewer photos
because the details of this process are exactly the same as in tutorials 5 and 6.
Bed Platform: Installing Cross Dowels in the Rear Panel
On the rear cabinet panel, I like to put a cross dowel about the center between each cabinet divider.
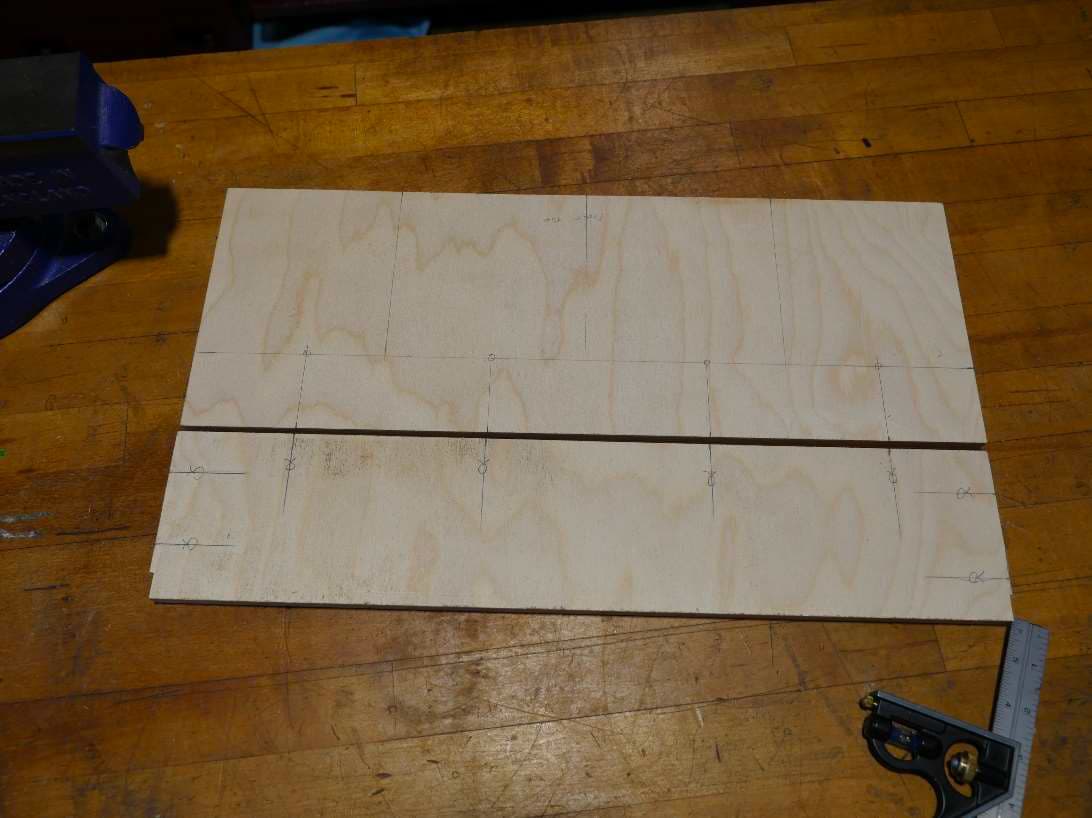
Here I’ve laid out the back panel with it’s top edge lined up with the back edge of the bed platform and
marked the positions across the joint of the panels where I’ll be installing cross dowels. Perfect
positioning of the cross dowels is not necessary and I just eyeballed these.
Using the Framing Square, extend the marks on the bed platform to join with the rear panel centerline.
Put a small circle where the lines cross to show that these are the through holes.
Using the combo square, extend the marks on the rear panel and mark them with a circle and arrow to
show that the cross dowels will be installed in this panel. Both panels are marked and double checked
to make sure everything lines up.
Use the cross dowel jig to drill and install the cross dowels in the rear cabinet panel. Then use the
automatic center punch to mark and the drill each of the through holes along the rear panel centerline
in the bed platform.
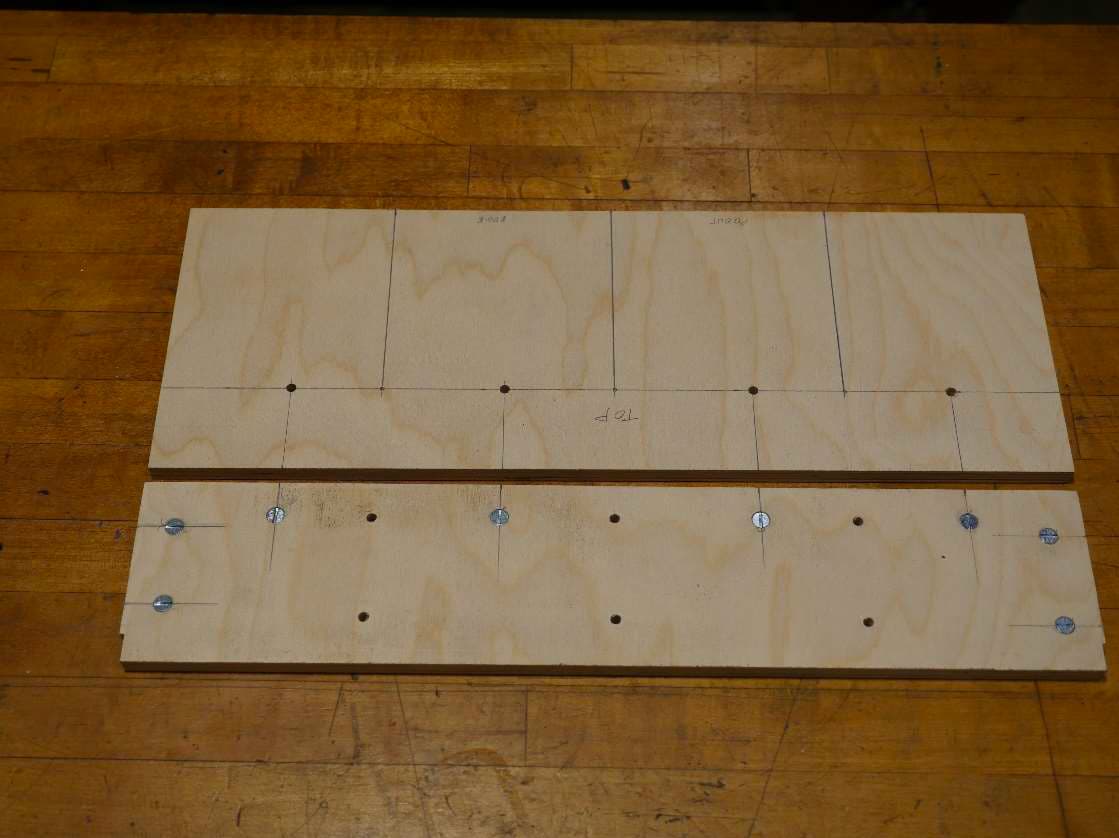
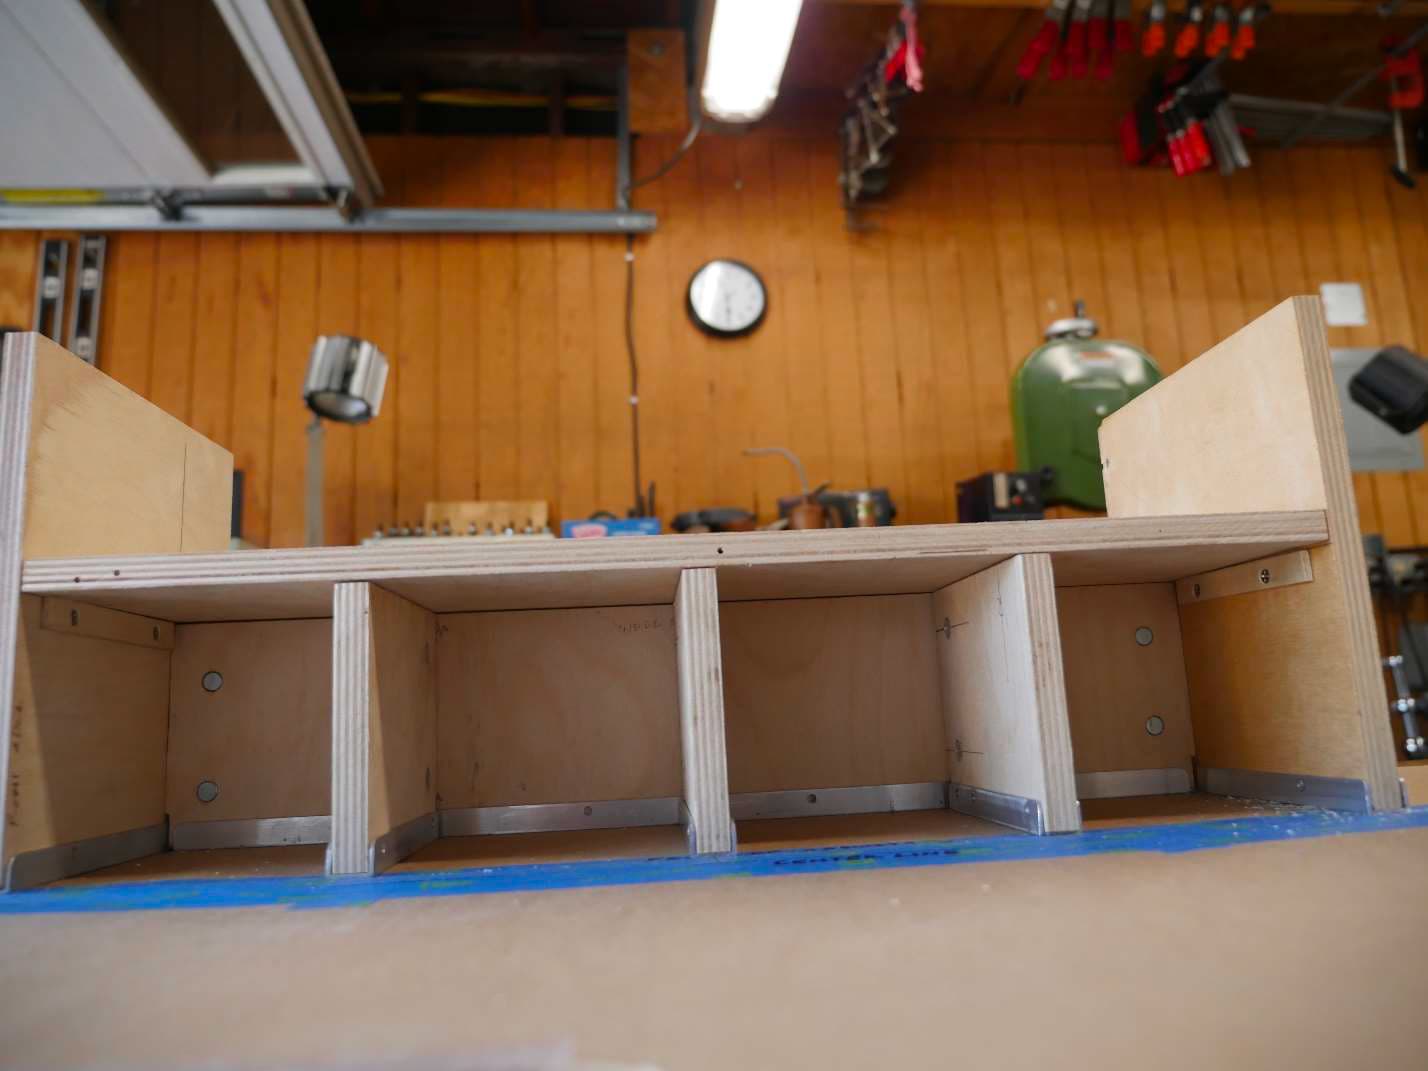
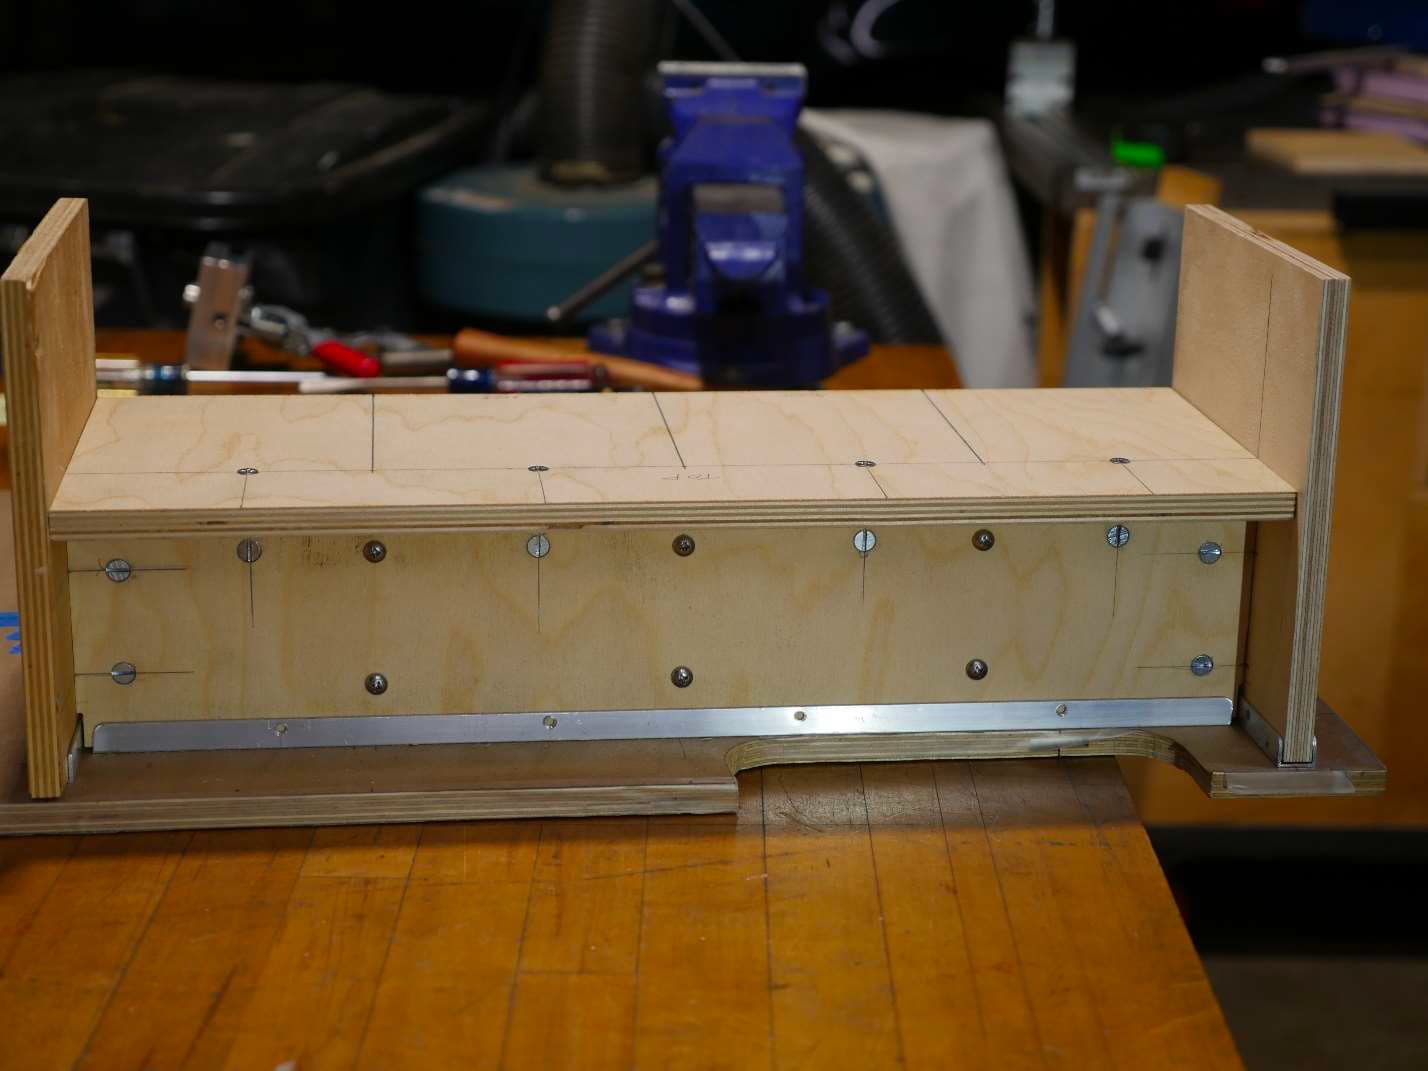
This is the back side of the cabinet showing the all the joints we’ve completed so far. All fits together
perfectly.
Bed Platform: Install Cross Dowels in Divider Panels
It’s time to anchor the top edge of the divider panels to the bed platform. This will keep the top of the
dividers from bowing or warping out of place, and make a solid foundation for mounting drawers.
Mark, extend, and annotate with a circle and arrow the cross dowel positions in the top of the divider
panels where they will attach to the bed platform. In a full sized build, one cross dowel should be
located about 1 ½ to 2 inches from the front edge. A second cross dowel about the center between the
front cross dowel location and the rear panel. I’ll only be installing the front cross dowel.
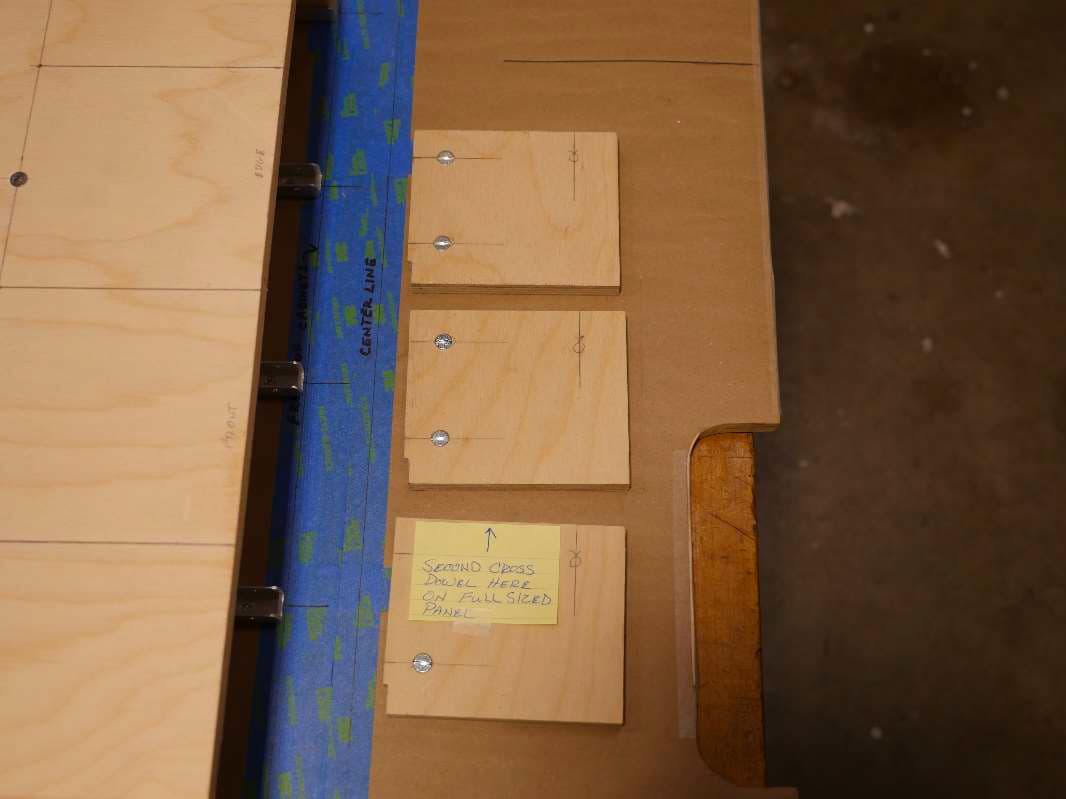
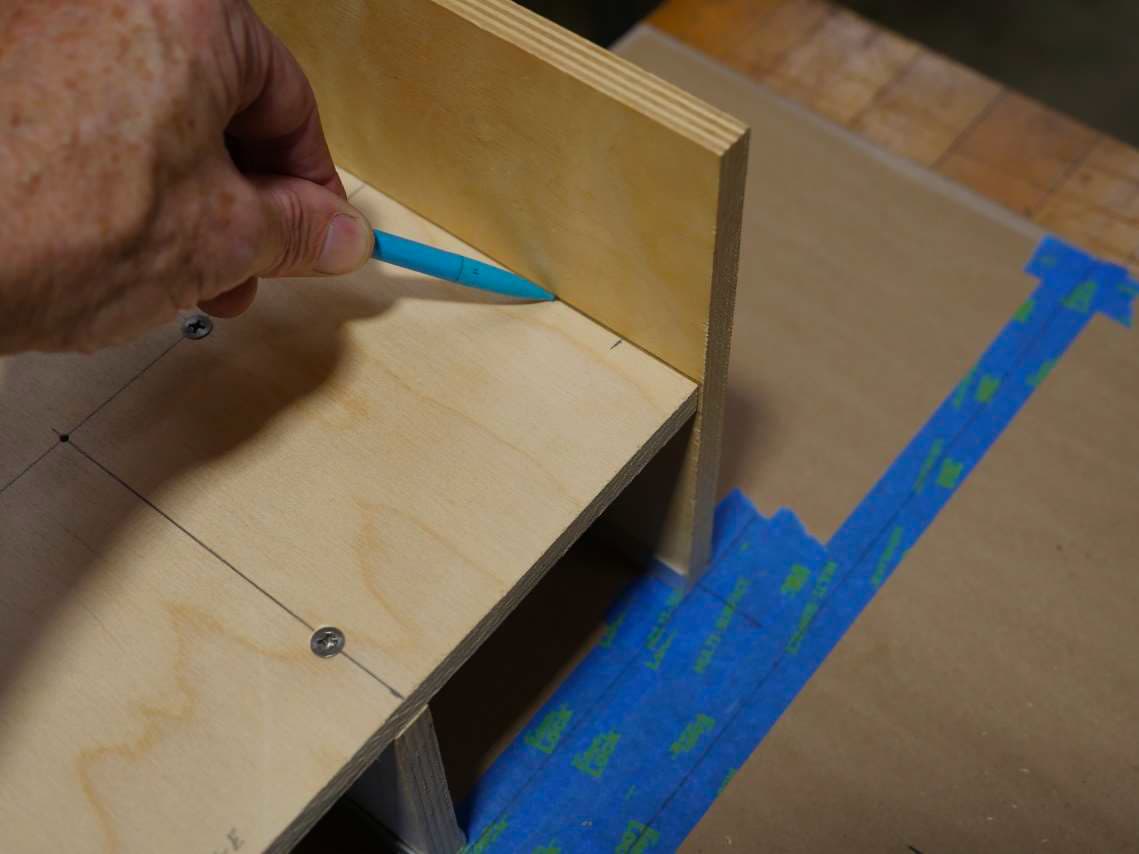
Once the cross dowel locations have been marked, take the first divider panel, turn it upside down,
bring the front edge of the divider panel up flush with the front edge of the bed platform and then mark
the position of the through hole on divider panel centerline on the top of the bed platform.
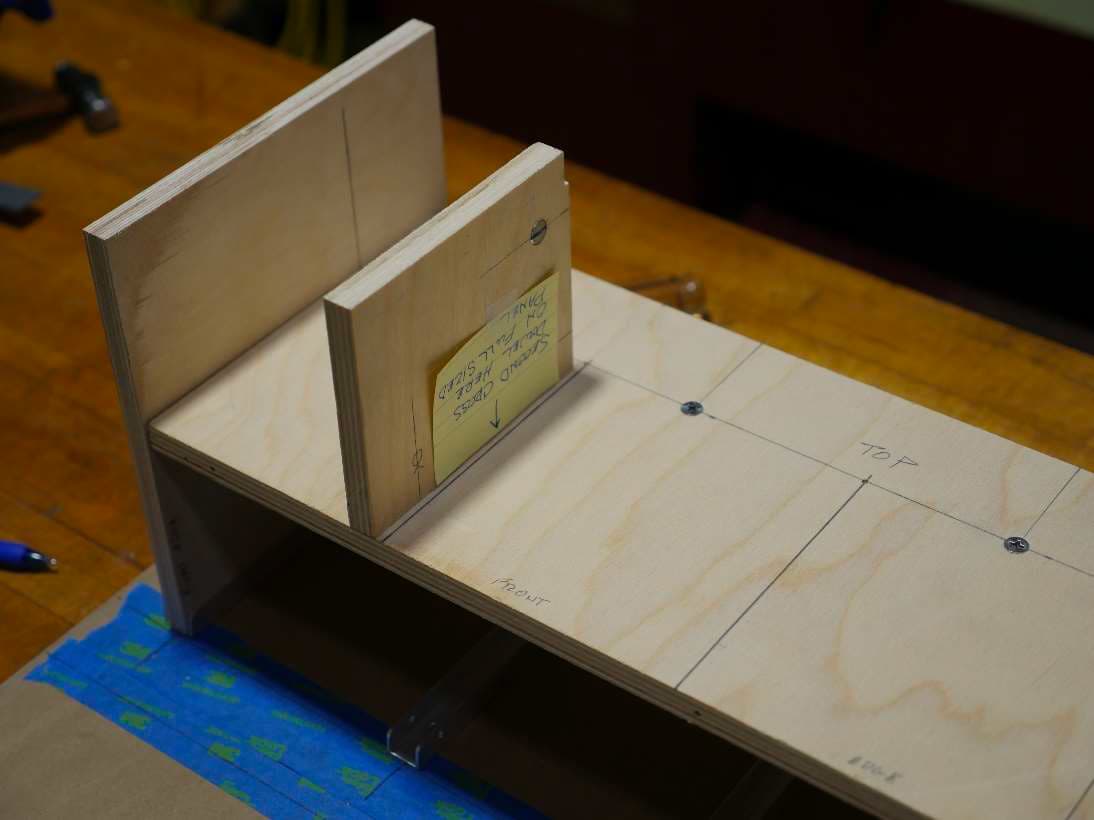
Repeat this process with the remaining panels.

Drill and install the cross dowels in the top of the cabinet divider panels. Automatic center punch and
drill the through hole locations in the bed platform.
It should look like this when assembled.

Bed Platform: Installing Cross Dowels in Head and Foot Boards
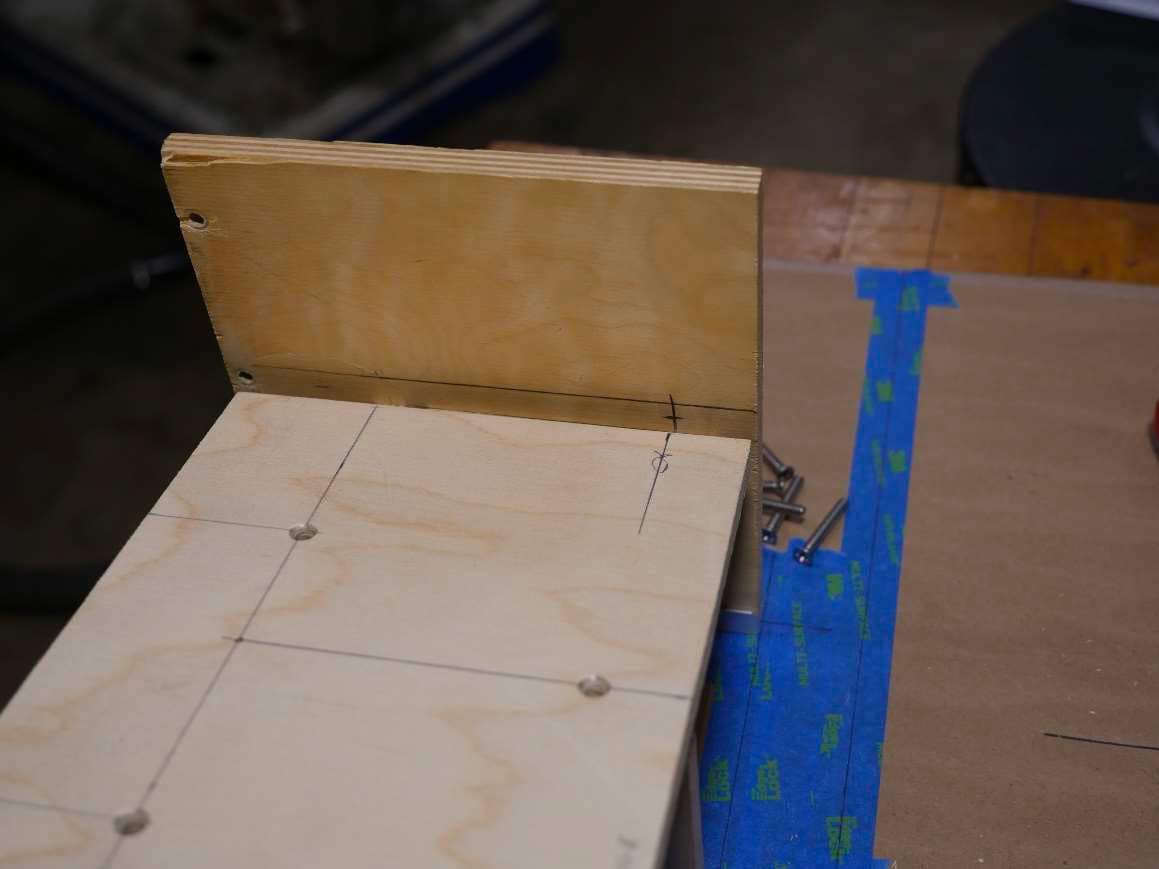
The final task is to secure the head and foot boards to the bed platform with cross dowels. Locate the
positions where you wish to install cross dowels. In this model I’ll install one near the front edge as I did
in the middle cabinet dividers. In a full sized cabinet I’d install one near the front edge, one between the
front edge and the rear cabinet panel, and possibly one at the rear edge. Mark the cross dowel
locations on both the bed platform and the head and foot boards as shown.
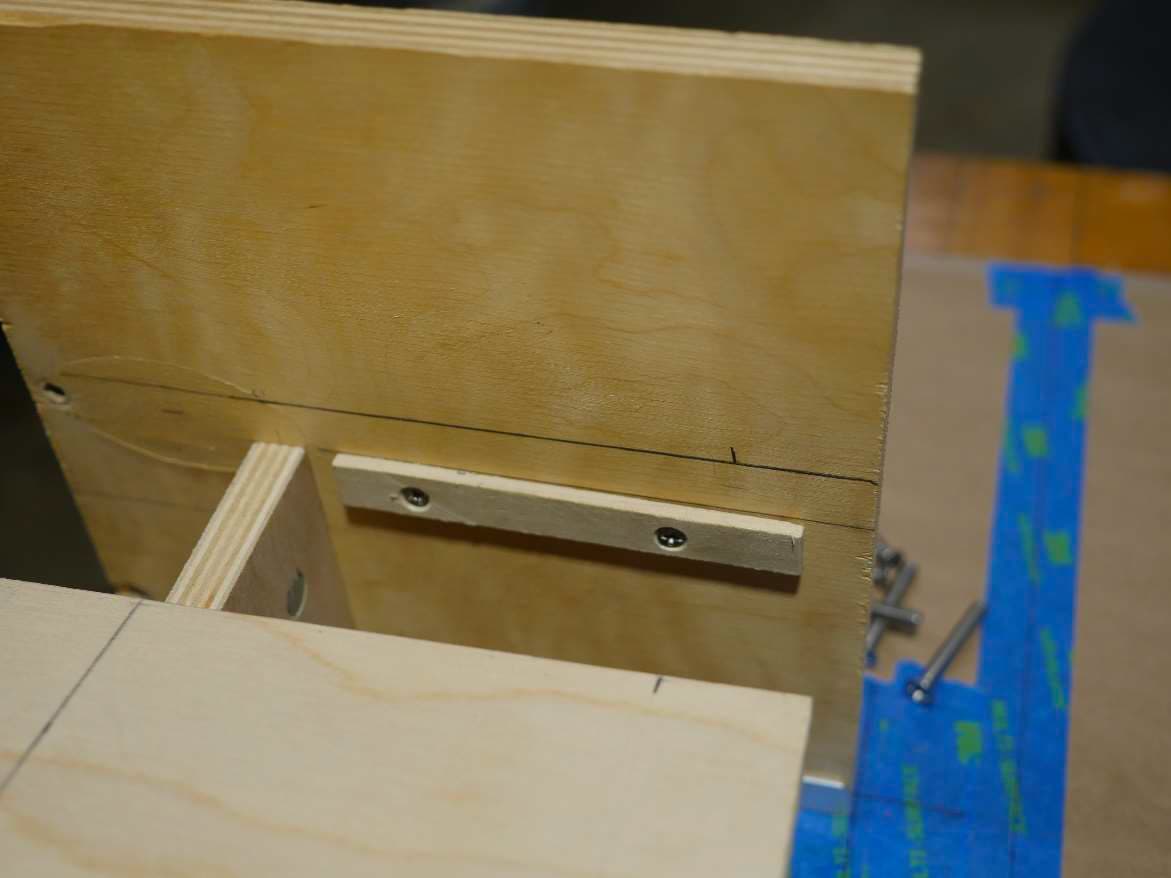
Now draw a line on both the head and foot boards across the top of the bed platform.
Remove the bed platform. You should see a space between the ledger boards and the line you just drew
the exact width of the plywood. Above the line on both head and foot boards you should have a mark
showing where the through hole should be located.
Extend that mark straight down across the plywood space to the ledger board. Now make a cross on the
line exactly in the center of the ½ inch space. Do this on both the head and foot boards.
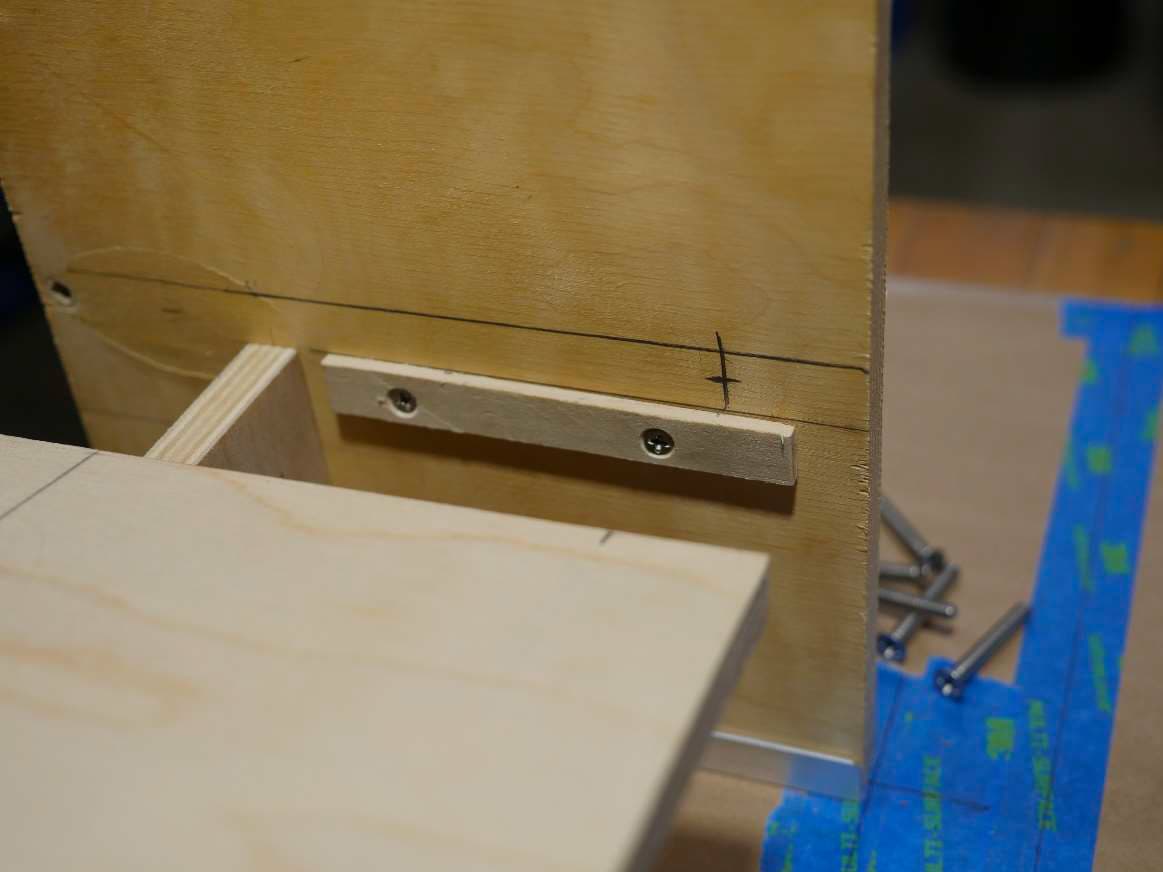
Mark up the bed platform for drilling and installing the cross dowels at both the headboard and
footboard ends.
Using the cross dowel jig, drill and install the cross dowels in the bed platform. Center punch the cross
marks and drill the through holes in the head and foot boards.
Bed Platform: Completion
You can now assemble the entire cabinet.

This completes the actual construction of this cabinet. For a full sized build I would have used 24 cross
dowels:
4 ea on the headboard (2 to attach to the rear cabinet panel and 2 to attach to the bed platform.)
4 ea on the footboard (2 to attach to the rear cabinet panel and 2 to attach to the bed platform.)
6 ea (2 to attach the back of each of the 3 middle cabinet divider to the rear cabinet panel
6 ea (2 to attach the top of each of the 3 middle cabinet dividers to the bed platform)
4 ea to attach the rear cabinet panel to the bed platform.
24 Total
More to come…
6. Bed Construction, Head and Foot panels
8. Locating Points