Van Build with Cross Dowel Construction
Note from @Matt: This build series @dodge-promaster is by my friend @Lex. I used this series to build my Ford Transit.
After having built out three vehicles of my own and helped on several others, I’ve developed an overall process, only part of which, is using cross dowel construction for the cabinetry. The floor and general layout is an integral part of the process making each successive step built on the previous one. In this document I’m going to take you through each step, showing you what I do, and giving you the rational for why I do it in a particular way.
I start with the floor.
Paper Template
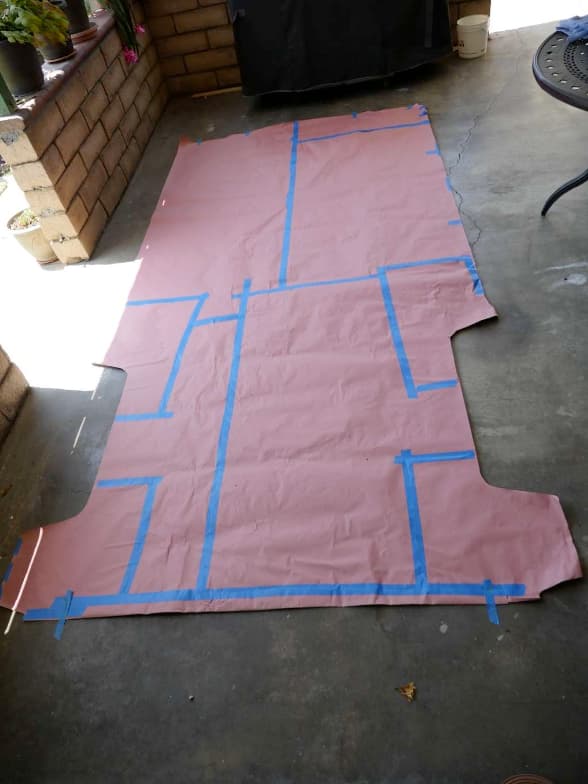
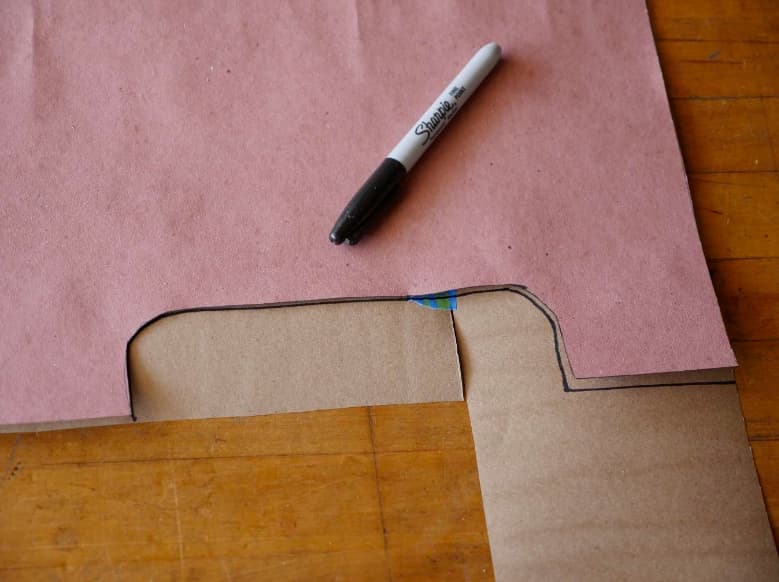
I first make a paper template of the entire floor of the vehicle. I use a roll of 36” wide paper. Any paper will do. The large box hardware stores sell brown paper and red rosin paper for around $12 for a lifetime supply. I cover the entire cargo area, cutting around the wheel wells. I may use many small pieces to fill in around the jigs, jags and corners and hold everything together with blue painter’s tape. I only use this paper template once so I use the cheapest paper and tape that I can find. Here’s an example of a template for a 159” wheel base Ram Promaster. You can see it is made up of lots of bits and pieces.
Sub-Floor
I use the paper template to cut out a 1/8” thick sub floor. This sub floor serves two purposes: 1) it acts as the template for creating the upper floor layers, and 2) it helps spread the load of people walking on the floor across the peaks and valleys of the ribbed metal cargo floor. This way I don’t have to cut strips and glue them into the valleys. The thin sub floor does the job nicely with no mess and no fuss.
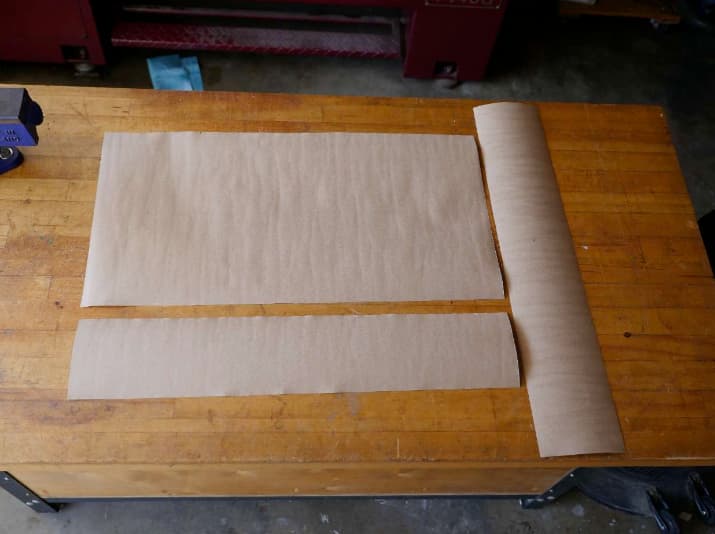
From here on I’m going to be using a scale model as it is easier to photograph and show the details.
In measuring out the template for my 136” wheel base Promaster, I discovered that the cargo floor was almost exactly six feet wide by 10 feet long. This allowed me to use two 4’ x 8’ sheets of material to cover the floor. I decided to use one full sheet behind the passenger seat in front of the sliding door. This area gets a lot of traffic from entering and leaving via the side door so I don’t want any joints in this area if I can help it.
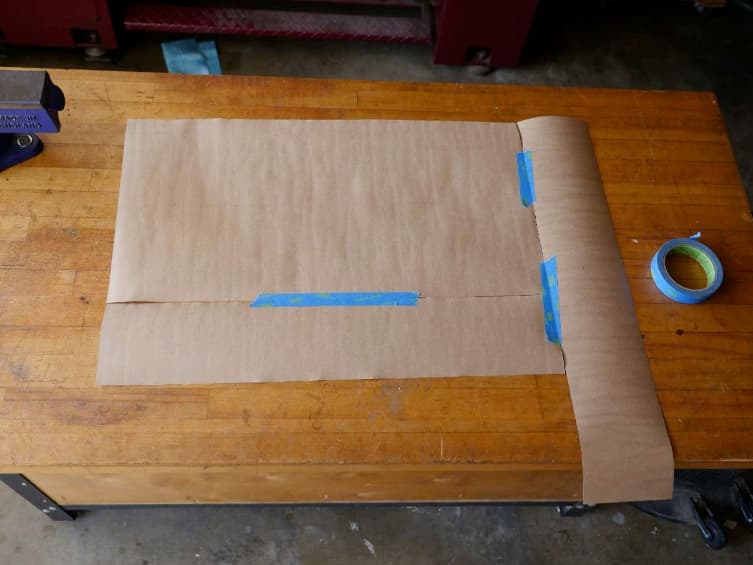
This leaves a 2’ x 8’ strip behind the driver’s seat which happens to be 1⁄2 of a 4’x8’ sheet cut in half length wise. It also leaves a 2’x6’ strip open in the rear of the vehicle which can be covered by the other half of the cut sheet. I’ve already cut out the sub floor so in the photos below I’m using brown paper to simulate the layout of the 1/8” plywood. Here you see one 4’x8’ sheet and two 2’x8’ sections placed so they would properly cover the van’s cargo floor.
If you are building out a 159” wheel base Promaster, you can lay three 4’x8’ sheets side by side which would give a 12’x8’ base upon which to lay your paper template.
I use 1/8” thick Luan plywood as my subfloor. Any thin plywood will do, but Luan is very inexpensive at less than $15 per sheet, and it does the job nicely.
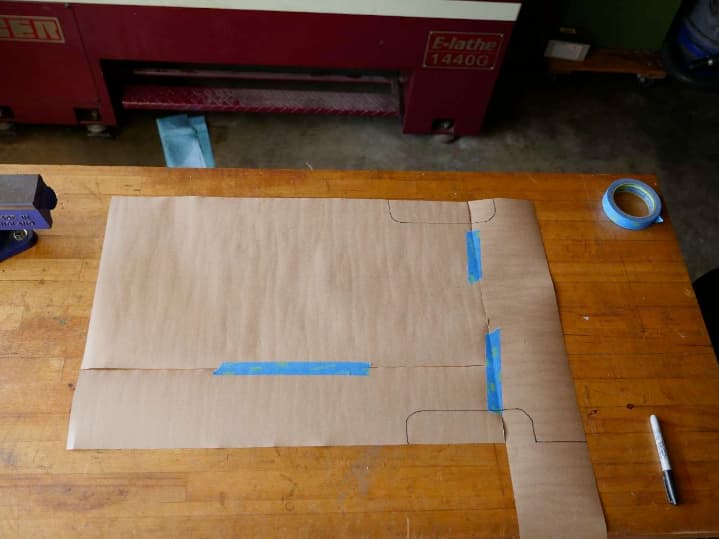
The next step is to tape the pieces of the subfloor together so that they don’t move. I use blue painter’s tape for this. You want the cheap stuff that you can easily remove once you’ve done your markup.
Now lay your paper template on top of your taped sub-floor and trace around it. You’re tracing out the entire floor, but the floor will actually be in sections when you cut it out.
Since the cargo floor of my 136” wheel base Promaster closely matches the layout of the two cut sheets of plywood, there will be very little cutting to do and not much waste.
For the 159” wheel base promaster, with three 4’x8’ sheets side by side, the 12’ length is correct so little or no cutting there, however the floor is only 6’ wide so there will be approximate two feet cut off of each of the three 4’x8’ sheets as well as the cutouts for the wheel wells.
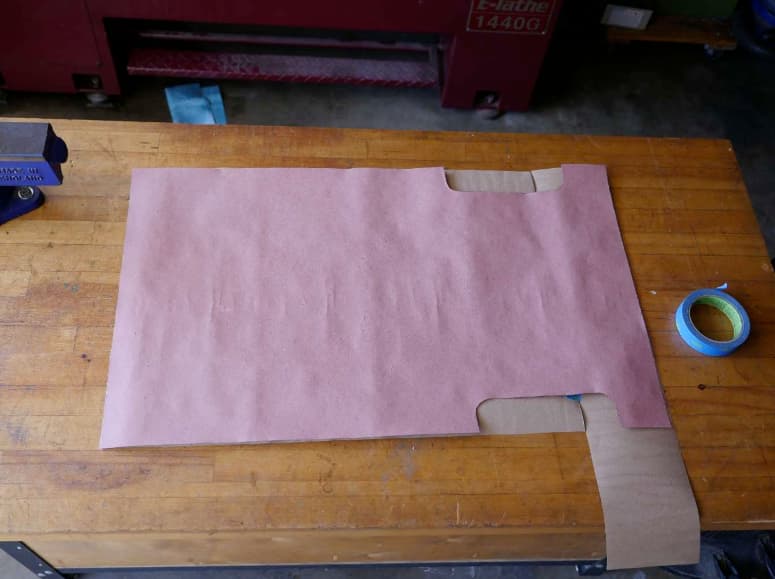
Here is the marked up sub-floor. Now remove the blue tape and cut out each of the pieces.
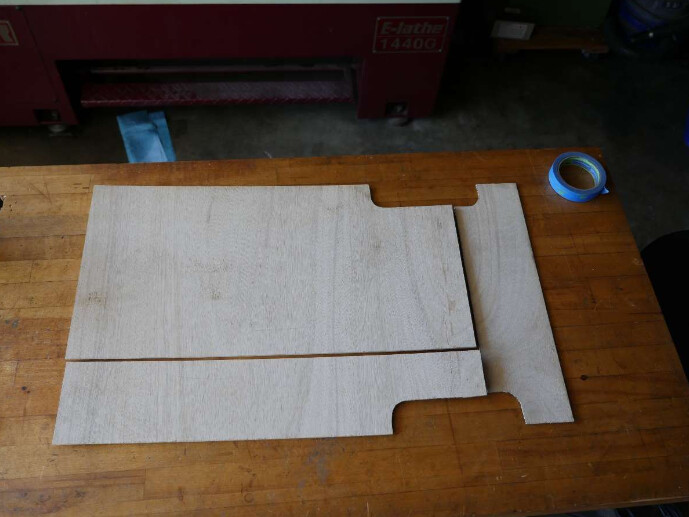
The end result should look something like this. This is actual 1/8” thick Luan sub-floor material.
Test fit your sub-floor in the van and make any necessary adjustments to get the best possible fit. It should be an “easy” fit. You don’t want it tight against the sides of the van or wheel wells. The edges of the sub-floor sections should fit closely together. You want them right up against each other if possible and no larger than 1/8 of an inch gap between them. This will be important when we tie the upper floor sections together with splines.
Insulation
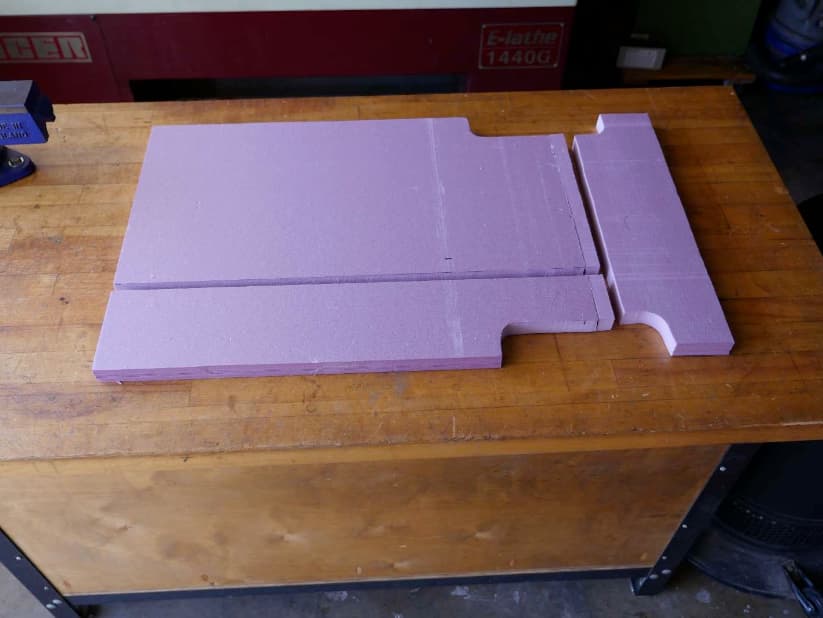
Next you’ll want to insulate your floor. I recommend 1⁄2” or 1” thick rigid foam board insulation. You can use XPS (the pink stuff), or Polyiso, commonly called Rmax, or Styrofoam. Some of these have a reflective aluminum cladding which will help reflect heat. I generally prefer 1" Polyiso. It seems the best overall compromise. It has aluminum cladding which helps reflect heat. If you expect to spend all your time in the southern states, then 1/2" will do, but in the northern latitudes you’ll want 1". I don’t think you gain enough insulation value with 1 1/2" or 2" to offset the sacrifice of head room.
Using the thin sub-floor sections as templates, cut out your insulation board of choice to match the sub-floor sections. For this you can use a jig saw or a utility knife. I used a jig saw for the cuts made in the photo below which made a nice clean edge.
Baltic Birch Top Floor
Now it’s time to cut the actual floor. For this I recommend half inch (12mm) Baltic birch plywood. Baltic birch plywood is stronger and denser than American made plywood. Most half inch American made plywood has 3 to 5 plys, is made with soft pine, and is filled with large hollow spaces or voids. Baltic birch has 9 plys, all plys are birch, and it has almost no voids – good stuff.
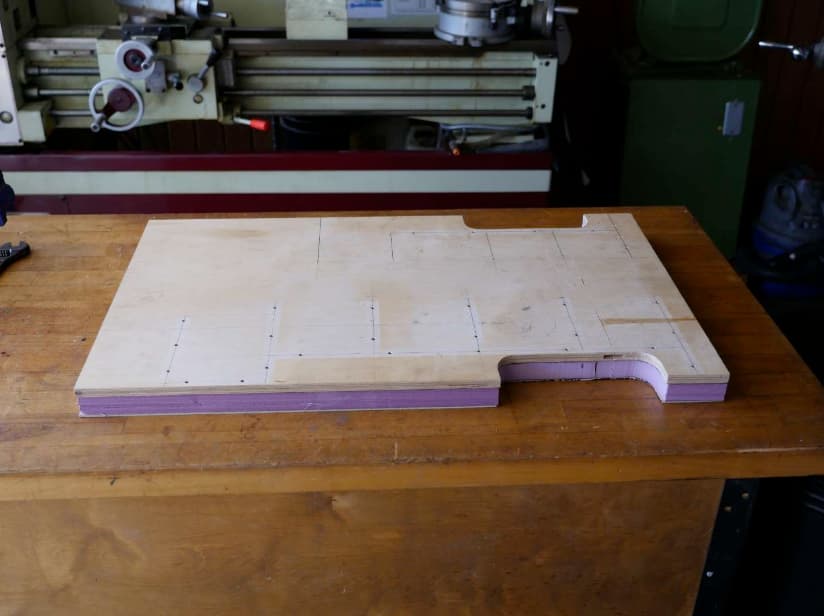
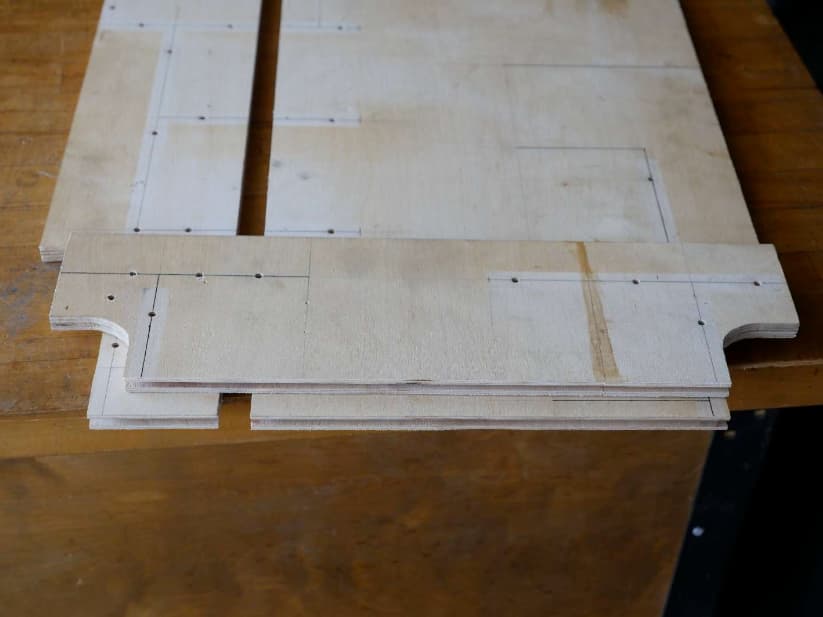
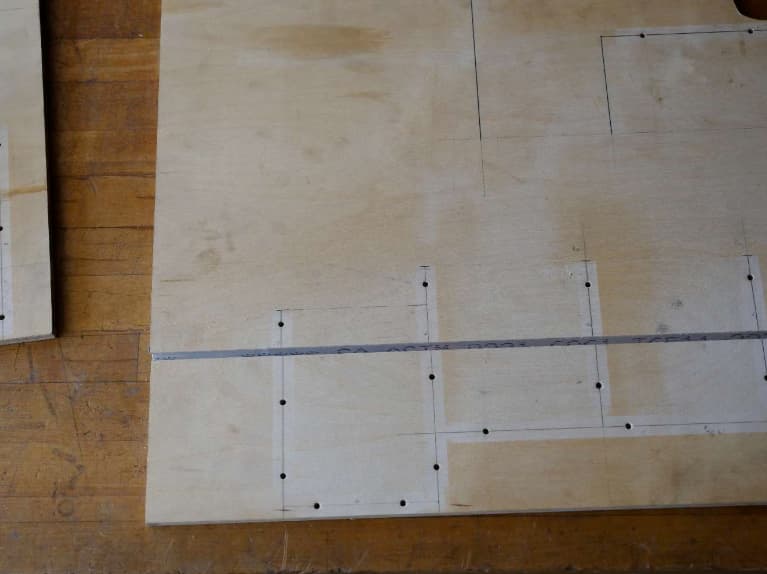
Again using your thin sub-floor sections as templates, cut out matching half inch Baltic birch top floor sections. Your finished floor sections should look something like this.

The markings and holes on the surface of this model will be explained later. For now we’re only concerned with cutting out the floor sections and making sure they fit properly.
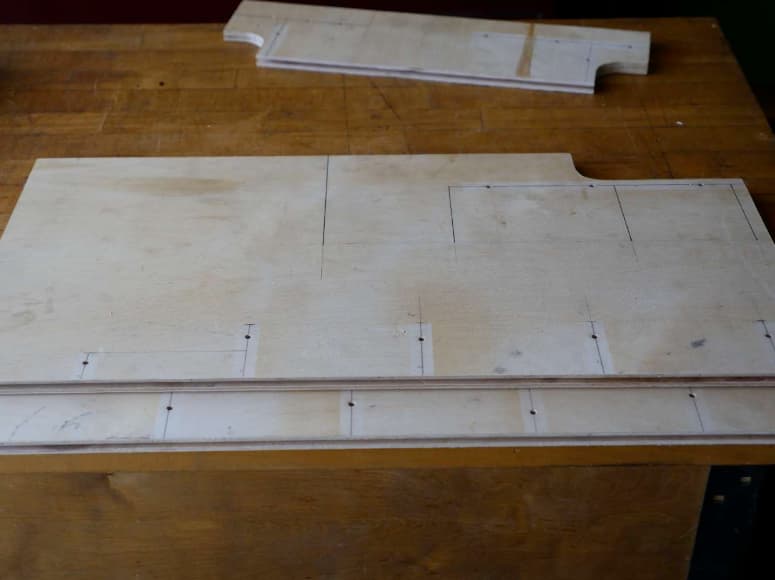
Test fit your entire floor “sandwich” in the van. Start with the sub-floor, then the insulation, and finally your Baltic birch. Make sure everything fits properly and that the Baltic birch floor sections butt up against each other with no more than 1/8 inch space between them.
Making Spline Joints
Once you have everything fit to your liking it’s time to tie the upper half inch Baltic birch floor sections together so that they can’t shift out of place. The 1/8” sub-floor and the insulation layers can “float”, but you want the top floor to be stable. We especially want our floor to remain flat. We don’t want one section of the floor to rise in relation to it’s adjacent section.
We’re going to accomplish this with splines. Think of it as a tongue and groove. In the case of a spline joint, a groove is cut into both pieces of wood being joined and the tongue, or spline, floats between them. The spline keeps the joint from moving up or down and the floor remains flat.
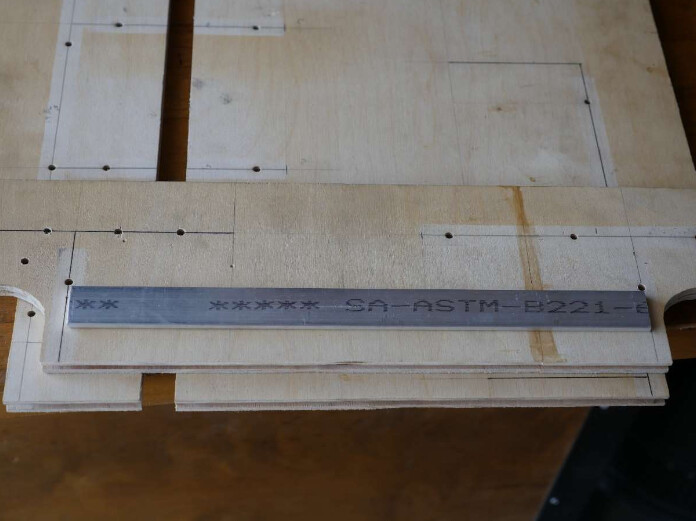
In most carpentry work a wood spline is used and glued in place to make a permanent joint. In our case, we need to keep the floor in manageable pieces as we put it together, and we may want to take it apart some day, so I use a metal spline. For the floor I use 1/8” thick by 1” wide aluminum flat stock or bar. This can be purchased at most of the big box hardware stores like Home Depot or Lowes in 8’ lengths. If you have a local metal supplier they may be cheaper, and if all else fails you can order from Grainger, MSC Direct, or McMaster Carr.
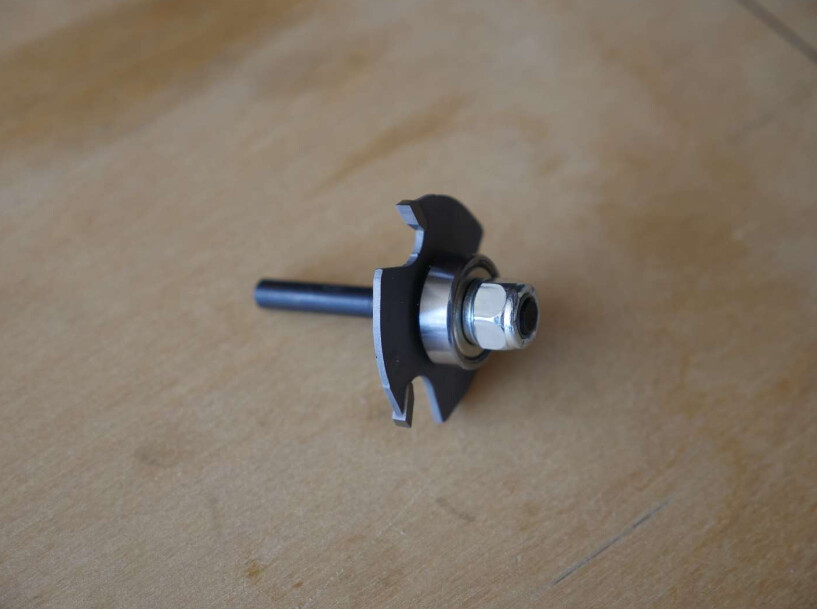
To make a spine joint you’ll need to cut a 1/8” wide slot 1⁄2” deep into the adjoining edges of the plywood floor sections. For this you will need a slot cutting router bit. You can find these on the internet from around $12 up to $30. Cheaper is fine for our purpose. If you have a Rockler or other wood workers supply store near you they will probably have them in stock.
You’ll need a router. I use a router for rounding off sharp edges and a host of other purposes so don’t be bashful and purchase an inexpensive one. You’ll find lots of uses for it. I think you can get a Ryobi for around $70. You might also try Pawn Shops to see if they have a name brand for a reasonable price. See if a neighbor has one you can borrow. (WARNING Don’t buy the $30 Finish Router from Harbor Freight. It is a nightmare to use and will only cause you frustration)
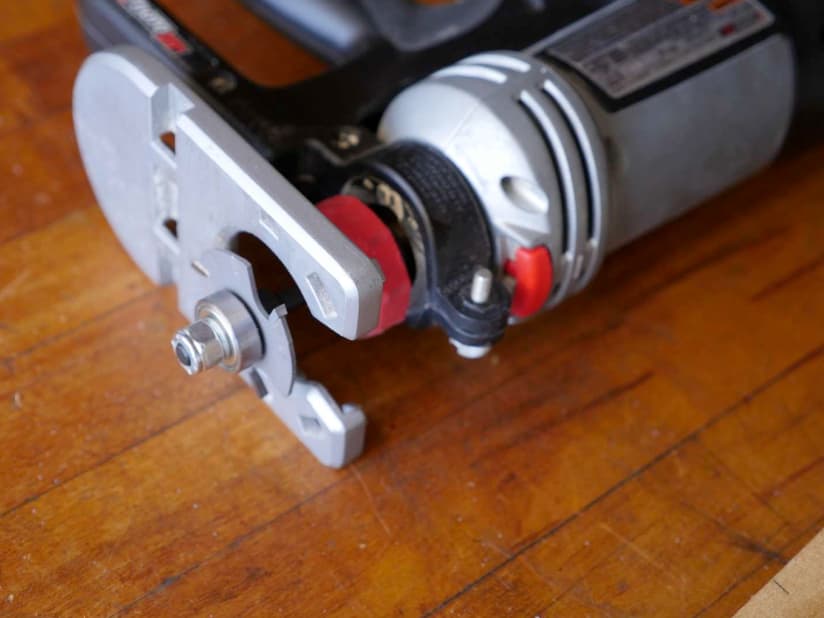
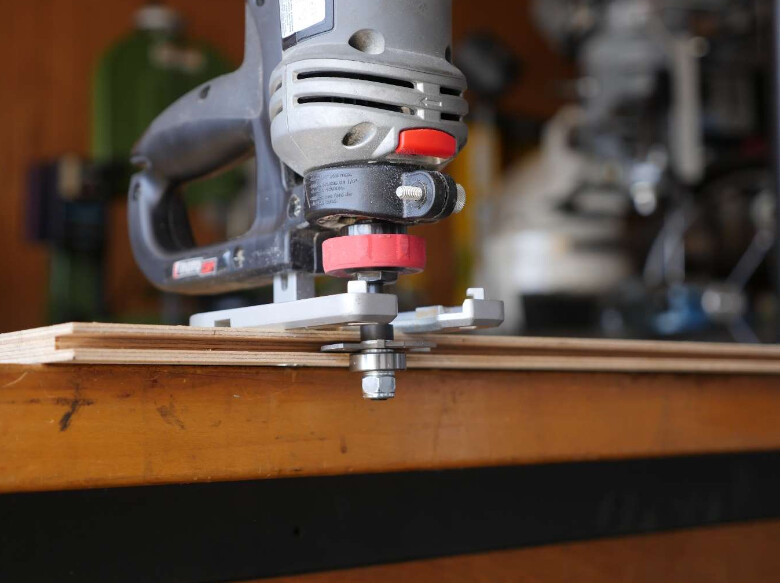
You’ll want to set the bit so that it cuts a slot in the very center of the plywood edge. Baltic birch is very obliging as it has an odd number of plys, (9 for 1⁄2”) so there will be a “center” ply that you can align the bit with.
Once the bit is properly aligned cut a 1/8”slot 1⁄2” deep in all the pieces of plywood where there are adjoining edges.
sdNow cut pieces of the 1/8”thick x 1” wide aluminum bar about 1” shorter than the length of the pieces you are going to join. For my 8’ length joint I’ll cut the aluminum spline to 95”. For the shorter spline that joins the pieces between the wheel wells in the back, it will be cut an inch or so short as well. Make sure you have clearance where two spline joints meet. In my 136, the 8’ spline joint down the side will meet the 6’ spline joint across the back and I don’t want the aluminum spline of the 8’ piece intruding into the slot for the 6’ spline joint.
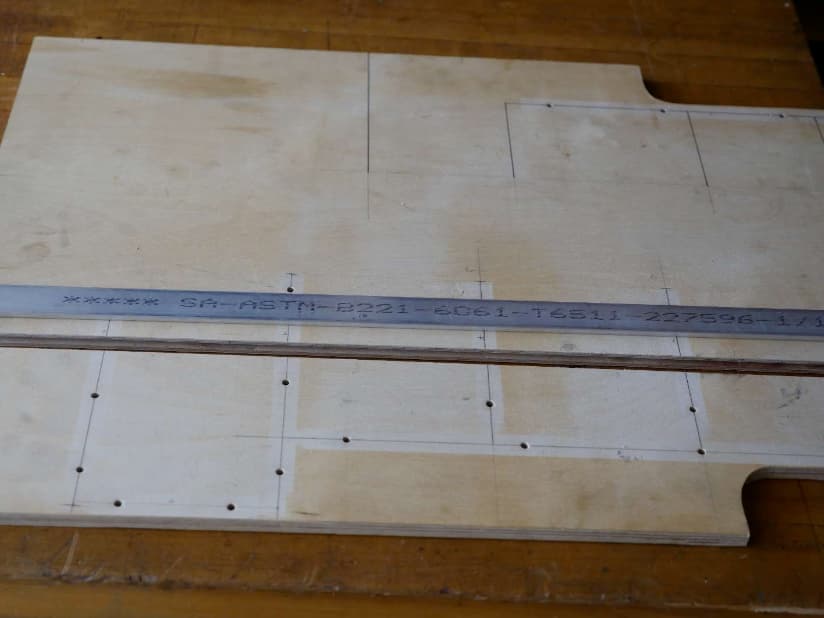
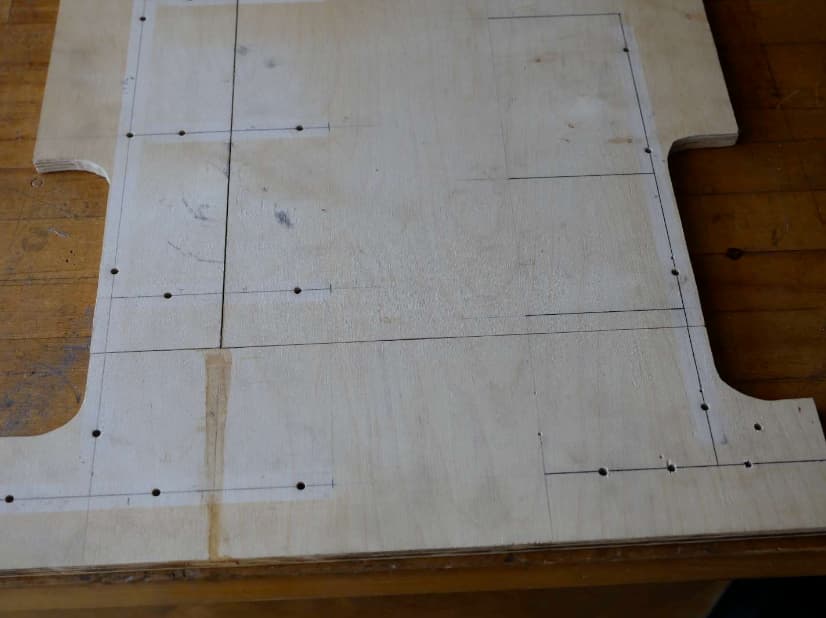
Test assemble the joints outside of the vehicle. Make adjustments until all the 1/2” Baltic birch floor sections fit nicely together.
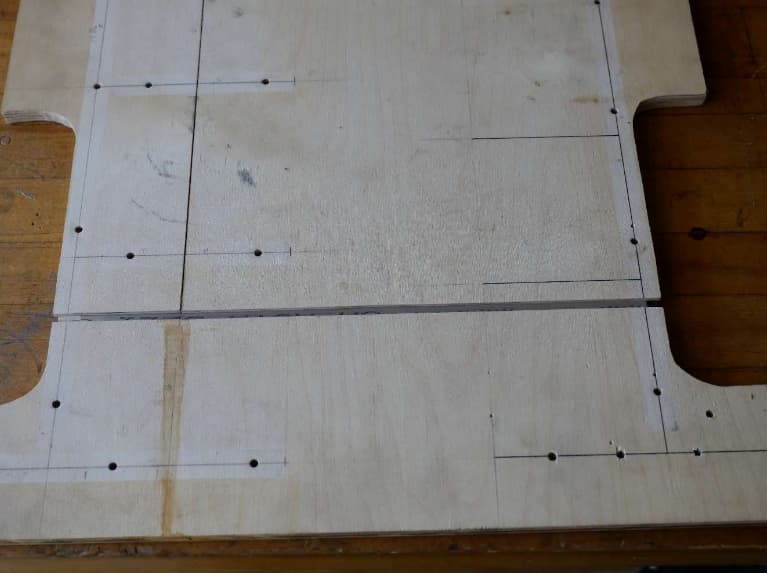
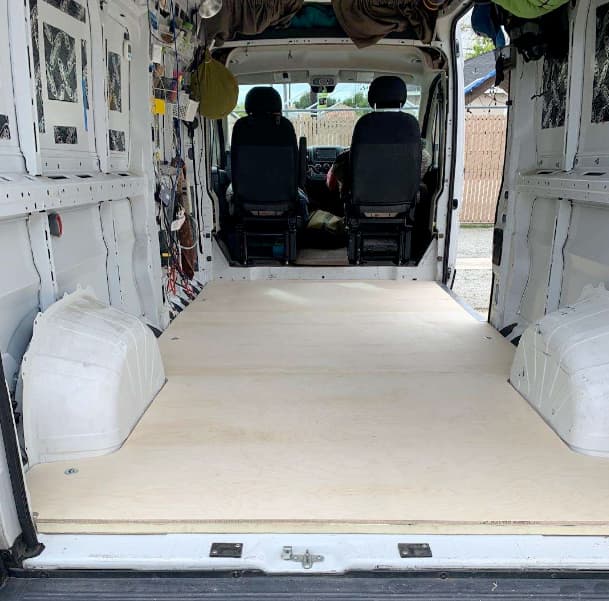
If you’ve measured carefully and taken the time to make sure everything fit properly along the way, these pieces should go together perfectly with a very small visible joint.
When you’re happy with the fit it’s time to install the finished floor in the van. Sub-floor first, followed by the insulation layer, and finally fit the top floor sections complete with their splines. The sections of sub-floor and insulation will “float”. The top floor with it’s splines will almost act as though it is one piece.
Congratulations! You now have a floor that will remain flat and become the perfect foundation upon which to build your cabinetry. You can leave the entire floor as it is or you can attach it to the metal van floor with bolts where the old tie-down rings used to be.
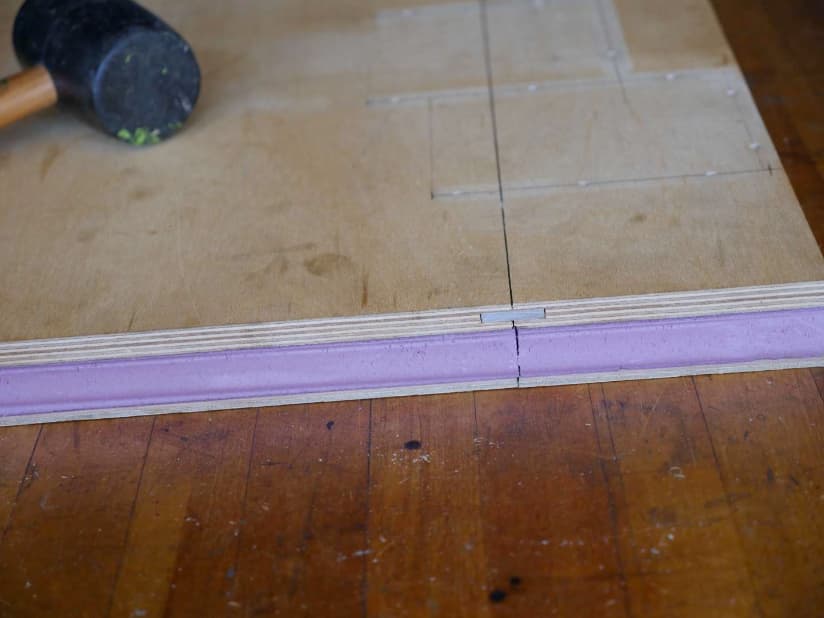
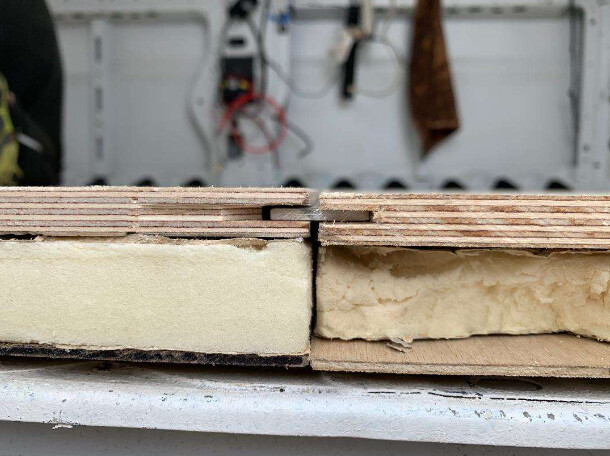
Here’s the assembled floor showing the edge of one of the spline joints. When we build the cabinets, we’ll be tying the upper floor sections together with C-channel and you’ll have a very solid floor indeed.
159 Promaster Floor
Here are some photos of a floor that we installed in a 159 Promaster. There are two spline joints. One in the open space in the side door area and one just in front of the wheel wells.
The floor is a 3 layer sandwich with Luan sub-floor, 1 inch Polyiso insulation, and 1/2 inch Baltic Birch top floor.
This is a photo showing the sandwich construction and the spline at the side door.
MORE TO COME…