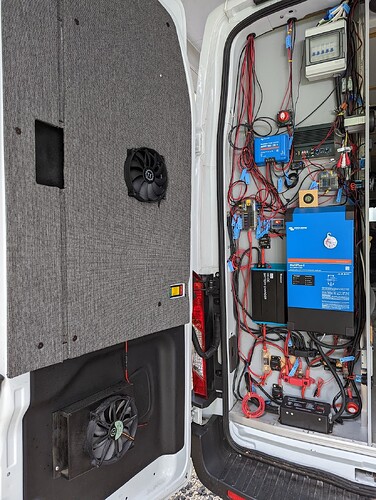
This vertical electronics cabinet in my Ford Transit is a bit of a puzzle to work through. I’m looking at moving things around to make room for more components. While this layout has been functional, and there is some logic to it, it could be better.
To give you the big picture, here is what it currently looks like. There is greater cabinet depth around the lower fan. The upper part is open but has a shallower depth. I’m currently configuring communications equipment and antennas for this area, but I am sure there will be some room for expansion.
I want to make room for more components and shorten a few wires. Components to add:
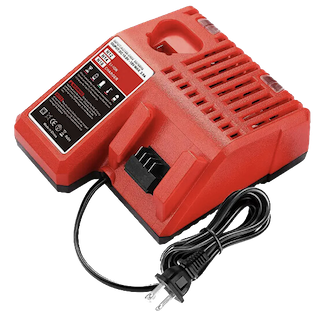
- Milwaukee battery charger
- Storage for M12 & M18 batteries
- 120-volt outlet box
Milwaukee battery charger
The battery charger is 5 3/4" wide, 6 3/4" tall, 6 3/4" deep. Because of the depth, it will need to be mounted in the lower part of the cabinet, around #16, to clear the door contour.
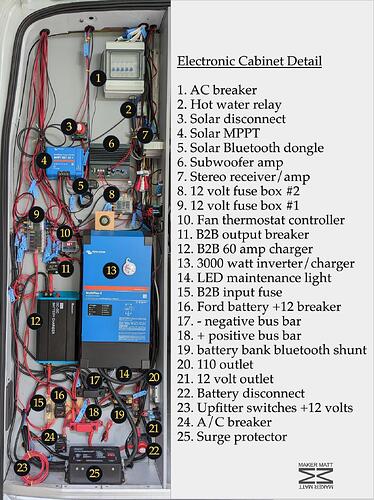
Layout Detail
Component part numbers and suppliers are here.
Yes, it is a tangled mess but there is some logic to it. The 120 AC breaker is in the upper right, #1, and the DC system is split between the two fuse boxes 8, & 9, and the bus bars at the bottom, 18, 19.
On the other side of this wall is the lithium battery bank and Sleep Number pump, and the furnace, and the A/C evaporator. I’m trying to keep cables as short as possible to the battery bank.
The current plan is to make room by moving 9, 10, 11, and 12 up, to move 12 Renogy B2B as high as 13 Multiplus. This allows me to move 15 & 16 up and then move the 18 + bus bar to be as high as 19 - bus bar. Finally, move 24 down or left. Now the whole center of the bottom is open for new components. When components are in their final positions, I’ll remove excess wire to reduce clutter.
When I’m done I’ll post a summary followup here and details on my blog. Comments are appreciated and if you have a nice electrical cabinet photo please post it.


